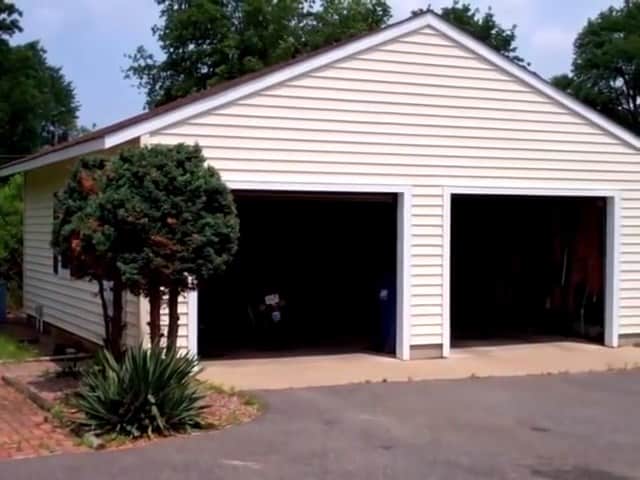
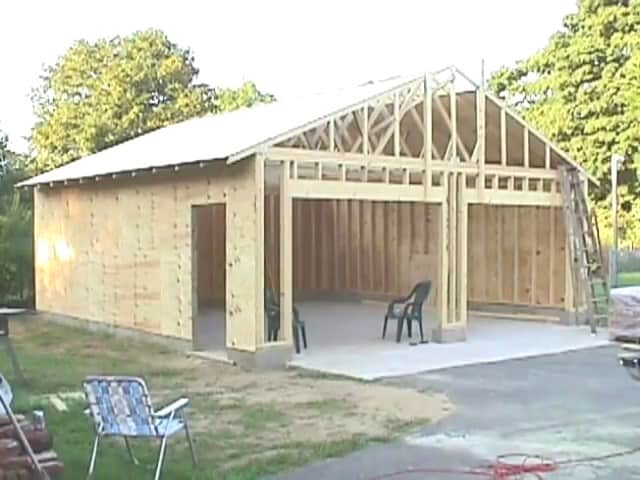
Welcome to our comprehensive tutorial on how to build a 24 x 24 garage with two 9-foot doors and one side door window.
Whether you need extra space to store your vehicles, equipment, or other belongings, building a garage is a great way to add functional space to your property while also increasing its value.
In this tutorial, we will guide you through the entire process of building a garage from start to finish. We’ll cover all the essential steps, from obtaining the necessary permits to laying the foundation, framing the walls, installing the doors, and roofing the structure.
With our detailed instructions and helpful tips, you’ll be able to tackle this project with confidence, even if you have little to no prior experience with construction.
STEP 1 : PREREQUISITES
Before you start building your 24 x 24 garage, it’s essential to obtain the necessary permits from your local building inspector.
This step is crucial as it ensures that you comply with all the zoning requirements in your area. Building codes and regulations vary by location, and failure to obtain the required permits can result in costly fines, delays, or even legal consequences.
To obtain the necessary permits, you’ll need to submit paperwork and a plot plan to the building inspector’s office. The paperwork typically includes a detailed description of your project, including the dimensions of the garage, the materials you plan to use, and the location on your property where you intend to build it.
The plot plan shows the location of the proposed garage on your property and how it relates to other structures and features.
You can obtain the necessary paperwork and plot plan from your assessor’s office, town hall, or even with your property deed.
It’s essential to have these documents ready when you go to the building inspector’s office to avoid any delays or additional paperwork requirements.
STEP 2 : LAYING THE FOUNDATION
The first step in building your 24 x 24 garage is site preparation. This involves using heavy equipment like a bucket loader to clear the area of any trees, bushes, or other obstacles.
The site is then leveled off, and any debris or brush is removed to ensure a smooth and stable foundation for the garage.
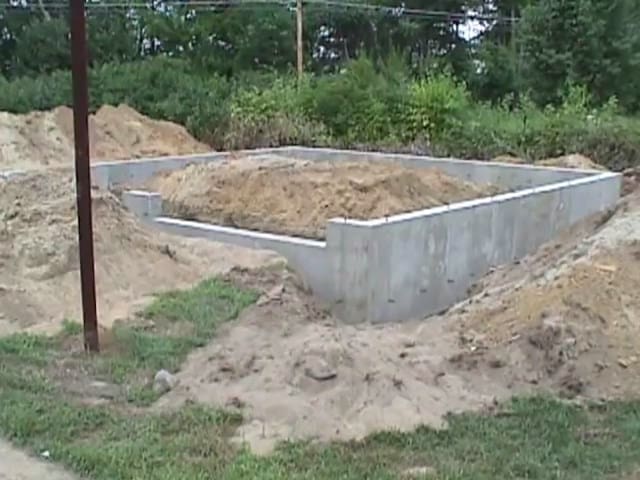
After site preparation, the next step is to dig down and install the footings. The footings are the foundation upon which the garage will be built, providing a solid and stable base for the structure. In this case, a four-foot wall is put in place with a floating floor.
The wall of the foundation is about six inches high and extends four feet into the ground. This type of foundation is preferred over a flat pad foundation because it helps to prevent bug issues that can arise when a structure is built directly on the ground.
It’s important to note that the size and depth of the footings and wall foundation may vary depending on your location, the size of the garage, and other factors.
It’s essential to consult with your local building inspector to determine the specific requirements for your area.
STEP 3 : THE FLOORING
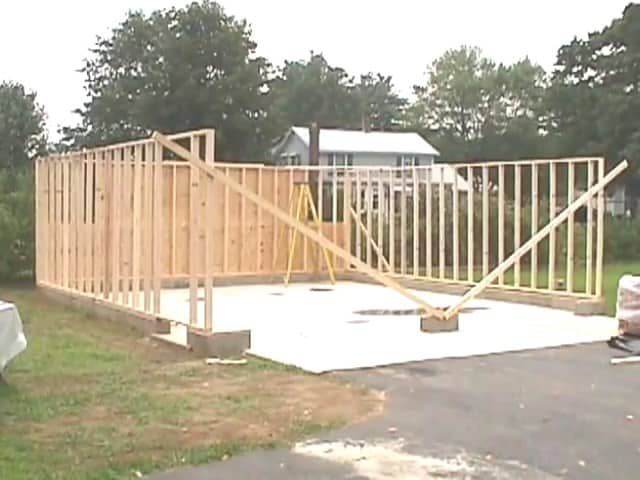
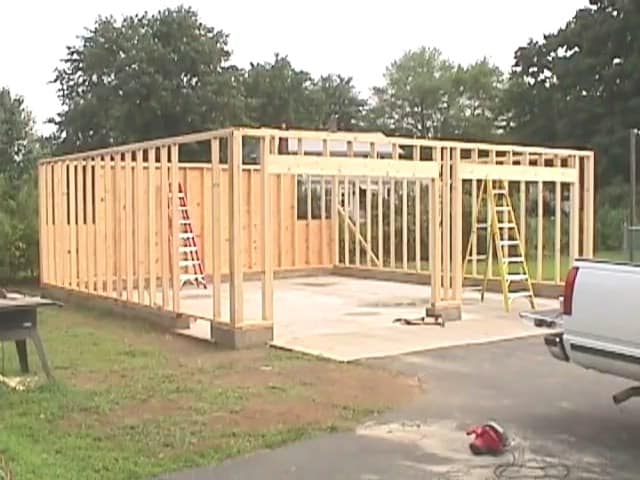
Once the footings are dry, the next step in building your 24 x 24 garage is to erect the walls. The walls are constructed using standard 2 x 4s, with a double sill plate and top plate running horizontally.
The walls are framed to accommodate two nine-foot doors and a side door, providing ample entry and exit points for vehicles and people.
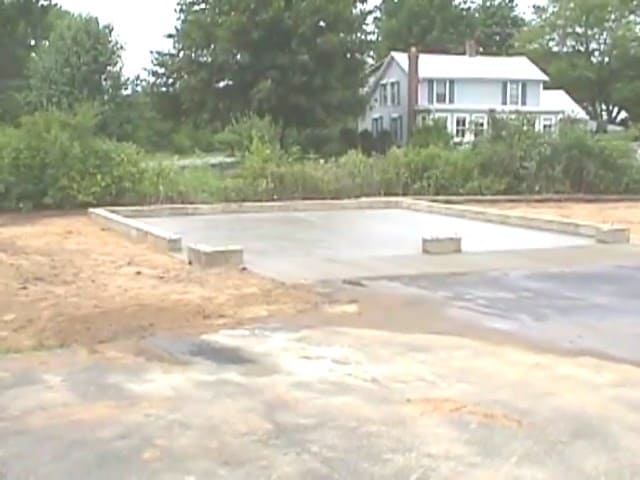
Once the walls are up, they are allowed to dry for a few days before the floor screen is laid. The floor screen is a standard 4-inch thick flooring that is poured separately from the wall foundation.
This type of flooring is known as a floating floor because it is not actually connected to the wall foundation, but rather poured right up against it.

A floating floor provides several benefits for your garage. It allows for a little give and prevents cracking if the ground swells during the wintertime, as it can rise up and sink down with the movement.
This helps to ensure the longevity of the garage’s foundation and flooring. Additionally, the floating floor provides insulation and soundproofing, helping to keep the garage warmer and quieter.
STEP 4 : THE WALLS
When constructing the walls of your 24 x 24 garage, it’s important to ensure they are stable and secure.
To achieve this, every four feet, a half-inch threaded rod is embedded into the concrete while it’s still wet.
The rod extends down about a foot and a half and has an L shape on the bottom, with the rod sticking up directly in the center of the 2 x 4 wall framing.
This technique provides additional stability to the walls, preventing them from shifting or settling over time.
In addition to the embedded rods, two inlets are installed for underground wiring, with a 50 and 130 amp circuit buried four feet down through PVC piping.
This allows for easy access to electrical power within the garage, making it a functional workspace for a variety of activities.
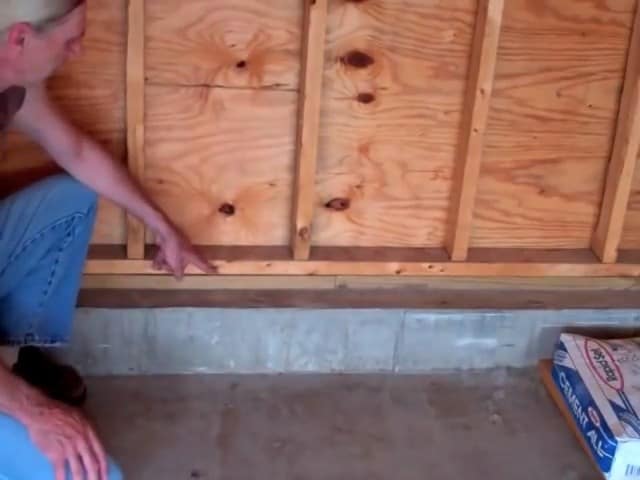
To construct the walls , standard 2 x 4 framing is utilized with double sill and top plates that run horizontally.
The use of pressure-treated wood against the concrete foundation helps protect against bug damage and decay.
The garage door headers are constructed using standard 2x10s, with a double layer of half-inch plywood in the center.
This approach provides additional reinforcement to the headers, enabling them to support the weight of the garage door without warping or sagging over time.
STEP 5 : THE TRUSSES
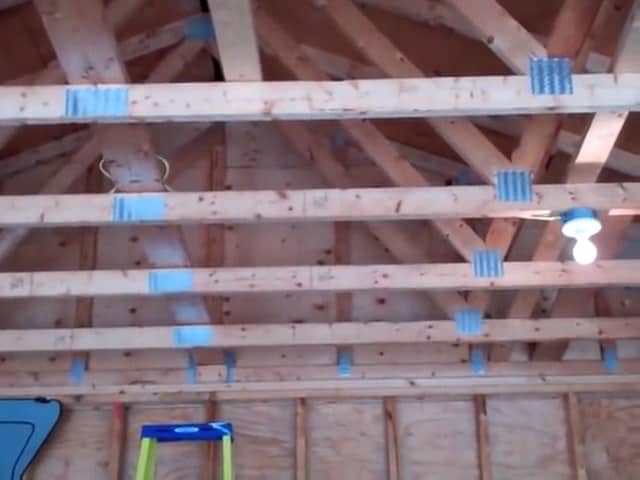
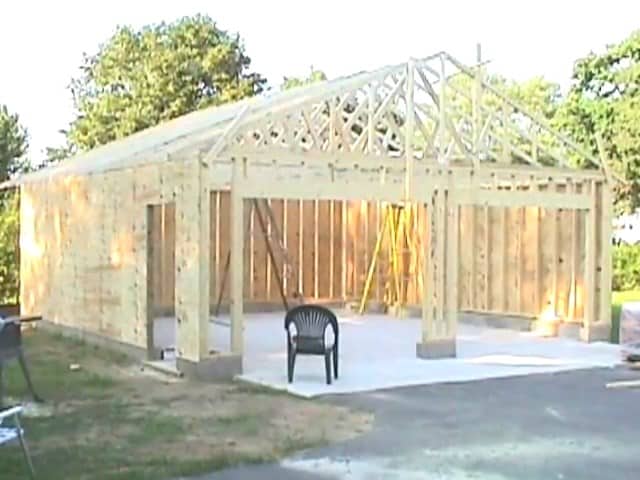
To continue building the 24 x 24 garage, the plywood is installed on the three sides and trusses. The trusses are first put up upside down and then flipped into place.
The top sills are marked, nailed, and braced to ensure stability, and then measured and straightened out. The trusses are spaced 24 inches apart, which is different from the 16-inch spacing of the walls.
When installing the trusses for the 24 x 24 garage, the first truss on both ends of the building is referred to as the gable end and differs slightly from the other main trusses.
The trusses are spaced 24 inches apart in the center, which is different from the 16-inch spacing of the walls.
STEP 6 : THE ROOFING
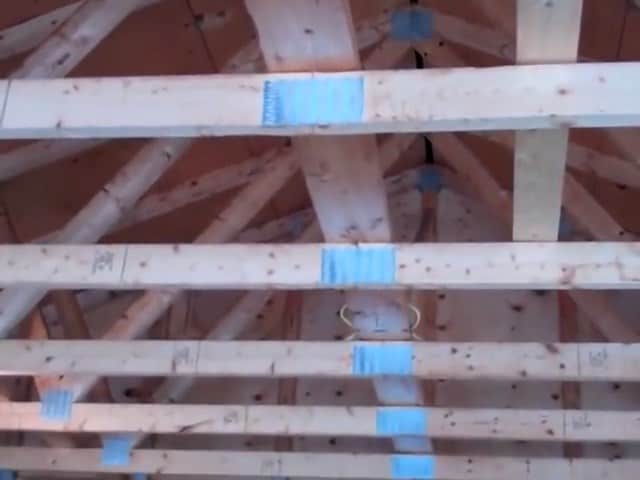
After completing the installation of the trusses, it is now time to focus on the roof and sides of the 24 x 24 garage. For this, half-inch plywood is used to provide a sturdy base for the roof and sides.
To further strengthen the construction and prevent twisting during snowstorms, stringers are added down the center and on the sides.
One essential aspect to keep in mind during the installation process is the importance of the first piece of plywood.
This initial piece serves as the reference point for the rest of the installation, and it is critical that it is aligned correctly and squared to the gable end.
Once the first piece of plywood is installed, it is essential to secure it with plywood ties between the trusses. This step is crucial to prevent the roof from flexing if there is moisture inside the garage, which can lead to bowing and warping over time.
The plywood ties help maintain the flatness of the roof and ensure its stability.
By using these ties, you can ensure that your garage will withstand the test of time and remain structurally sound.The ties help in keeping them nice and flat and avoid the bowing.
After the installation of the trusses, a truss catwalk is put in place to stabilize the horizontal bottom piece of each truss. This catwalk runs down the center of the garage and provides a stable base for the trusses.
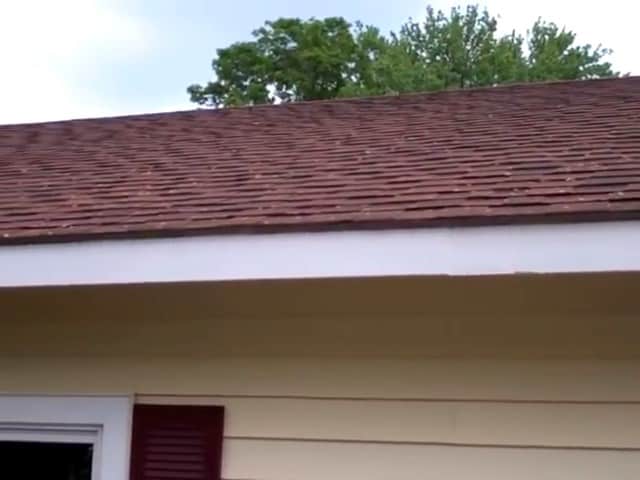
Next, the doors are framed and the roof is covered with standard architectural shingles. These shingles have a longer lifespan than other types of shingles and provide excellent protection against the elements.
Additionally, a layer of tarpaper is added to the roof to provide an extra layer of protection.
The wiring for the garage is installed down the center of the truss catwalk, which allows for easy access and maintenance.