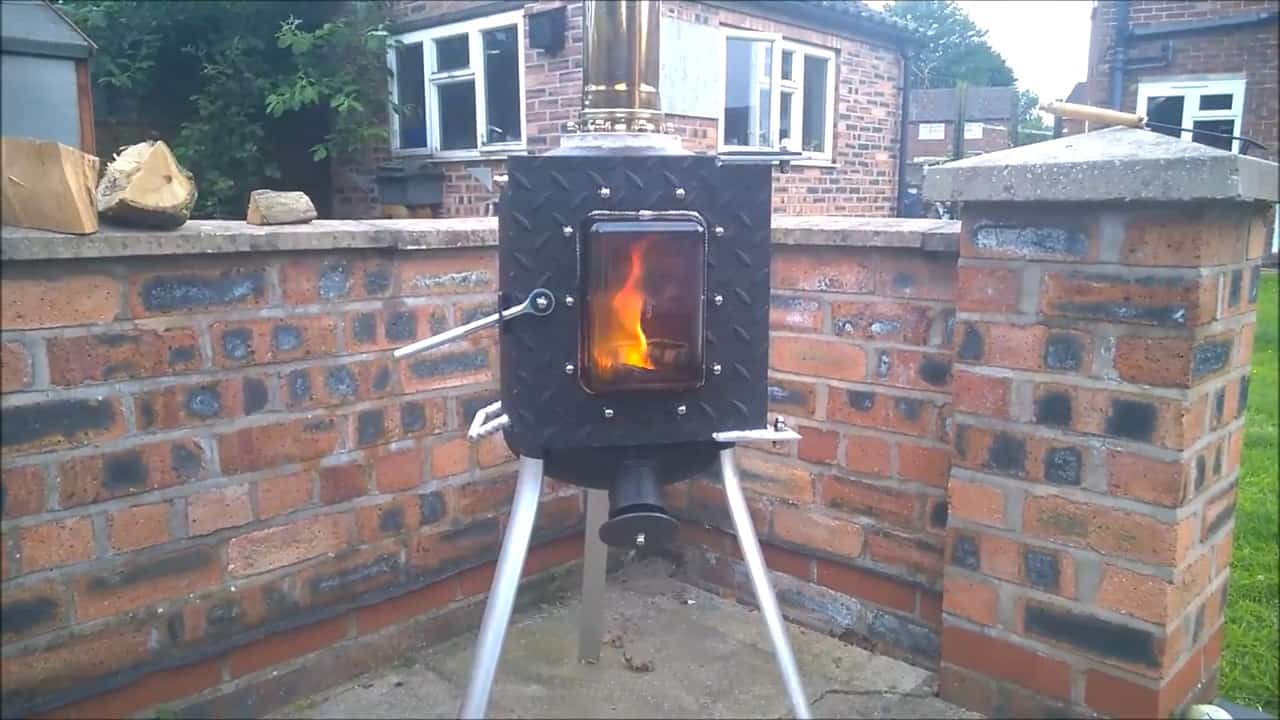
This project provides detailed instructions on how to build a high-efficiency outdoor wood-burning stove heater using an old propane tank and scrap metal.
The stove is designed with a unique secondary burn system that helps in the combustion of any unburned smoke or fumes inside, resulting in almost no smoke coming from the flue pipe.
STEP 1 : PREPARING THE PROPANE TANK
Before beginning the transformation of the old propane tank into an outdoor wood-burning stove heater, it is crucial to ensure that the tank is empty.
To do this, the first step is to remove the valve protector cage at the top of the tank and take out the valve.
Once this is done, the tank should be filled with water and left to sit for a few hours to ensure that any remaining propane gas is completely removed.
This step is essential for safety reasons, as any propane gas left in the tank could pose a serious risk when cutting or welding.
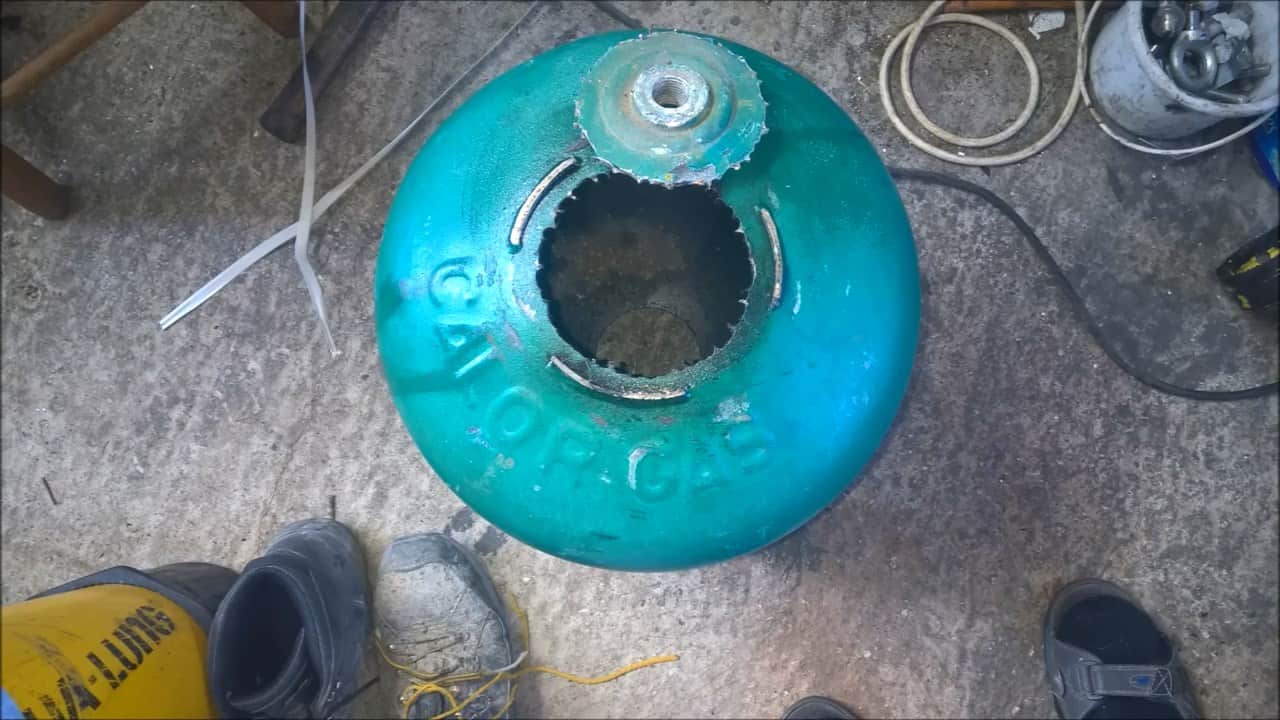
After the tank has been filled with water and allowed to sit, it is time to drain it and prepare it for cutting.The top and bottom of the tank should be cut off to create the base and chimney of the stove.
STEP 2 : CUTTING HOLES FOR FLUE PIPE
To create the base and chimney for your outdoor wood-burning stove heater, you will need to use a hole saw cutter to make two 100mm four-inch holes.
The first hole is for the flue pipe to sit in, and the second hole is for ash removal. Removing the bottom stand also makes cleaning even easier.
To get started, secure the propane tank in place and take all necessary safety precautions, such as wearing protective gear and ensuring that your work area is well-ventilated.
Then, using your hole saw cutter, carefully cut the two holes at the top and bottom of the tank.
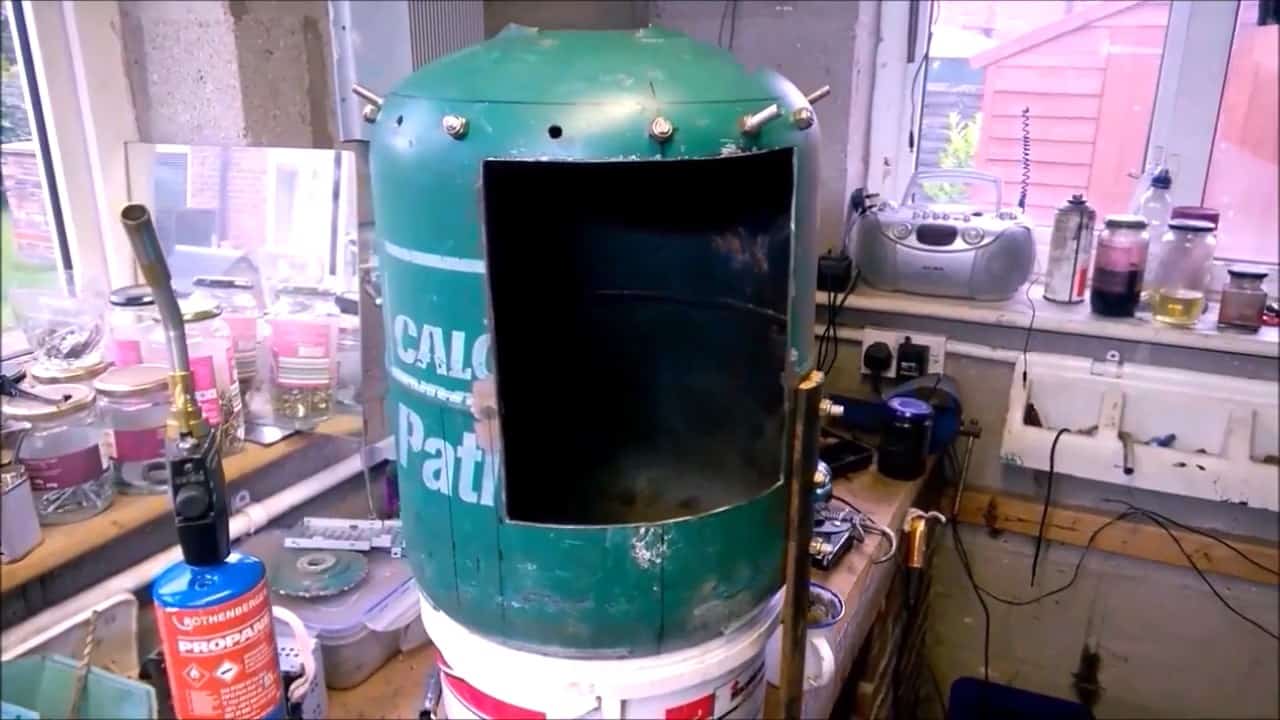
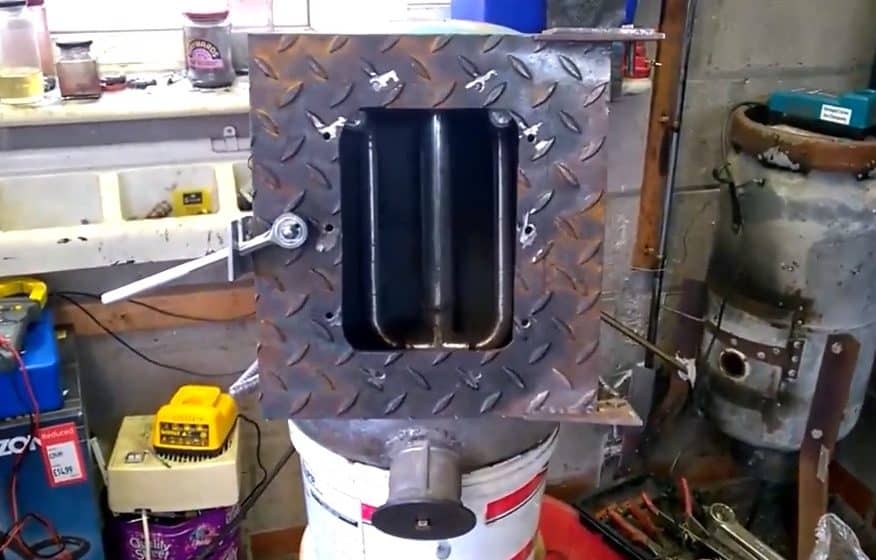
STEP 3 : THE STOVE DOOR
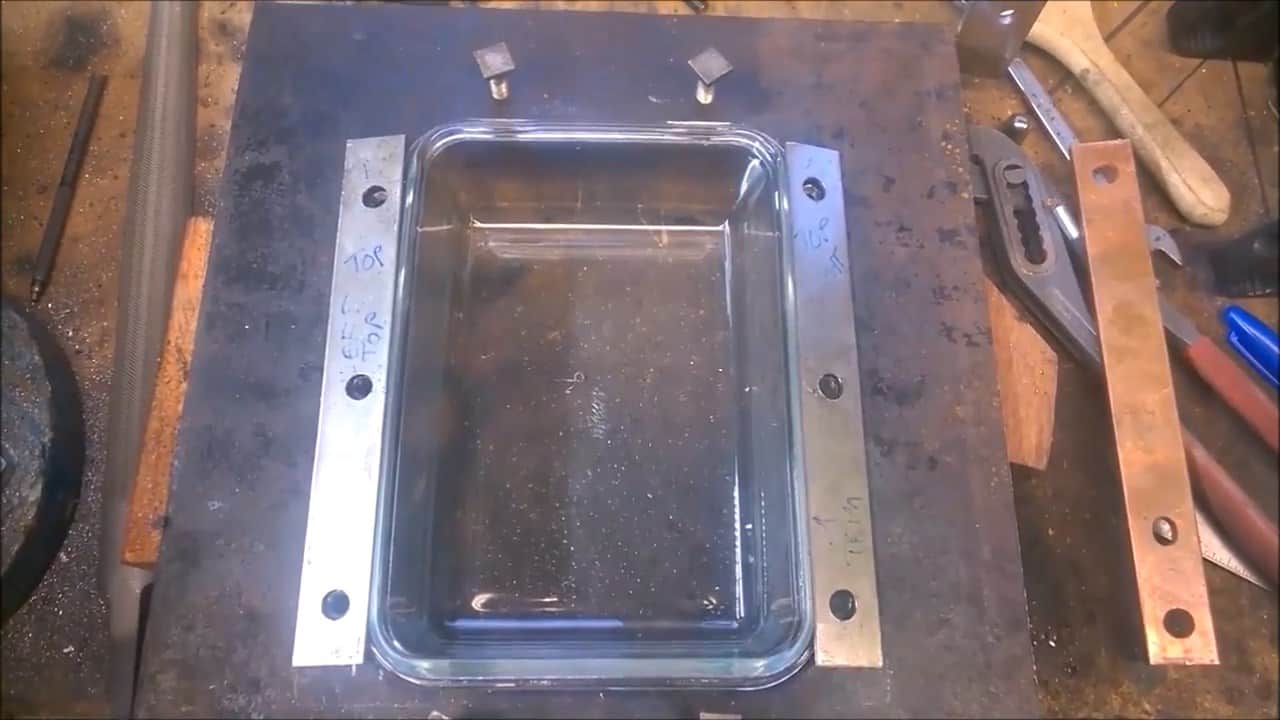
The next step is to create a door for your stove. The door should be cut as high up to the top of the propane tank as possible.
For the door, we will be using chequered plate pieces, which can be found at most hardware stores.
To make the door more functional, we’ll be adding a rectangular pyrex dish glass piece in the middle of the chequered plate.
This type of glass can withstand high temperatures and is perfect for observing the combustion inside the stove. The glass should be secured in place using a couple of steel bracket pieces.
The glass on the door of your outdoor wood-burning stove heater is a crucial element that allows you to see how the secondary burn system is working inside the combustion chamber.
By observing the flame and smoke through the glass, you can ensure that your stove is operating efficiently and safely.
To attach the door to your stove, you will need to use hinges. The hinges should be durable and sturdy to withstand the weight of the door.
Weld the hinges to the frame of the stove and attach the door. Once the door is attached, test its functionality by opening and closing it several times.
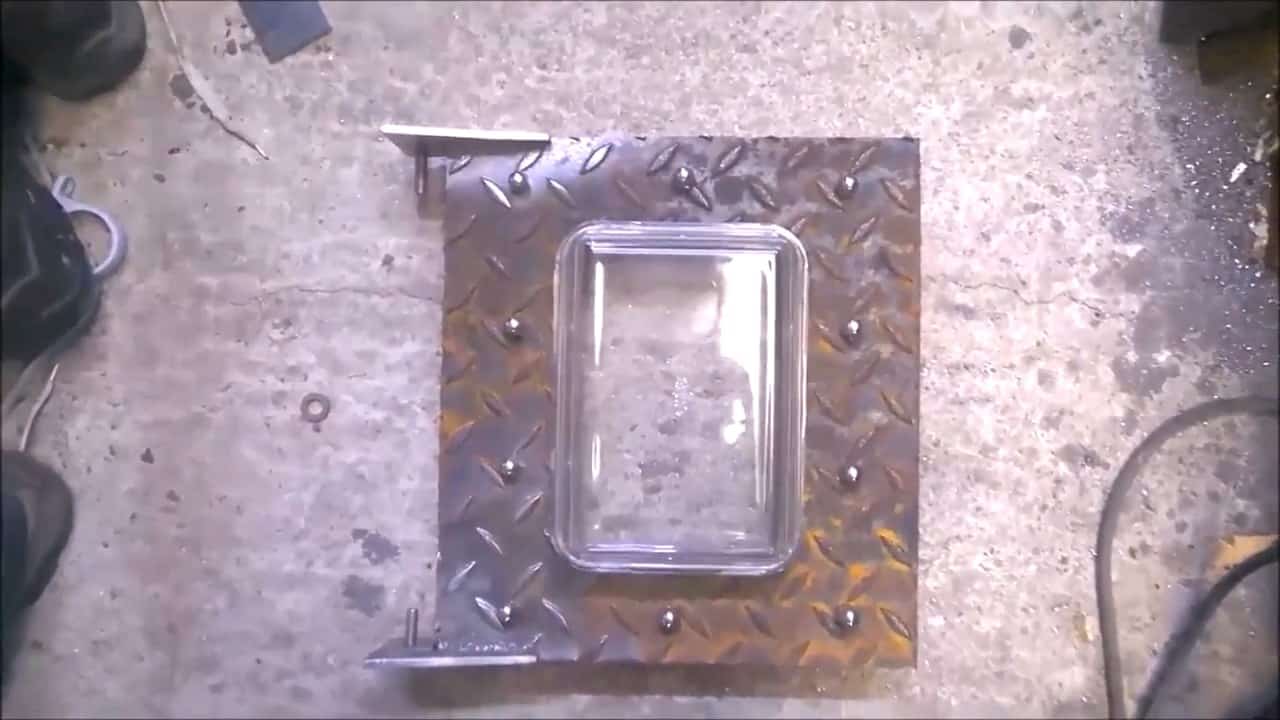
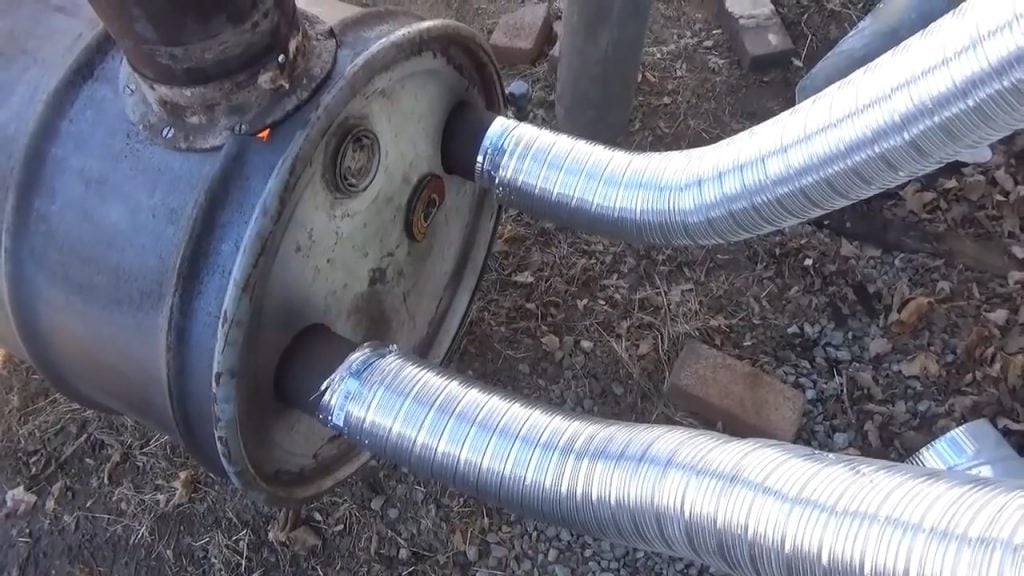
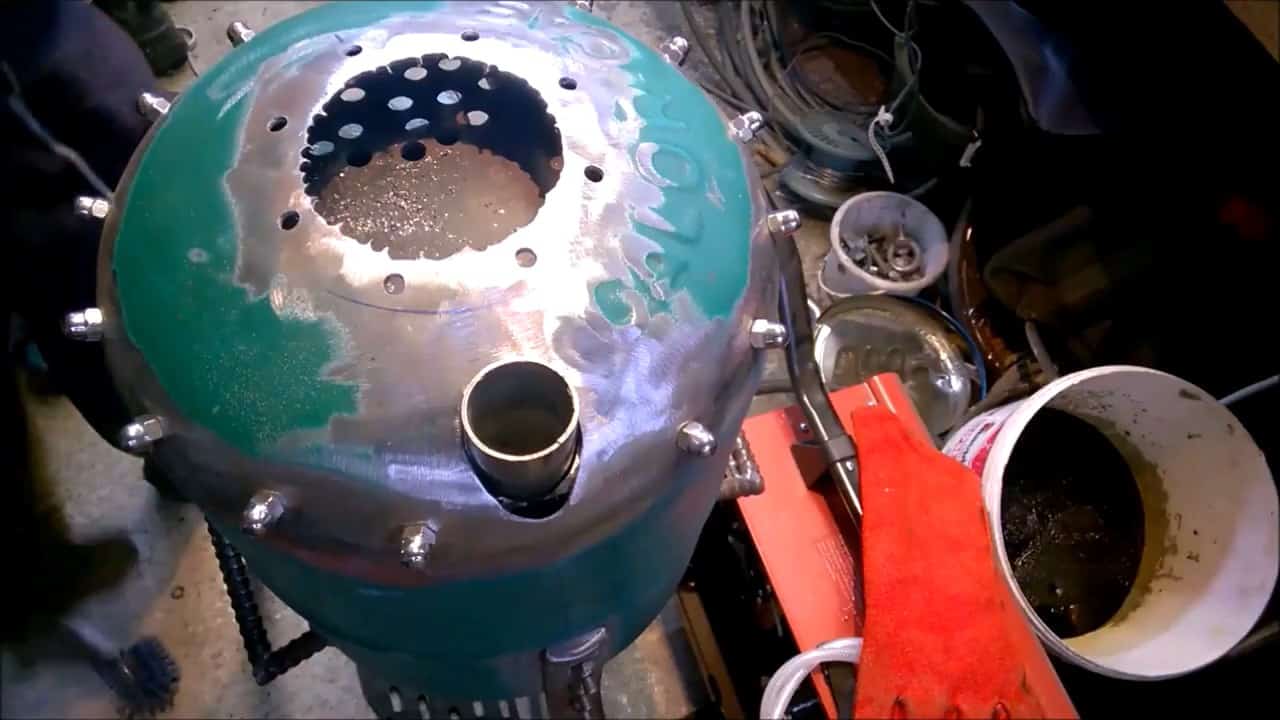
Now it’s time to attach the flue outlet and door handle to your outdoor wood-burning stove heater.
The flue outlet is an essential component that allows smoke and fumes to exit the stove safely, while the door handle provides easy access to the combustion chamber for loading wood and cleaning the stove.
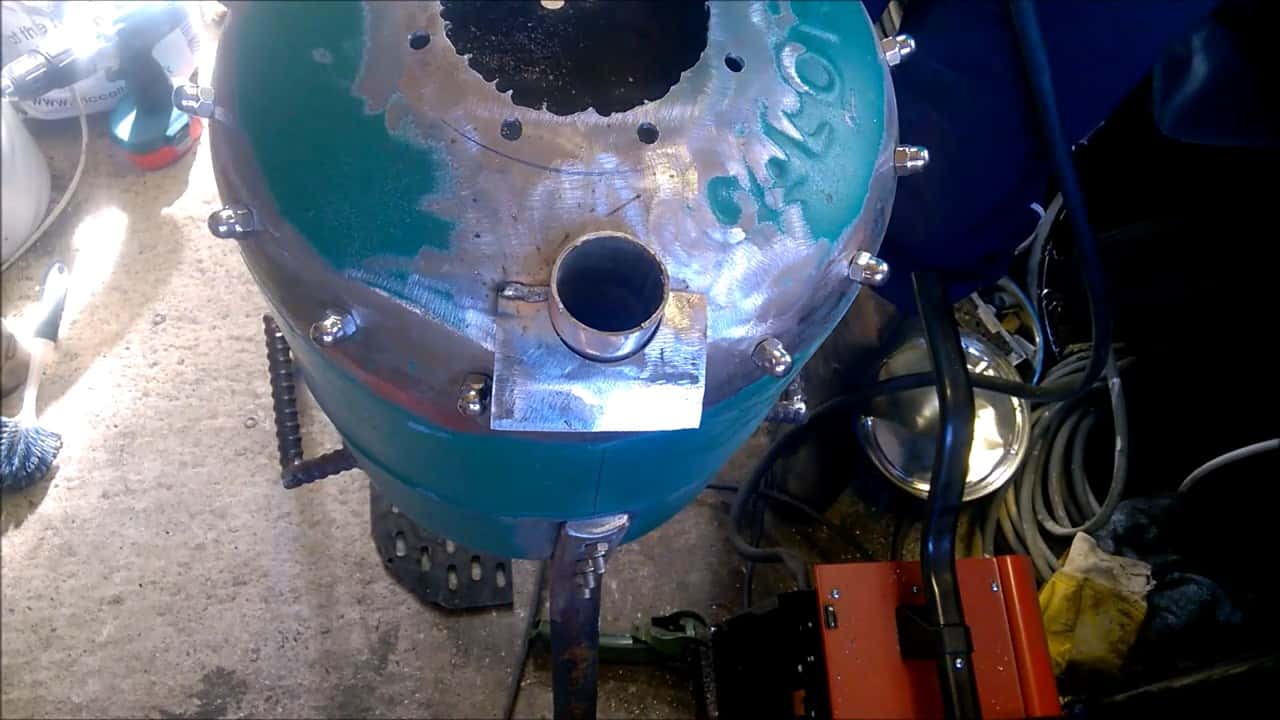
To attach the flue outlet, we will use a flange piece with holes. This piece should be securely welded to the top of the tank, ensuring that it’s level and straight.
The holes in the flange piece are used to attach the flue pipe, which will transport smoke and fumes outside. Make sure that the flue outlet is positioned at the highest point of the stove to allow smoke and fumes to exit freely.
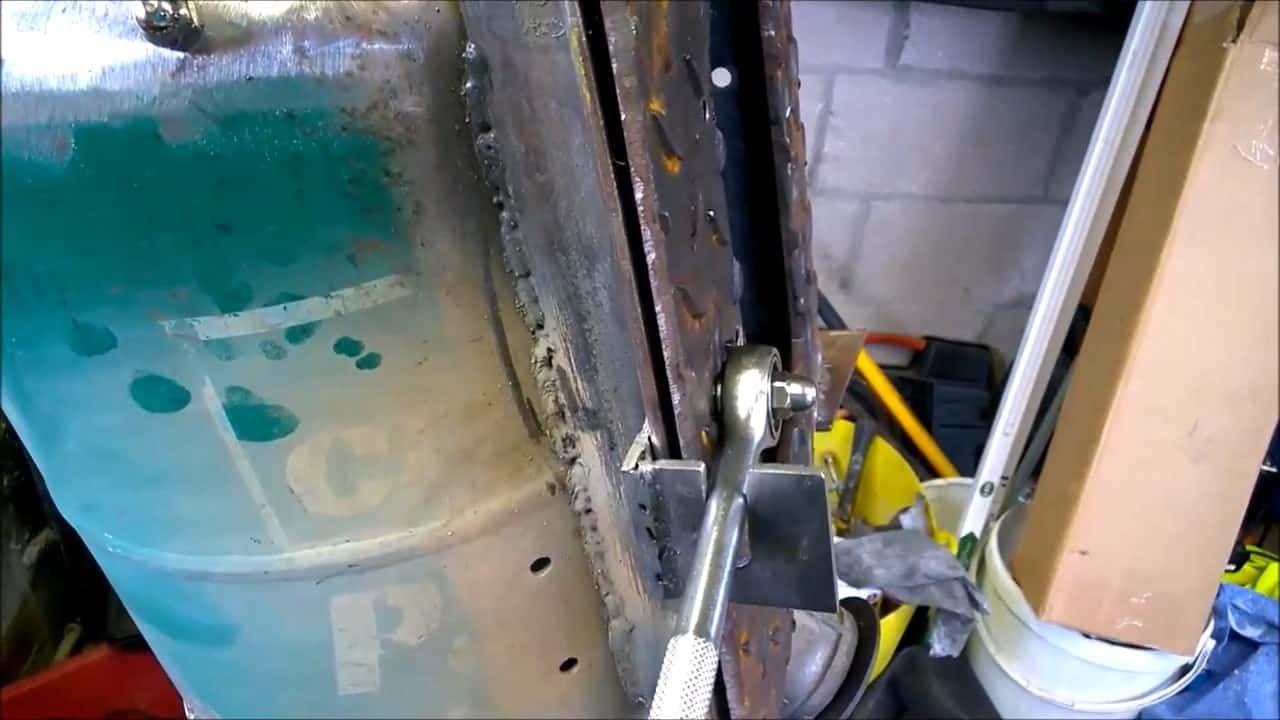
The door handle is made from a socket wrench, which should be bolted to a metal plate. The plate is then securely welded to the stove frame.
To ensure that the door closes tightly and provides a good seal, a small metal piece is welded to the frame, which the wrench can be pulled against.
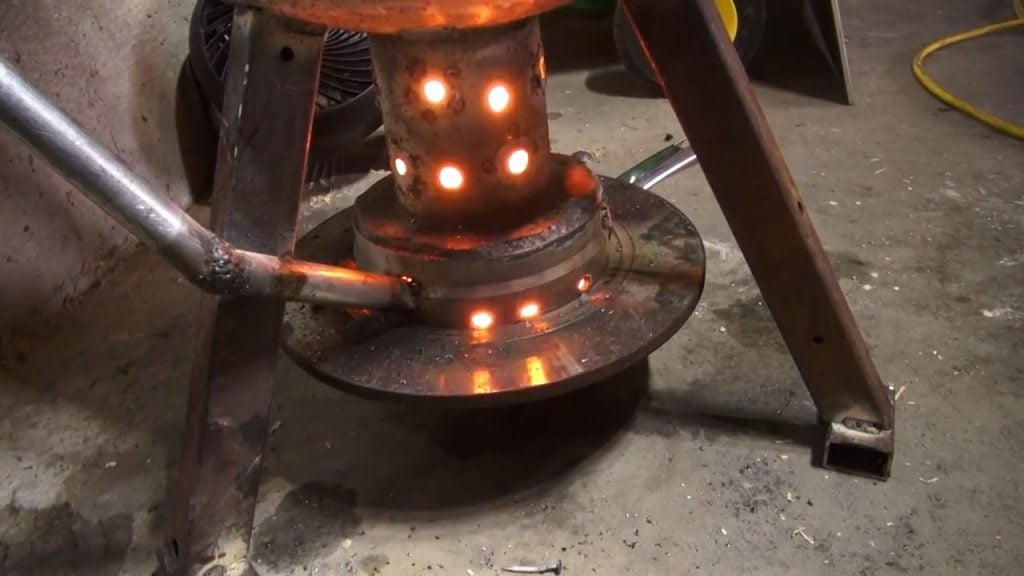
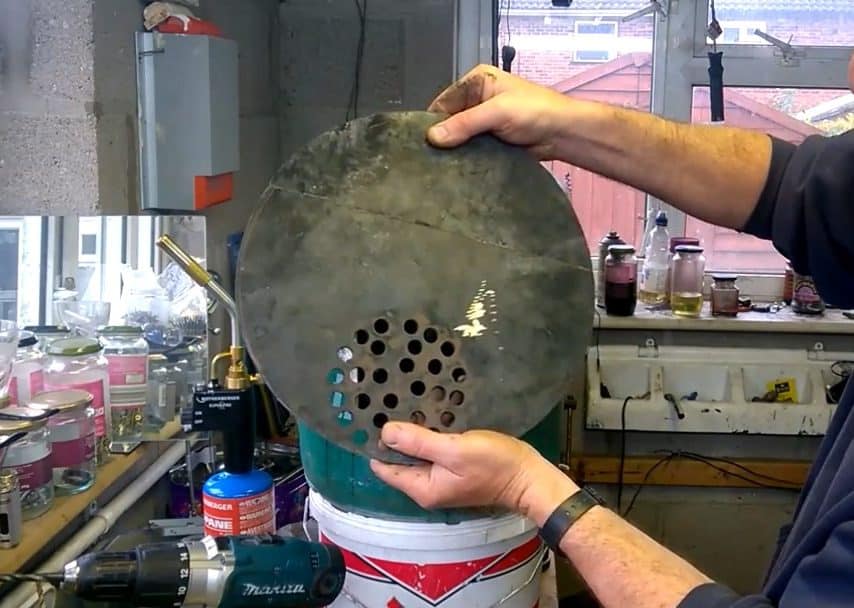
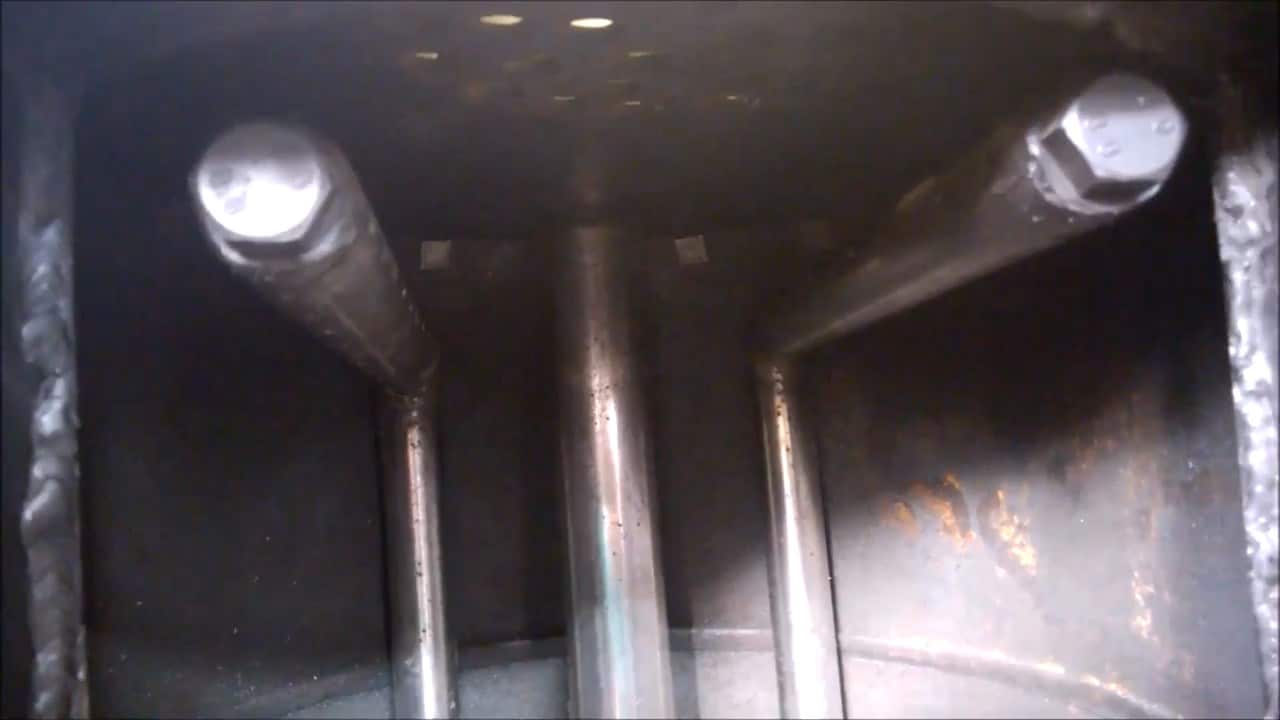
STEP 4 : MAKING THE DEFLECTOR PLATE
In this step, a deflector plate is installed on the top of the propane tank to redirect the flow of unburned gases and improve the combustion process.
The plate is made by drilling 8mm holes around the top of the tank and placing dome bolts across them to elevate the deflector pipe above the surface of the stove.
The deflector plate is cut to fit the size of the top of the stove and made from high-temperature-resistant metal.
Once the deflector plate is installed, it’s essential to ensure that it effectively redirects unburned gases from the flue outlet pipe towards the secondary burn chamber.
This redirection helps to encourage better flame flow, leading to more efficient combustion.
To install the deflector plate, it’s crucial to ensure that it’s positioned correctly and securely fixed in place. It should be situated directly below the deflector pipe to optimize flame flow towards the secondary burn chamber.
Once in position, it’s recommended to test the functionality of the deflector plate by observing flame and smoke flow and making any necessary adjustments.
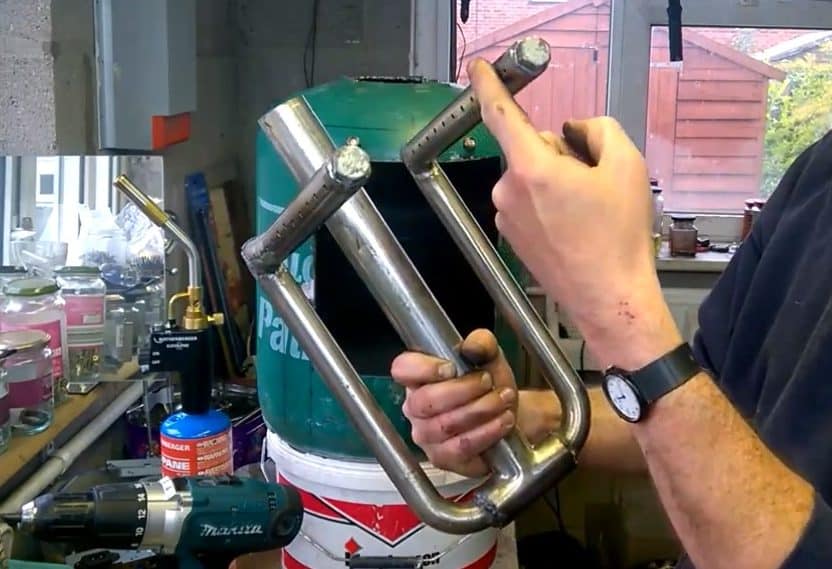
STEP 5 : ADDING A SECONDARY BURN SYSTEM
In this step, the secondary burn system for the outdoor wood-burning stove heater is constructed using stainless steel pipes.
The system is designed to improve the combustion process by superheating the air intake before it moves into two sections filled with holes.
The air intake section of the system is designed to be long enough to allow the air to get superheated before it enters the combustion chamber.
This superheating process is essential for promoting more efficient combustion of the wood, leading to less smoke and fumes.
The two sections filled with holes are positioned within the combustion chamber and allow for the introduction of secondary air.
This air helps to burn any unburned gases that are generated during the combustion process. By introducing this secondary air, the stove can operate with almost no smoke coming from the flue pipe.
The construction of the air intake system is critical in ensuring that the outdoor wood-burning stove heater functions optimally.
The air intake system consists of both primary and secondary air intake pipes, which are designed to regulate the flow of air into the combustion chamber to support efficient burning and heat generation.
The secondary air intake pipe, responsible for introducing secondary air supply into the combustion chamber, is constructed using stainless steel pipes.
It is welded onto the top of the propane tank with a flange piece, allowing the introduction of superheated air into the combustion chamber. This results in more efficient burning, leading to less smoke and fumes.
The primary air intake pipe is positioned under the door frame and is constructed using a two-inch coupler and threaded damper disc.
A small metal piece is welded onto the coupler with a hole in the middle, allowing the damper disc to be screwed in to control the air supply. This placement provides the initial air supply to the combustion chamber, ensuring efficient burning and heat generation.
The damper disc’s adjustment regulates the flow of air into the combustion chamber to optimize the combustion process, leading to minimal smoke and fumes.
The air intake system’s construction ensures that the outdoor wood-burning stove heater operates efficiently, leading to more effective heat generation.