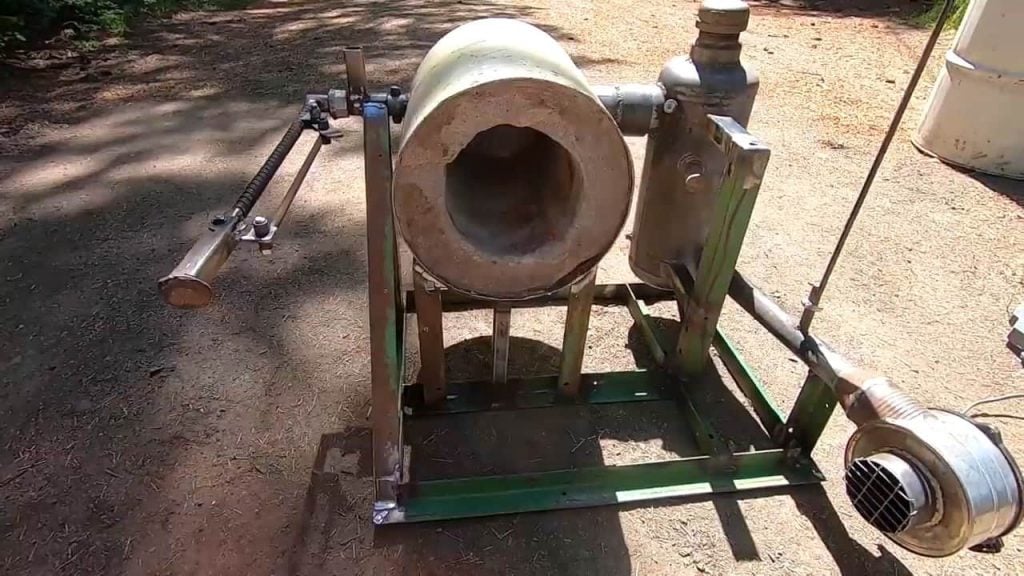
This DIY project involves creating a gravity drip-fed waste oil burner, which is a simple and efficient way to heat your garage or workshop.
By using waste oil as fuel, this system provides a cost-effective way to generate heat while also reducing waste.
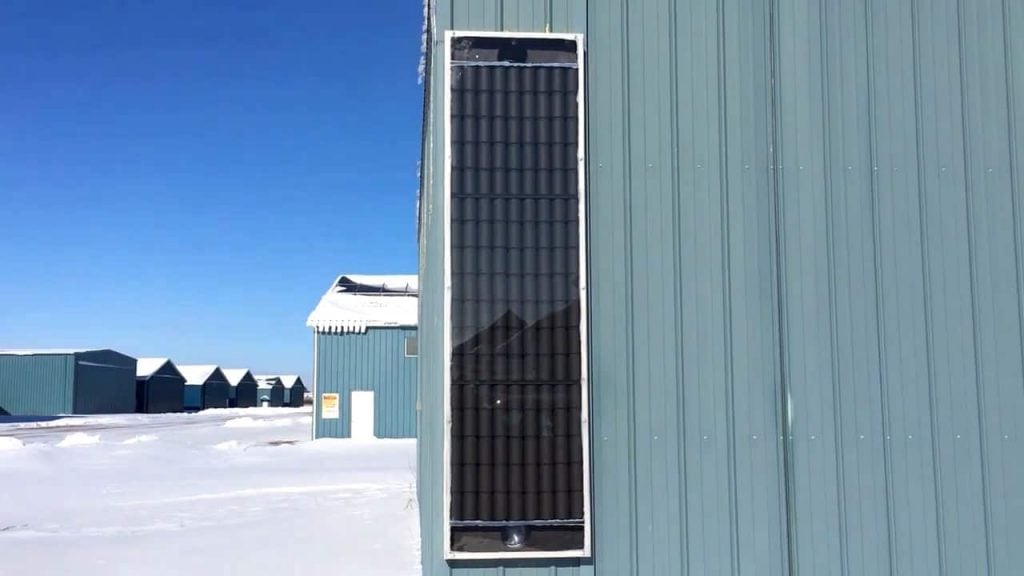
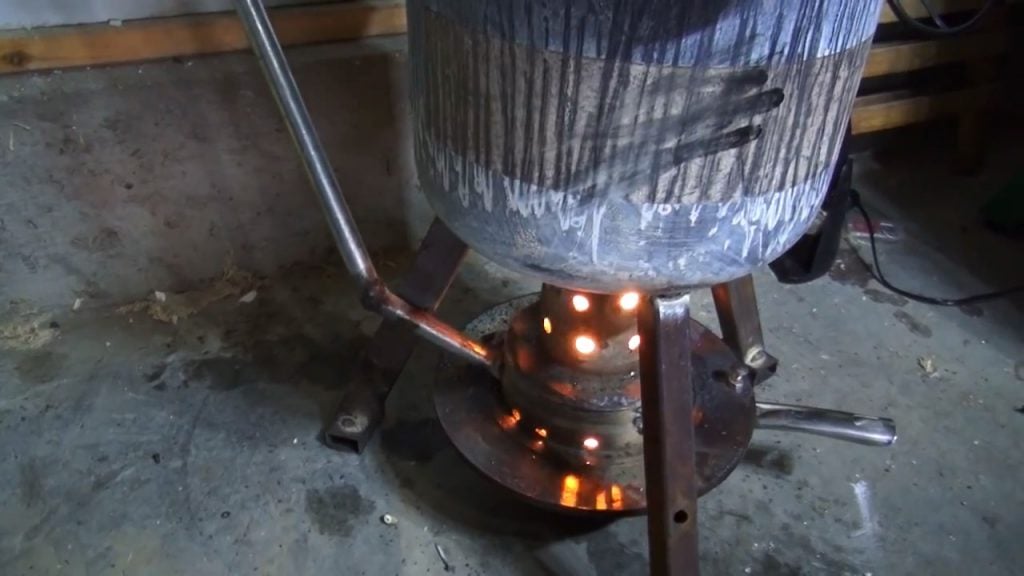
Once operational, this burner is capable of heating up the garage to temperatures ranging from 30 to 40 degrees.
The hot air generated from the center pipe can reach temperatures up to 500 degrees Celsius, providing ample warmth to the surrounding space.
By carefully adjusting the burner and ensuring the proper air flow, the smoke generated during operation is minimized and the system is stabilized at around 400°C.
STEP 1 : MATERIALS NEEDED
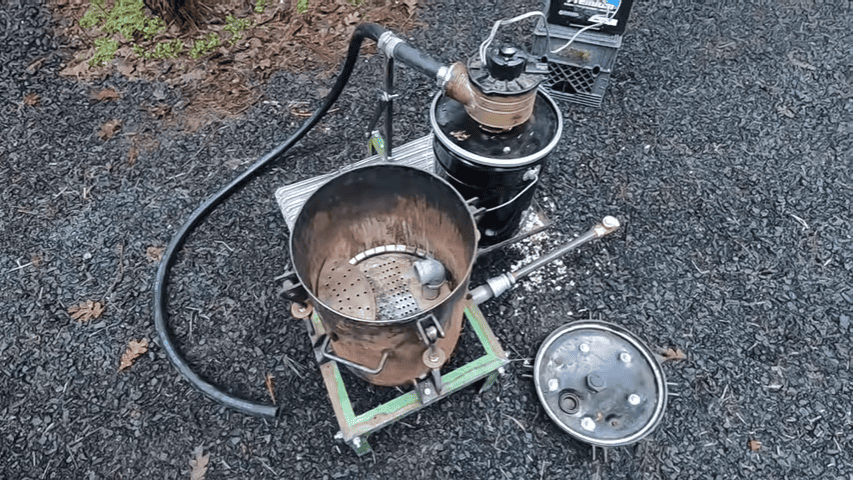
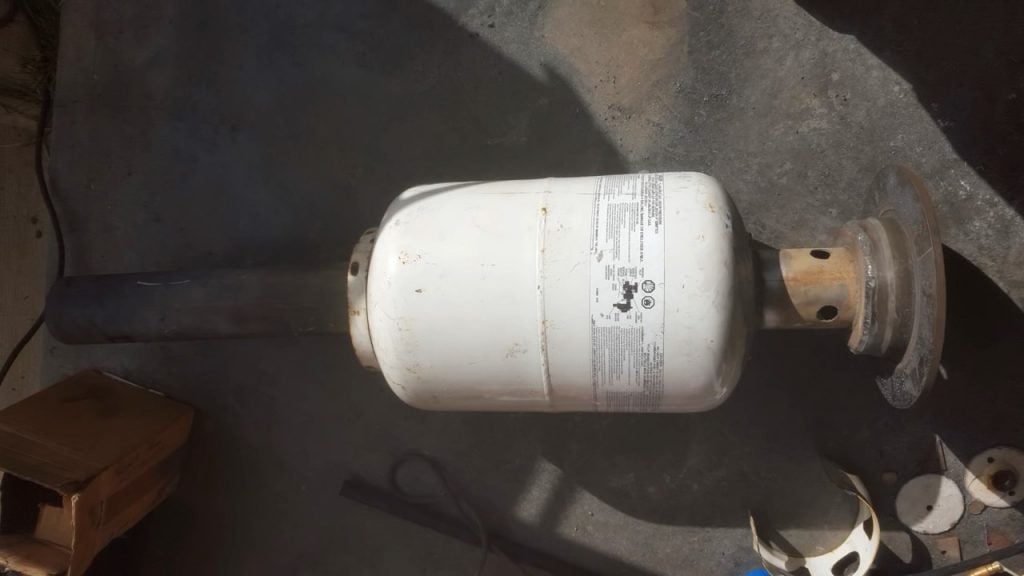
To construct the gravity-fed waste oil burner, we require certain materials and tools.
These include a grinder, MiG welder, plasma cutter, scrap propane tank, hammer, enclosed brake disc, steel cooking pan, 4 inches 10ft pipe, bolts, an iron rod, and a temperature sensor.
The grinder is necessary for cutting and shaping metal, while the welder and plasma cutter are used for welding and cutting metal pieces respectively.
The propane tank serves as the primary container for the burner, with the hammer used for metal shaping.
The brake disc is required for heat reflection, and the cooking pan is used to catch waste oil. The 4-inch 10ft pipe functions as the chimney, with bolts and an iron rod used for structural support.
Lastly, the temperature sensor is essential for monitoring and maintaining optimal temperature levels in the burner.
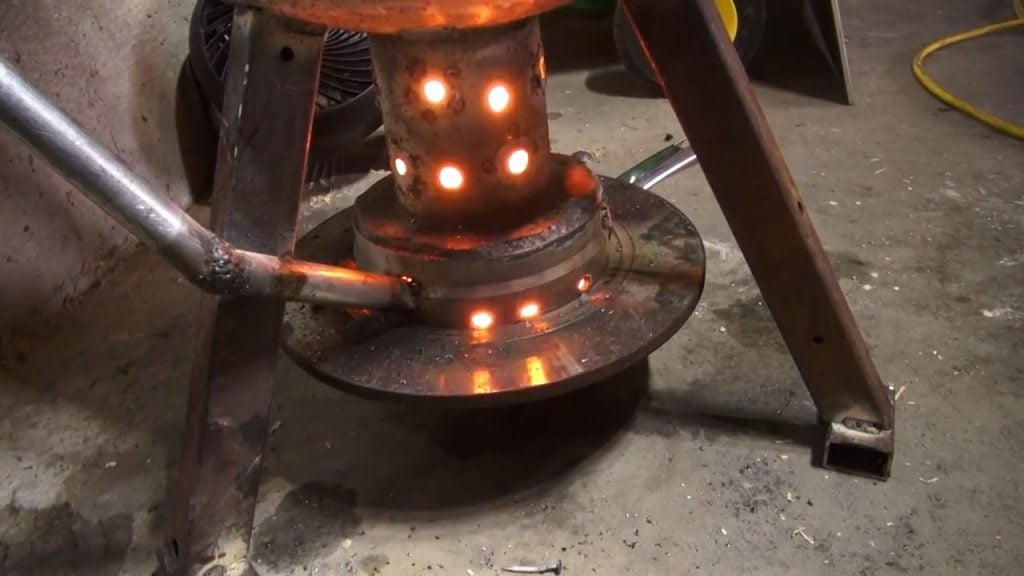
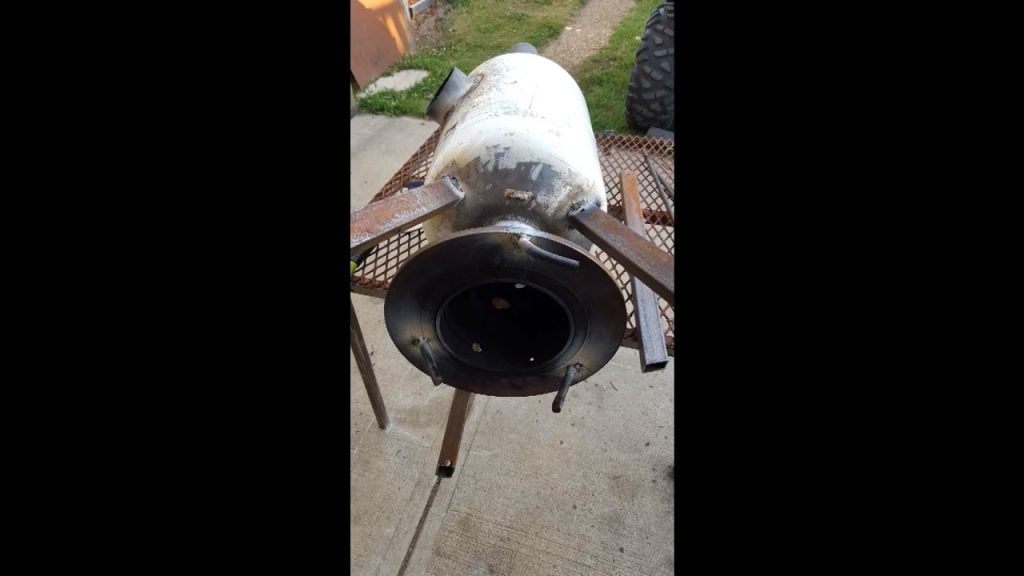
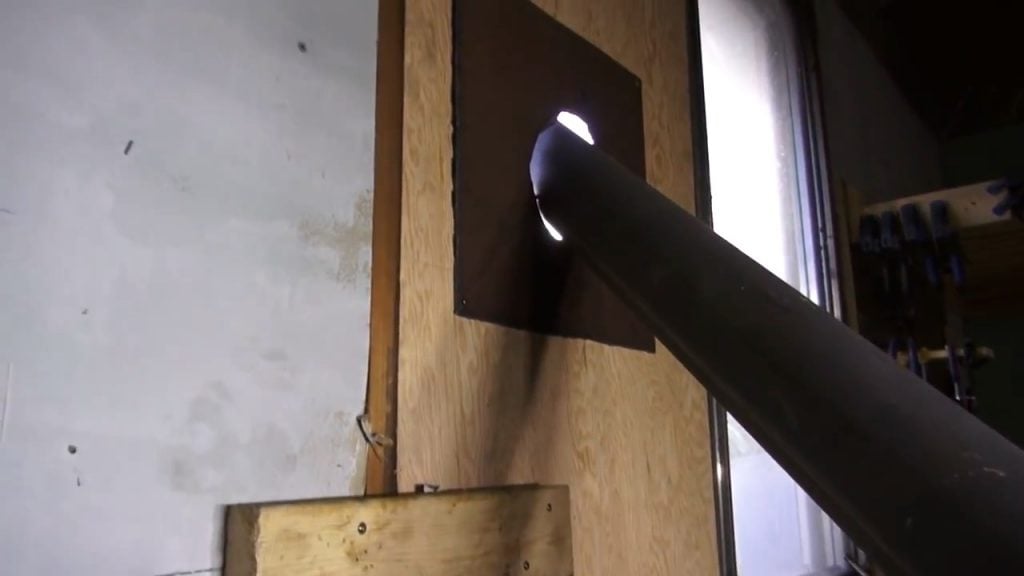
STEP 2 : ADDING CHIMNEY AND SUPPORT FOOTING
To construct the waste oil burner, the next step involves welding the footing and chimney pipe onto the propane tank. This provides a sturdy base for the burner and creates the necessary draft for combustion.
A pipe is then added through the middle of the tank, which will be used to feed the waste oil into the burner. To ensure stability, retainers for the pan and legs are welded around the tank.
These retainers keep the steel cooking pan and legs securely in place, preventing any movement during operation.
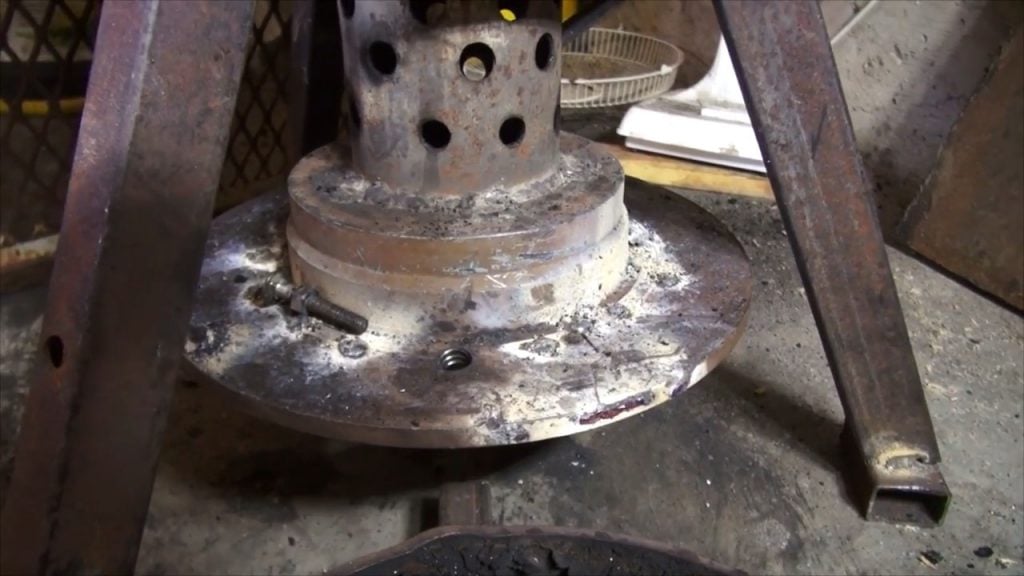
STEP 3 : IMPROVING THE AIRFLOW AND ADJUSTING THE TEMPERATURE
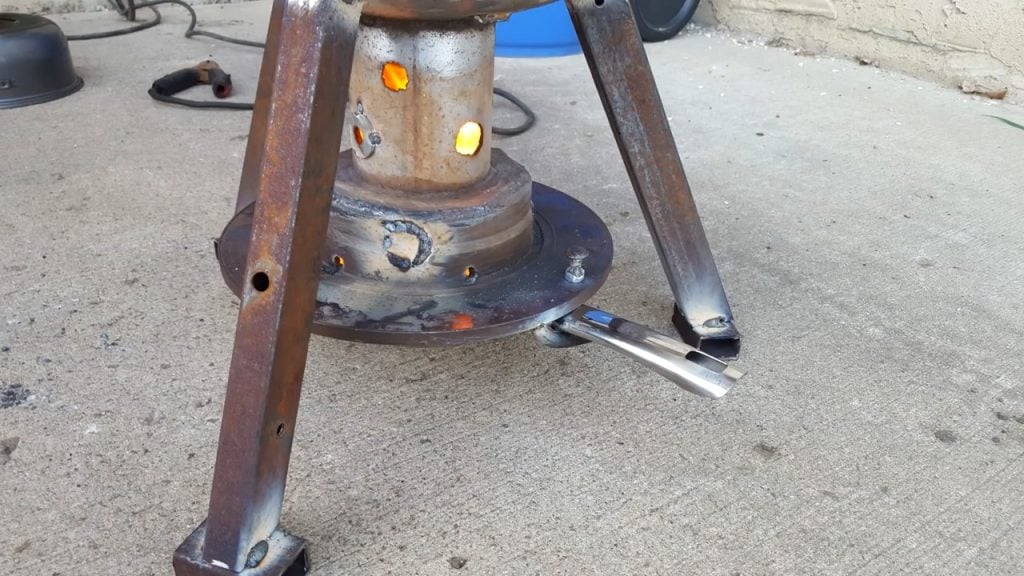
In order to enhance the airflow of the waste oil burner, we need to create multiple holes around the legs. This will allow for better ventilation and prevent overheating of the concrete floor.
Additionally, we should add more spaces on the legs to further distance the burner from the floor. We also need to make venting holes on both sides of the propane tank, in the middle.
This will facilitate air intake and exhaust, thereby improving the overall efficiency of the burner
To regulate the temperature of the waste oil burner, we need to add two primary holes measuring 7/16 at the base, just above the heating pan.
This will allow for greater control over the burner, as it adjusts the amount of air entering the combustion chamber. By regulating the airflow, we can increase or decrease the temperature of the burner as needed.
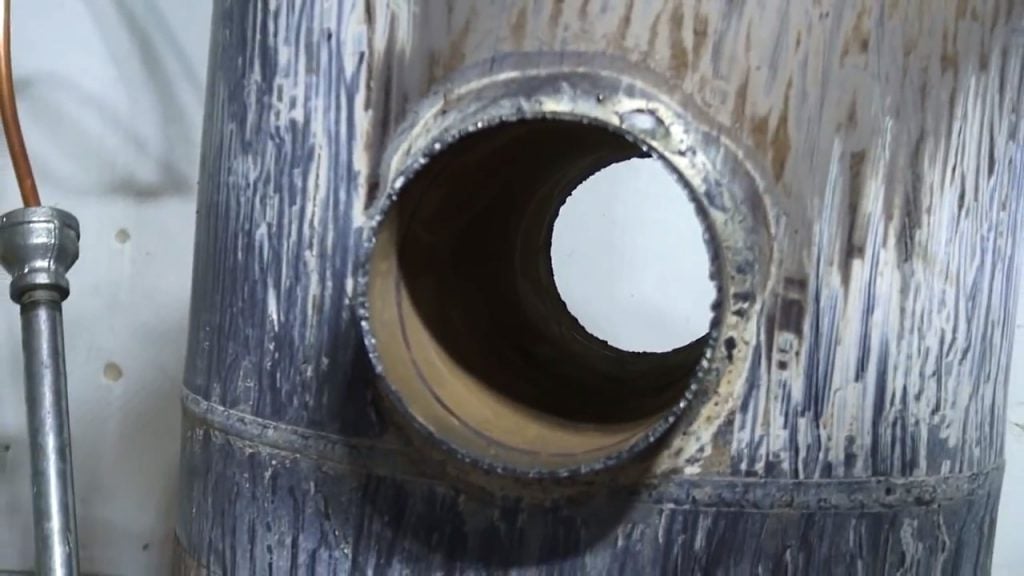
When creating air holes for the waste oil burner, we should avoid making them too large. Instead, it is important to have a sufficient number of holes to allow for increased airflow and temperature control.
With proper ventilation, fresh air can effectively reach the burner, resulting in a cleaner burn.
Additionally, these secondary holes will help to expel any oil splatter caused by the presence of water content.
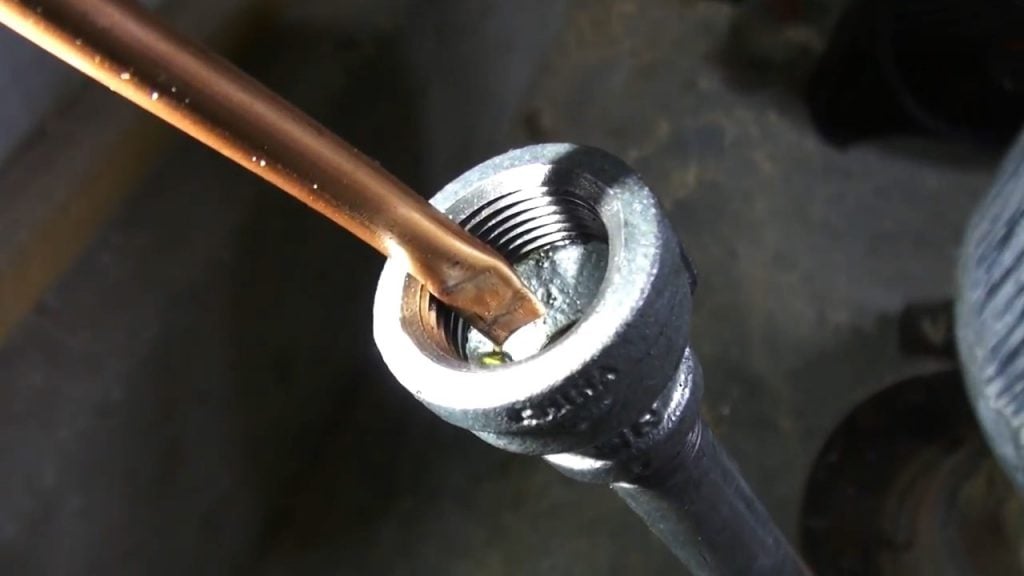
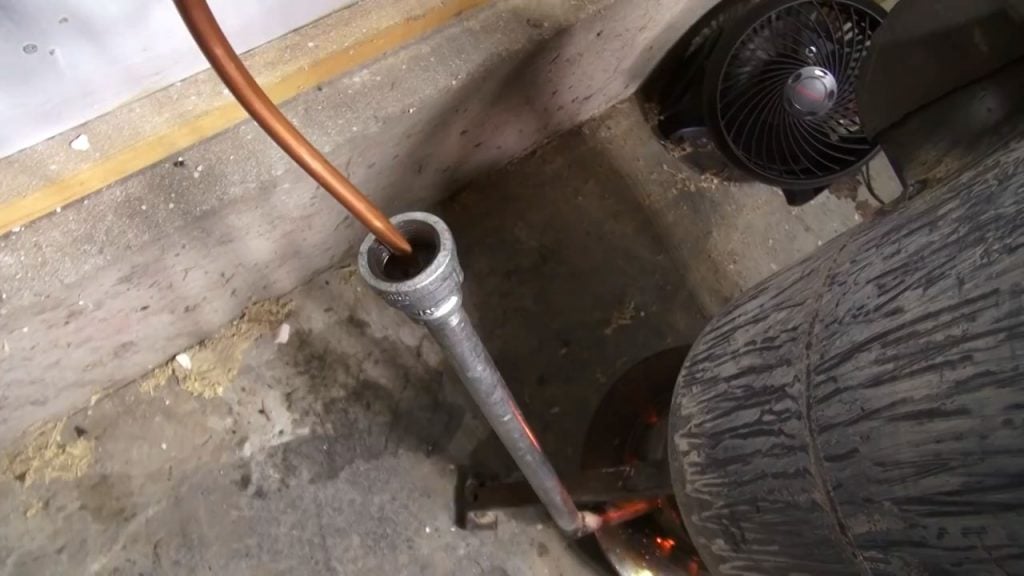
STEP 4 : DRIP FEED SYSTEM
Keeping the drip system of the waste oil burner open is vital for ensuring proper oil flow and safety.
It allows for easy monitoring of oil flow and acts as a safety measure in case of a flashback.
By keeping it open, any flashback will be safely expelled from this area instead of travelling through the pipe and back into the reservoir, reducing the risk of hazards.
The waste oil burner system is designed to be highly flexible and easily serviceable.
The entire system can be moved around without any permanent installation or bolts, making it a truly mobile and versatile option.
The chimney, exhaust pipe, and drip system pipe can be easily unhooked and removed, allowing for convenient maintenance and transport.
This feature ensures that the waste oil burner can be used in various settings, and users can make any necessary modifications or repairs without difficulty.
The drip system for the waste oil burner is created using sturdy pipe material and a small ball valve that is welded securely at a specific distance and height.
This design helps to diffuse the heat generated by the burner and prevents the oil from flowing back into the pipe.
STEP 5 : ADDING FANS
In order to enhance the heat dispersion of the waste oil burner, fans are used to facilitate the movement of air. This step involves incorporating two fans, each with a specific function.
One fan is used to blow hot air away from the wall, while the other fan draws in extra air to promote a more efficient burn.
The second fan also helps to pull cold air from the floor and allows fresh air intake, further promoting effective heating.
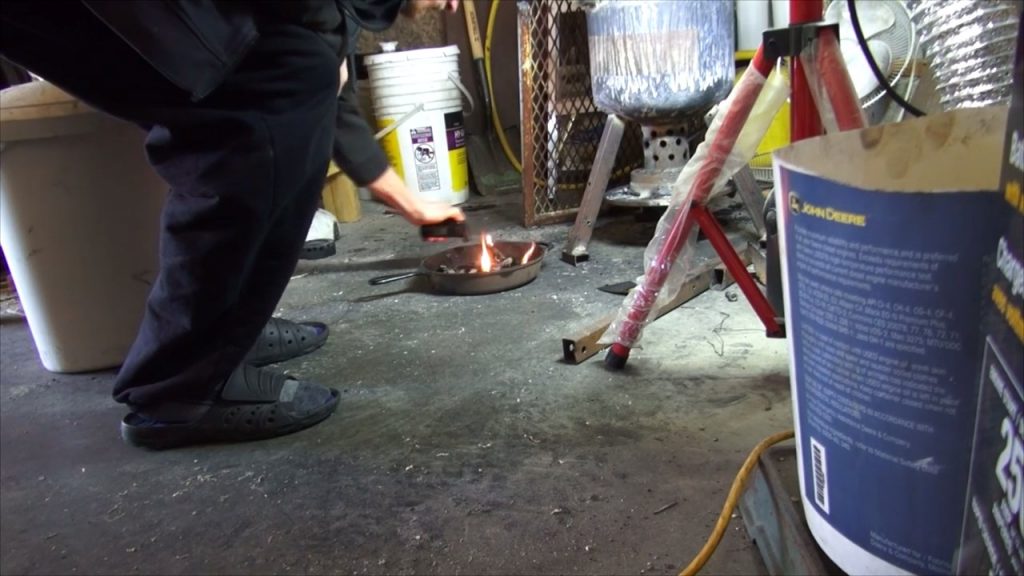
To initiate the waste oil burner, the first step is to pour the waste oil into a steel pan and place it under the burner.
However, it is important to ensure that there is no water in the oil or pan, as this can cause the oil to splatter out of the secondary holes.
The quantity of oil that can be introduced into the burning chamber will determine the extent of the burn and the amount of smoke produced.
Image Credits : Martian Dan