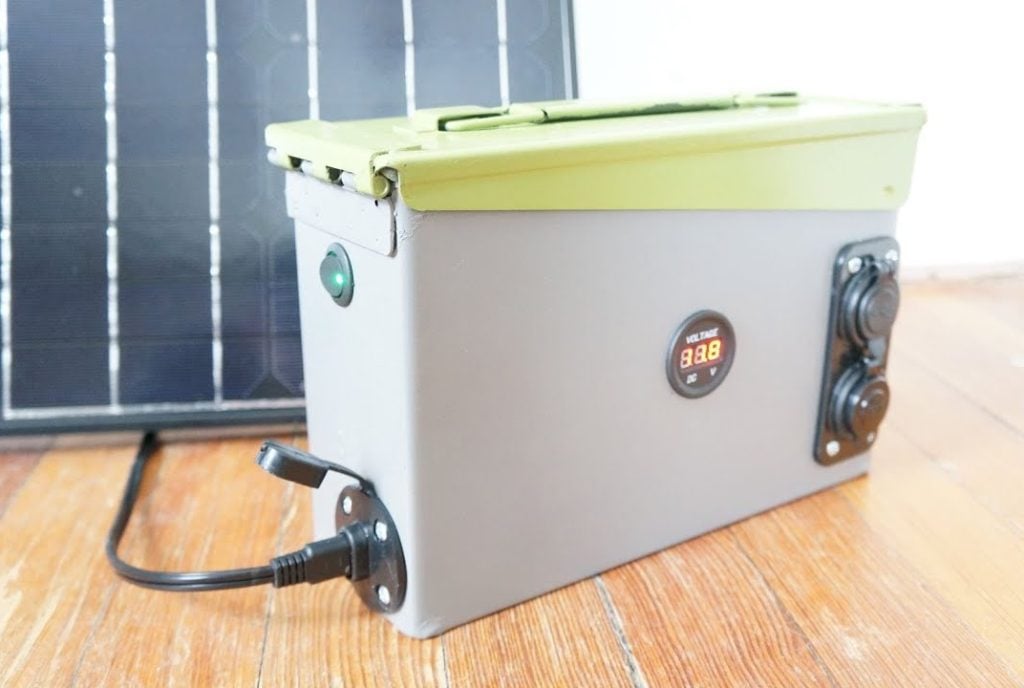
In this project, you will learn how to build a mini wind turbine that can complement your solar generator system. The wind turbine serves as an excellent backup power source during periods of reduced sunlight caused by cloudy weather.
By harnessing the power of the wind, you can ensure a continuous and reliable supply of electricity for your home or small-scale energy needs.
This DIY project is an affordable and eco-friendly alternative to purchasing a pre-built turbine, and it can be mounted anywhere for optimal wind capture
STEP 1 : BUILDING THE TURBINE BLADES
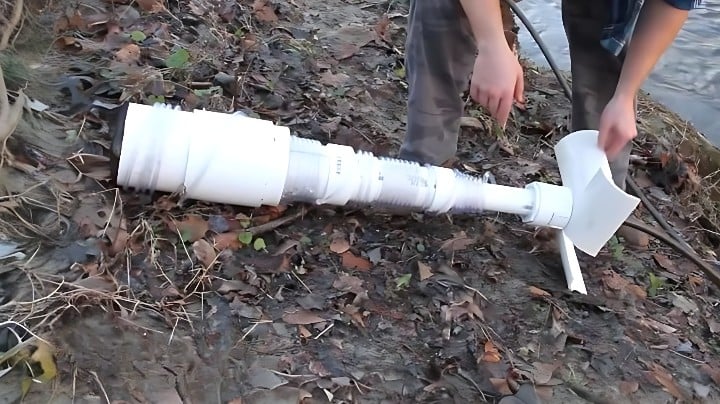
To begin building your own micro wind turbine, the first step is to construct the PVC blades that will capture the wind’s energy.
Start by cutting the PVC pipe to the desired length, ensuring that it is the same length for all six blades.
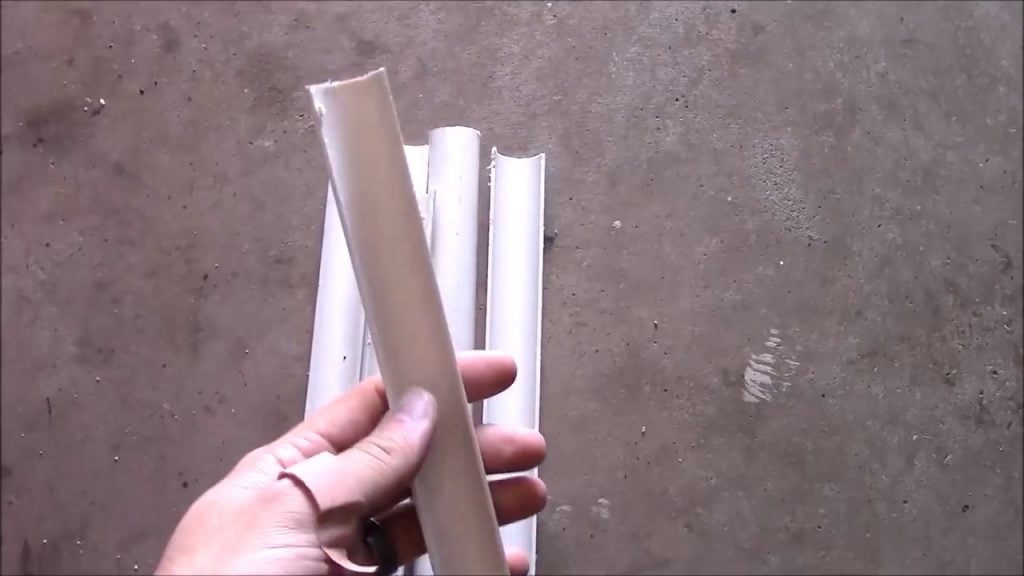
To achieve uniformity in the blade design, mark a straight line down the center of the pipe with a marker or pen.
Then, using a saw or cutting tool, carefully cut the PVC pipe in half along the marked line, creating two identical halves.
Once you’ve got it cut to length, then you want to take your straight edge again and Marco line down the center and cut it in half. Make sure that you do that on both sides.
One on this side. So that they’re perfectly in the middle so that you’ll get two even sides.
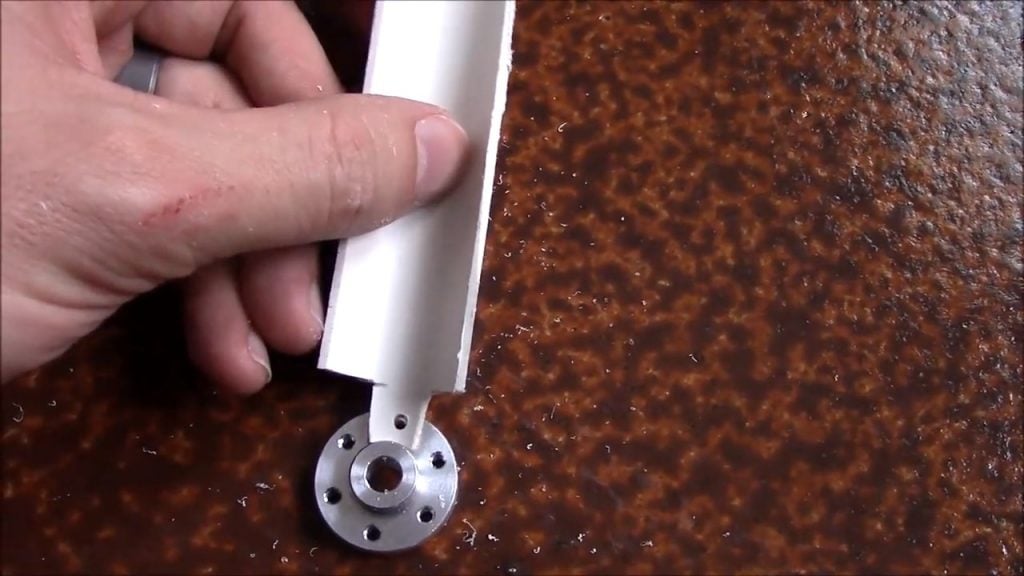
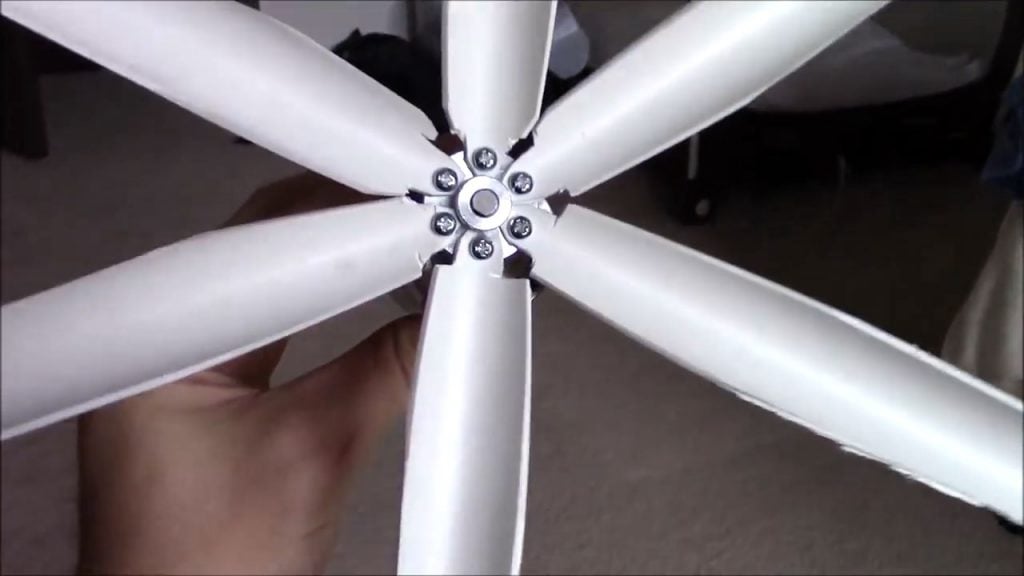
To ensure that the blades are well balanced and uniform, mark the center of each half and cut a small block at the blade’s end.
This block will be used to create a drill hole that will be used to attach the blade to the motor hub.
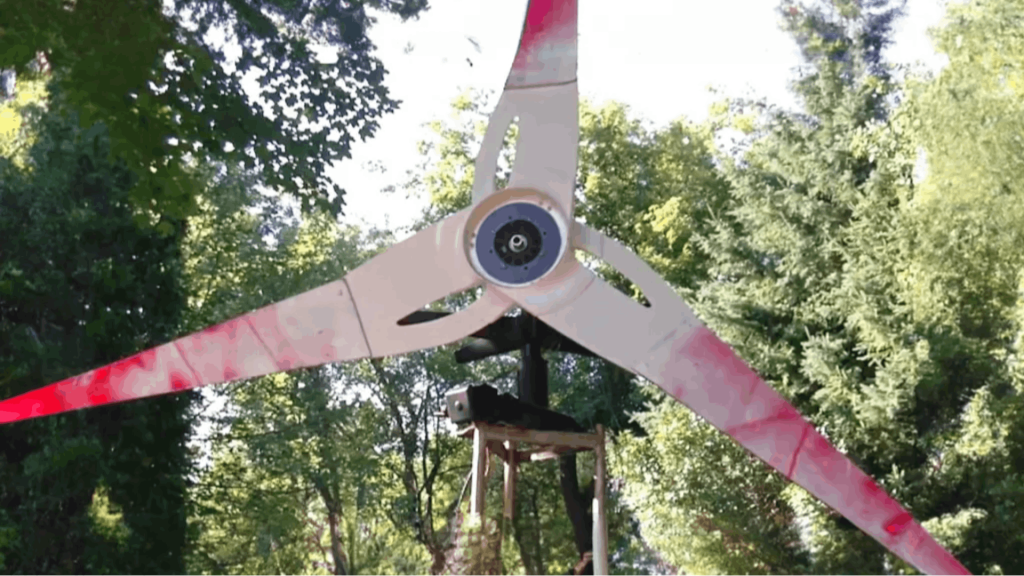
Additionally, to increase the efficiency of the wind turbine, you will need to cut away some material from the top of each blade to create a swept-wing shape at an angle.
This shape reduces drag and increases lift, making the turbine more efficient in capturing wind energy.
STEP 2 : ATTACHING THE MOTOR
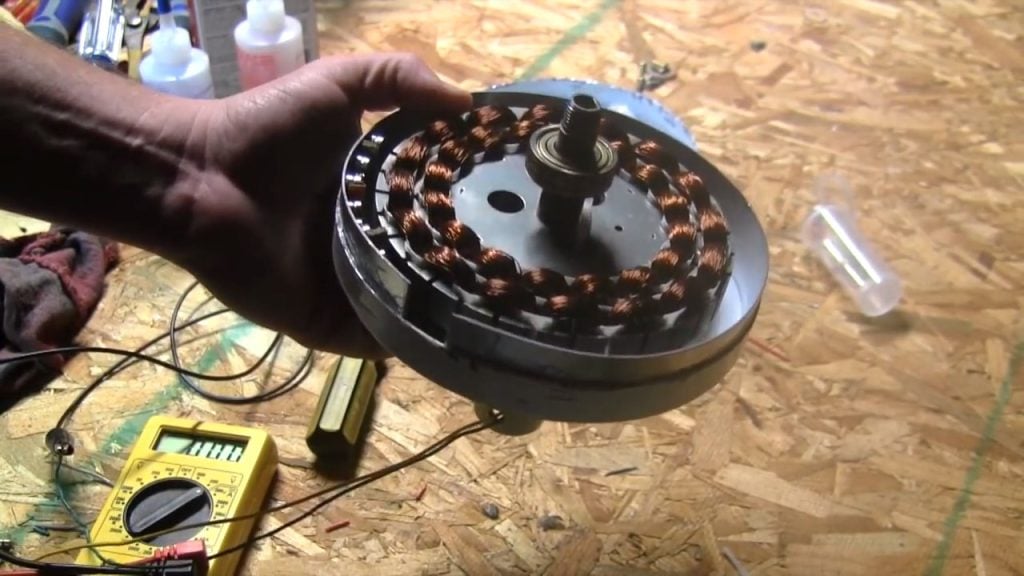
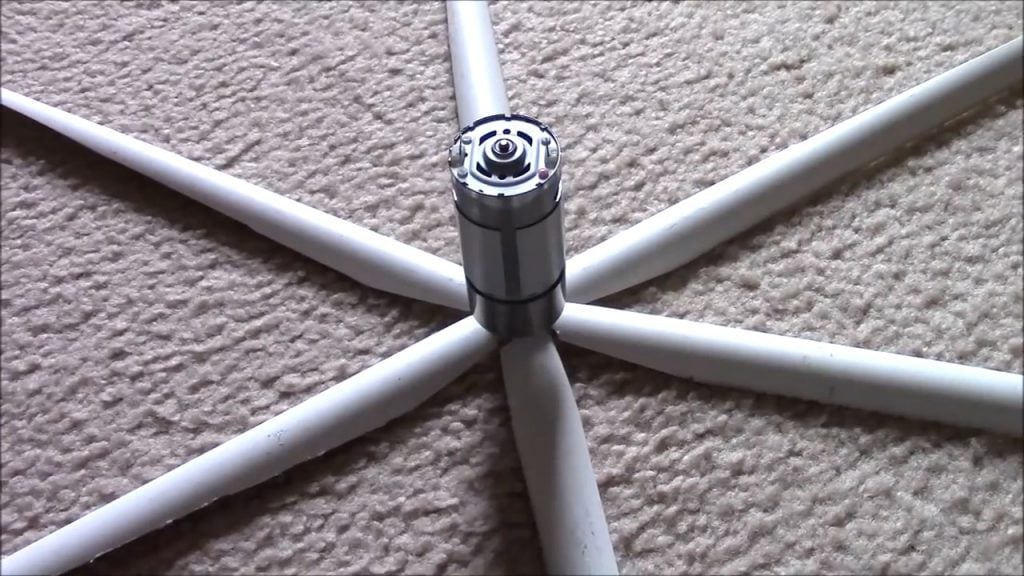
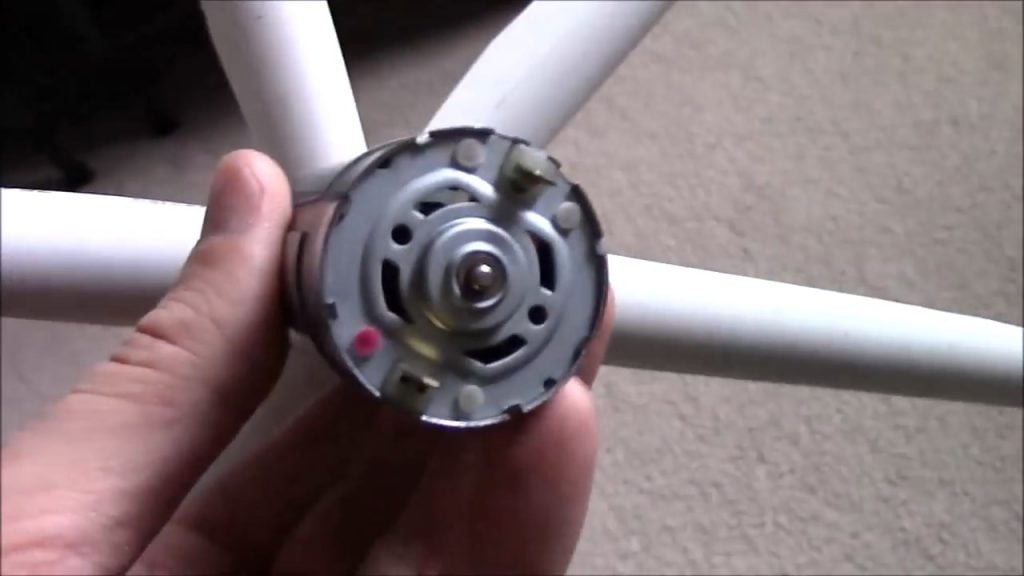
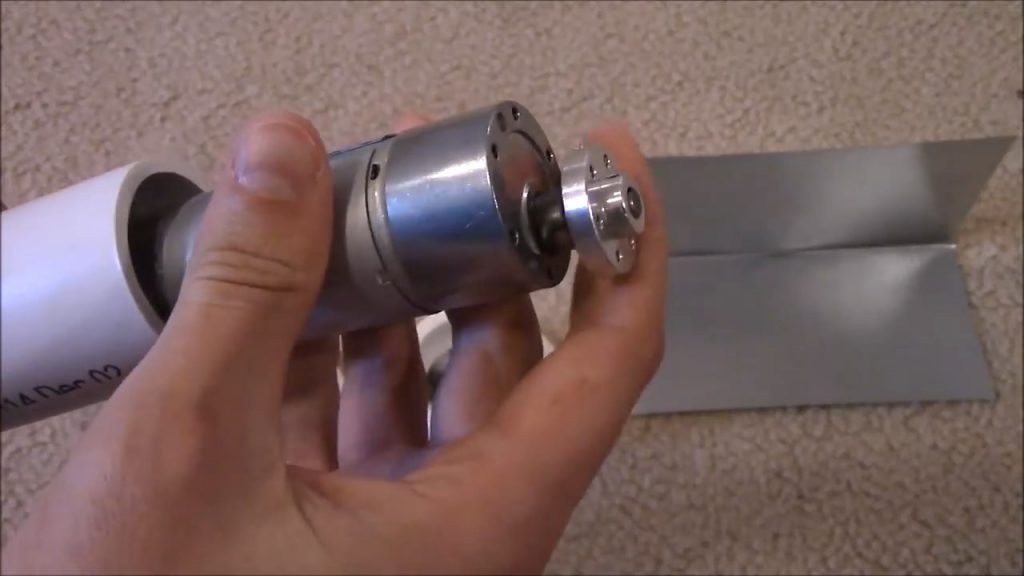
Once the PVC blades have been attached to the motor hub, the next step is to install the motor inside a 1.5-inch PVC pipe to protect it from the elements.
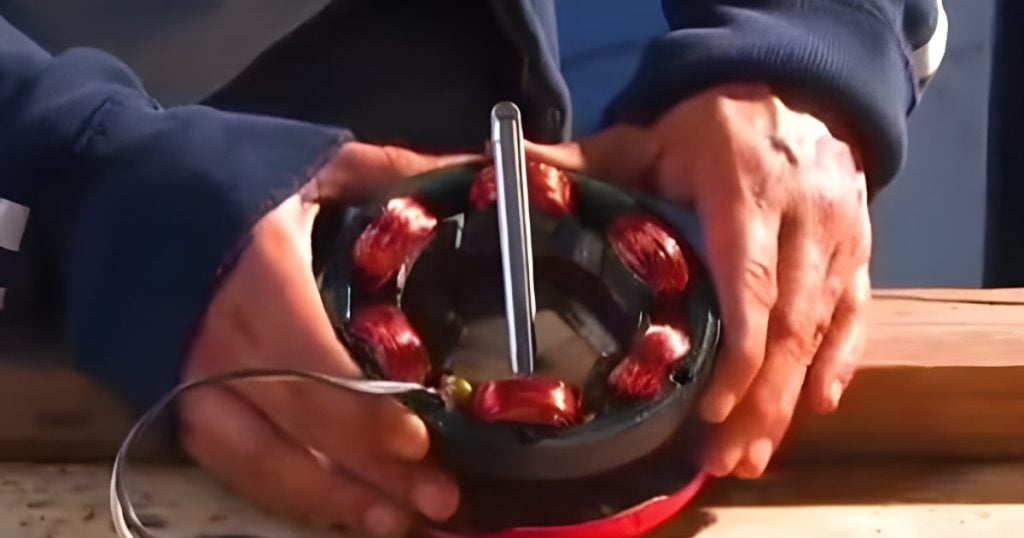
The set screws are used to securely attach the blades to the hub, ensuring that they are evenly spaced for maximum efficiency.
The motor used in this project is a 12V geared motor that operates at a maximum speed of 300 RPM. When fully loaded, this motor can produce a current of up to 600 milliamps, making it an excellent choice for generating electricity from wind power.
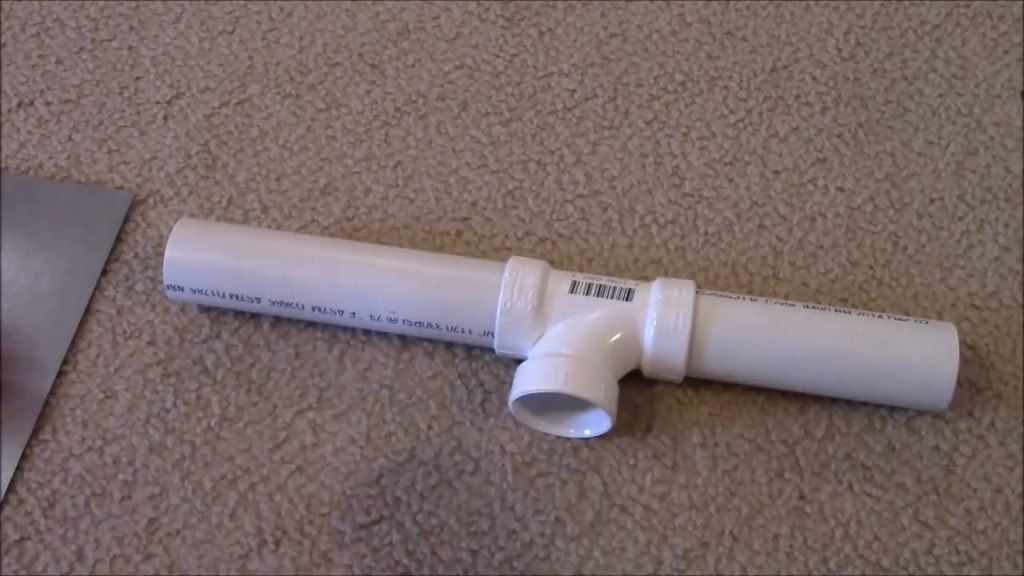
To connect the motor to the pole, a PVC tee is attached to the motor housing, and the wires are run down the pole.
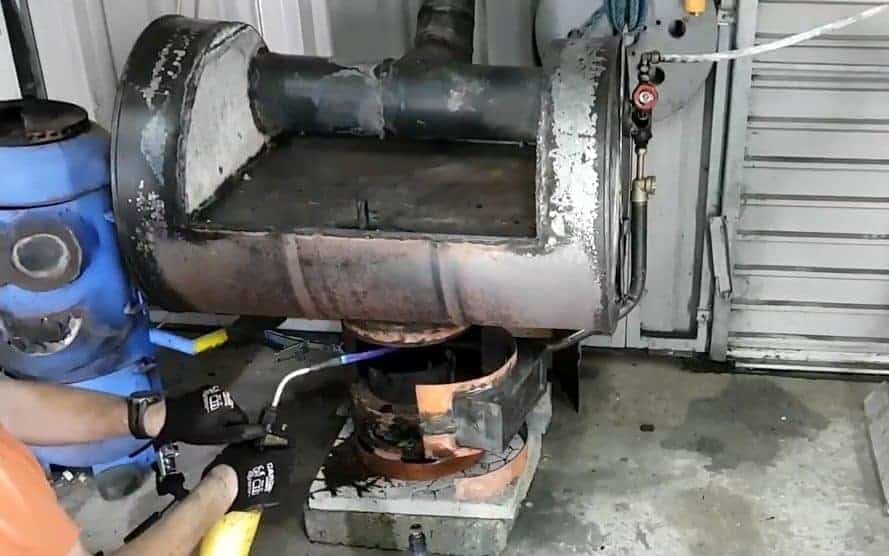
A 7-foot pipe acts as the tower or pole, providing height for the turbine to capture more wind energy.
At the bottom of the pole, a shower drain is installed, and the end of the pole is secured to a piece of wood, which acts as a solid base.
The use of a shower drain and piece of wood for the base provides stability and support for the pole.
STEP 3 : BUILDING THE YAW SYSTEM
The yaw system is an essential part of any wind turbine as it allows the turbine to turn and face the wind, ensuring maximum energy capture. In this project, a tail vane is used to create the yaw system.
To create the tail vane, a piece of cheap flashing material is used. The flashing material is cut to the desired size and shape, and then bolted between an 8-inch piece of PVC.
A hole is drilled through the center of the flashing material, and a bolt is inserted to hold it securely in place.
The tail vane is attached to the back end of the wind turbine, and its purpose is to help the turbine align with the wind direction.
As the wind changes direction, the tail vane will cause the turbine to turn and face the wind, ensuring maximum energy capture.

STEP 4 : THE BASE
To complete the construction of the micro wind turbine, a base is needed to support the pole and motor.
In this project, an old OSB board is used as the base, which is approximately seven inches square in size. A piece of treated lumber is attached to the bottom of the OSB board.
The base is designed to allow the wind turbine to rotate and face the wind. To achieve this, ball bearings are used to attach the PVC pipe, which holds the motor and blades, to the base.
This design allows the wind turbine to rotate freely with the direction of the wind, maximizing energy capture.
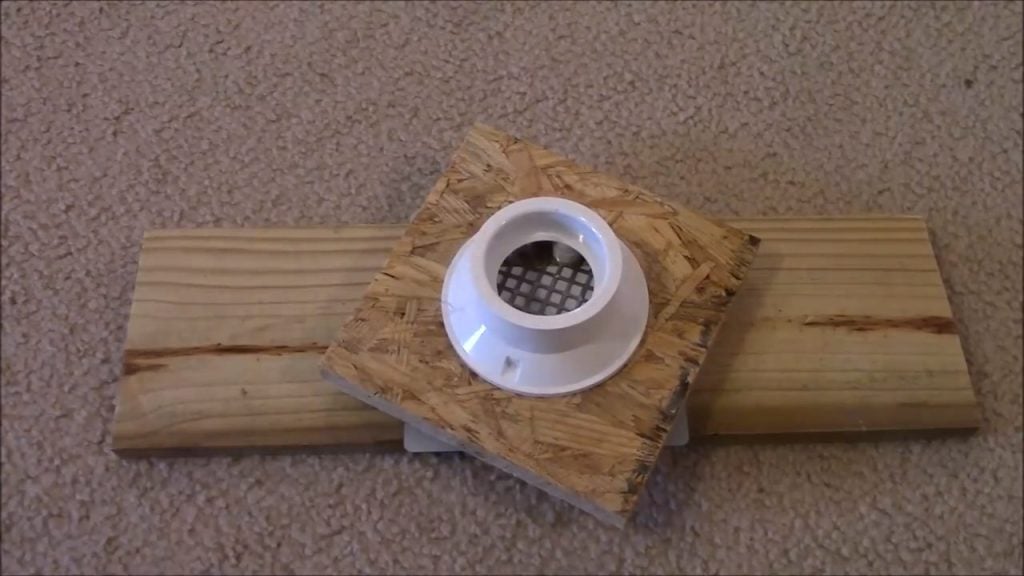
To ensure that the wiring is tidy and organized, the shower drain PVC is placed in the middle of the base through some ball bearings.
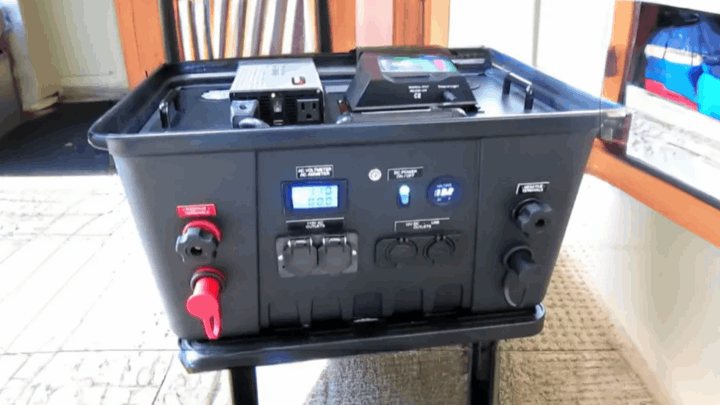
The wires are then routed down through the hole to connect to the charge controller.

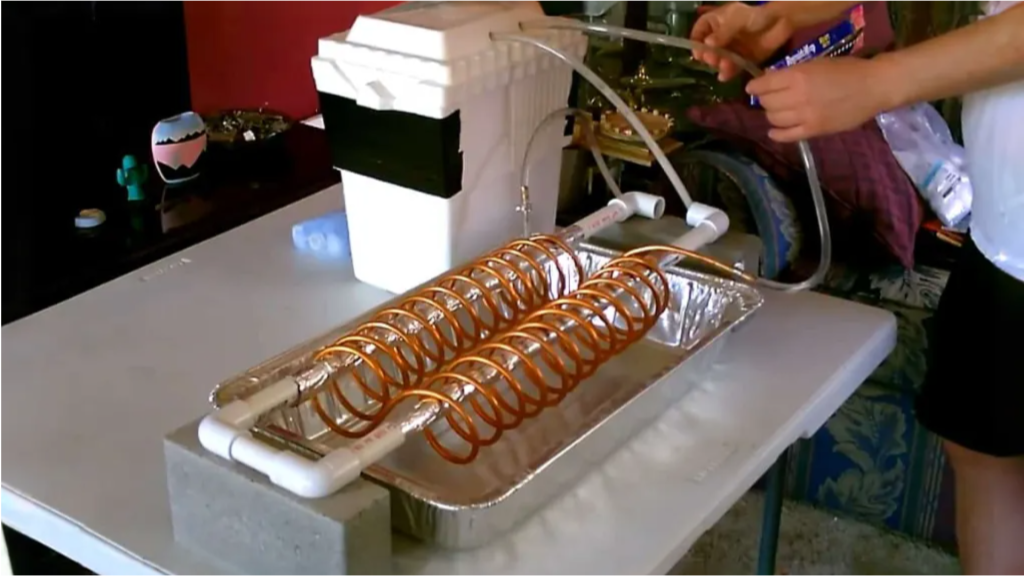
The final step in building the micro wind turbine is to connect the motor to the charge controller and battery bank.
This process involves wiring through the piping and connecting the terminals of the motor to the appropriate sides of the charge controller
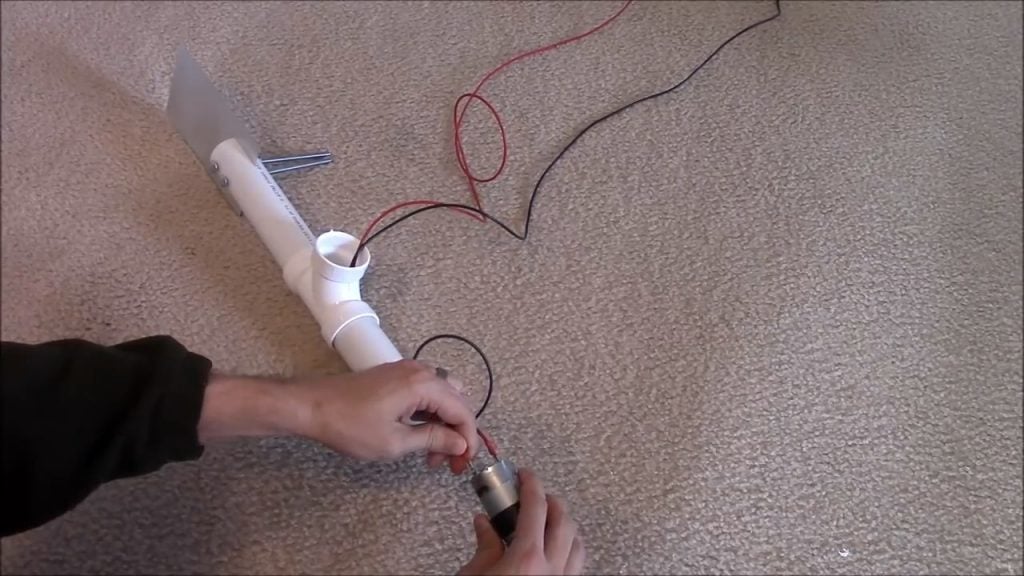
.First, the wires from the motor are routed through the PVC piping and down through the base to the charge controller.
The charge controller is an essential component in the wind turbine system as it regulates the amount of power flowing to the battery bank, preventing overcharging or undercharging.

Image Credit : LDSreliance