This article aims to guide readers in building their own portable solar power generator that is both efficient and cost-effective.
With the use of a 100W Polycrystalline Solar Panel, this generator can provide an environmentally friendly source of power.
The project is designed to be medium-sized and moderately priced, making it accessible for those who are on a budget or have limited space.
STEP 1 :CHOOSING A CASE
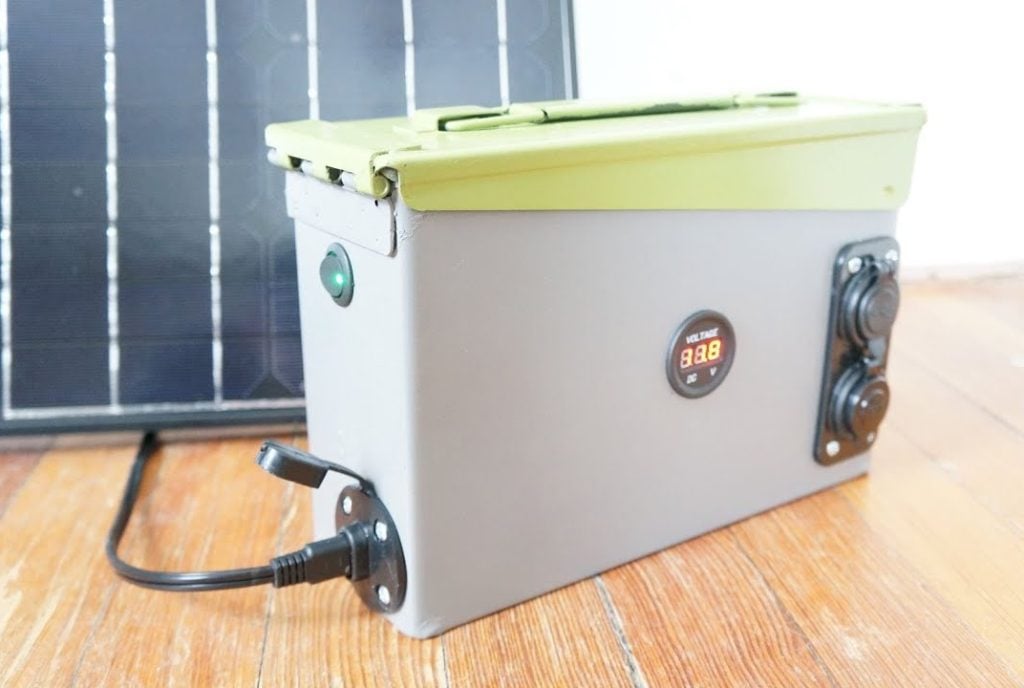
To house the components of the portable solar power generator, we have chosen the Plano sportsman case, which is not only sturdy and rugged but also quite affordable, costing approximately $25.
The case provides ample space to accommodate the components, while also ensuring their protection from external damage.
One of the advantages of this case is its top, which comes with handles that latch it down. This feature makes it easy to carry around and transport, even when it is fully loaded.
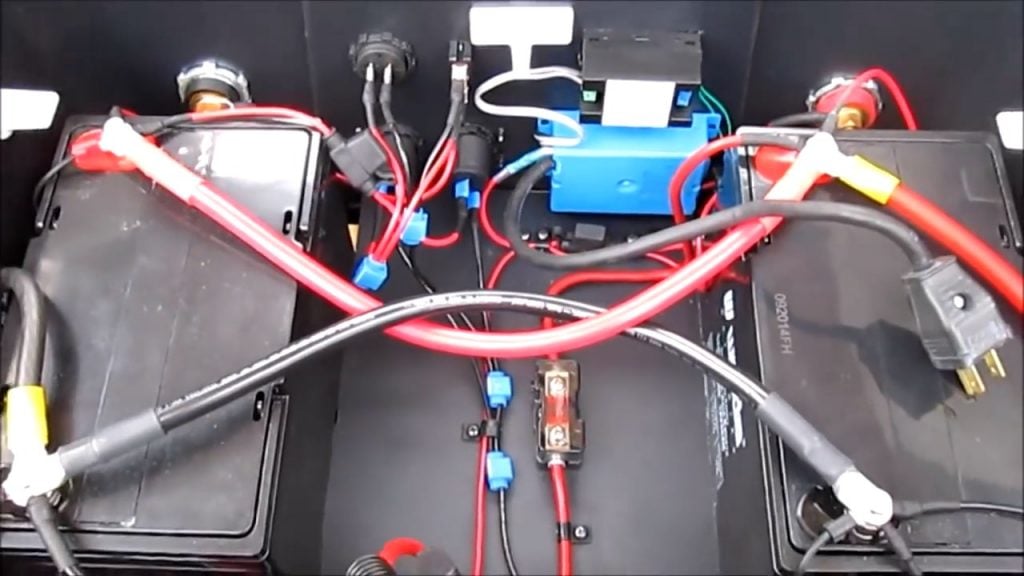
STEP 2 : CONNECTING THE BATTERY
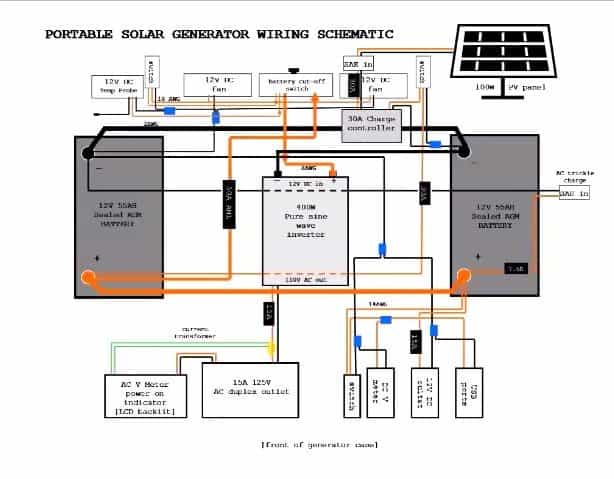
At the back of the portable solar power generator, we have a two-pin SAE port that serves as the entry point for the energy generated by the solar panel.
The energy is then directed into a 30A solar charge controller, which regulates the amount of energy that goes into the batteries.
The negative terminal of the charge controller is connected to the negative terminal of the batteries, while the positive terminal is linked to a switch that connects to the positive terminal of the batteries.
This setup allows for easy disconnection of the batteries when they need to be replaced or maintained.
To complete the circuit, the negatives and positives of the batteries are connected to each other. The negative terminal of the inverter, which converts DC power from the batteries into AC power that can be used to power appliances, is connected to the negative terminal of the batteries.
The positive terminal of the inverter is connected to a battery switch that is also connected to the positive terminal of the batteries through another switch. This arrangement enables the user to easily turn the inverter on and off.
Finally, the USB ports, 12V DC outlet, and DC meter are all connected to the respective terminals of the batteries, allowing them to be powered by the energy stored in the batteries.
STEP 3 : CONNECTING TO AN AC OUTLET
In order to connect the portable solar power generator to an AC outlet, we use a three-wire extension cord that can be easily obtained from a local hardware store.
The negative end of this cord is connected to the negative terminal of the shallow box AC outlet, while the positive end is connected to a 15A inline fuse and a current transformer.
The current transformer is responsible for measuring the amount of current flowing through the circuit, which is then displayed on an ammeter connected to the 110V outlet.
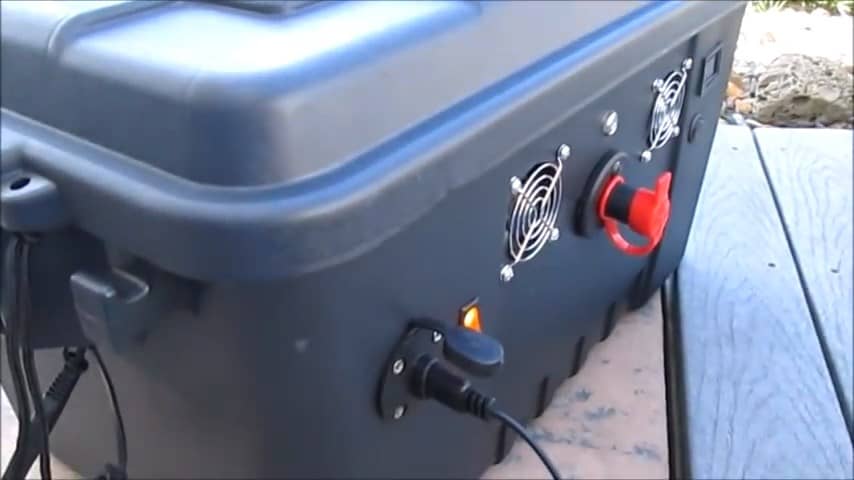
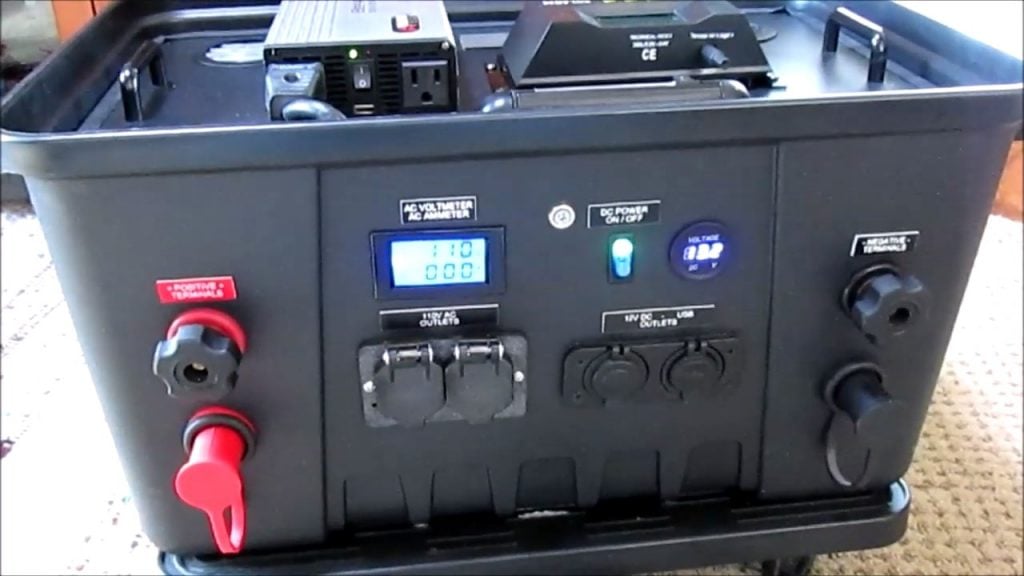
STEP 4 : ACCESSORY PORTS
The portable solar power generator has a set of accessory ports on its front panel, which include a 12V power indicator, two USB ports with 5V one amp and 5V 2.1amp outputs, a 12V outlet, an AC voltmeter, and an ammeter.
The ammeter serves to measure the amount of current being drawn from the system, providing a clear indication of the power usage of the connected appliances.
This information can be used to determine the amount of solar power being generated during the day and the amount of solar power being utilized by the system.

The generator is controlled by a 12V master key switch, which serves as the main power switch for the entire system.
When the key is turned, the switch activates the inverter, case temperature sensor, cooling fans, and AC power outlets, allowing the generator to provide power to the connected appliances.
The inclusion of a key switch ensures that the system is only turned on when needed, preventing any accidental activation that may cause unnecessary power consumption.
This feature also allows the user to easily turn off the system when it is not in use, saving battery power and increasing the lifespan of the components.
To prevent the inverter from overheating, two fans are installed on the back of the generator, which push air into the case and draw air out, effectively cooling the AC-DC inverter.

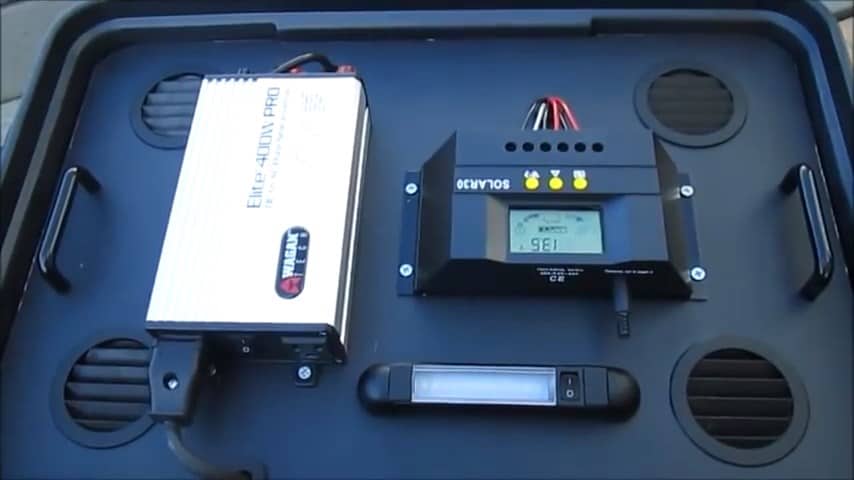
STEP 5 : CONFIGURING THE INVERTER AND CHARGE CONTROLLER
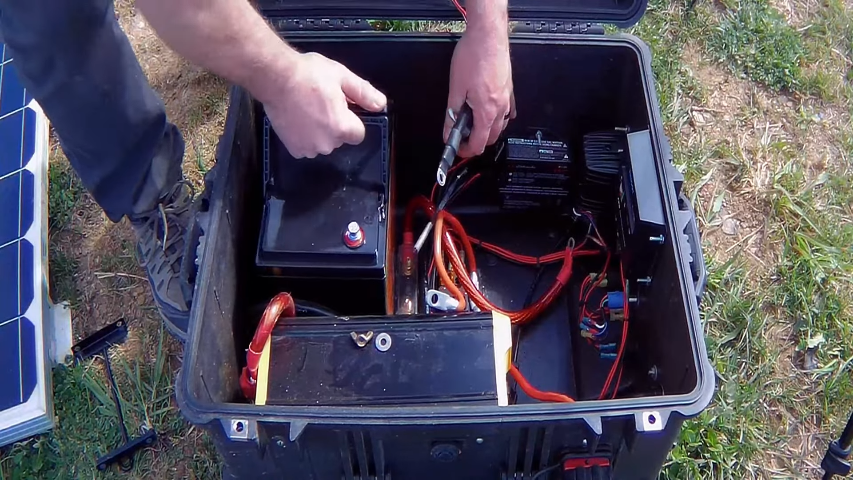
The interior of the portable solar power generator is constructed with a deck tray made from backboard material, which is readily available at Home Depot.
This deck tray houses several essential components, including a 400W pure sine wave inverter, a 30A MPPT solar charge controller, and a 12V LED light.
The deck tray is also equipped with four vents that allow air to circulate through the top and bottom portions of the case.
The inclusion of these vents ensures that the batteries remain cool and any off-gas buildup from the batteries is allowed to escape.
This is important because excess heat can negatively affect the lifespan and performance of the batteries, and off-gas buildup can cause safety hazards.
The inverter is equipped with a built-in automatic shutdown feature that prevents the batteries from being discharged to a significant level.
This ensures that the batteries are not overused or damaged, extending their lifespan and performance.
After disassembling the deck tray, the portable solar power generator reveals two 55AH AGM sealed batteries that are connected in parallel using a 2 AWG cable to transfer power between the batteries.
This configuration allows the generator to store a significant amount of energy, providing reliable power to connected appliances and devices for extended periods.
These types of batteries require less maintenance compared to other battery types, making them an ideal choice for a portable solar power generator.
To keep the batteries in place and prevent them from moving around, a wooden frame is installed inside the case, which perfectly matches the dimensions of the interior.
To protect the components of the generator, several fuses are included in the system. ANL 50-amp fuses are installed between the inverter and the battery, while inline 30-amp fuses are placed between the solar charge controller and the batteries.
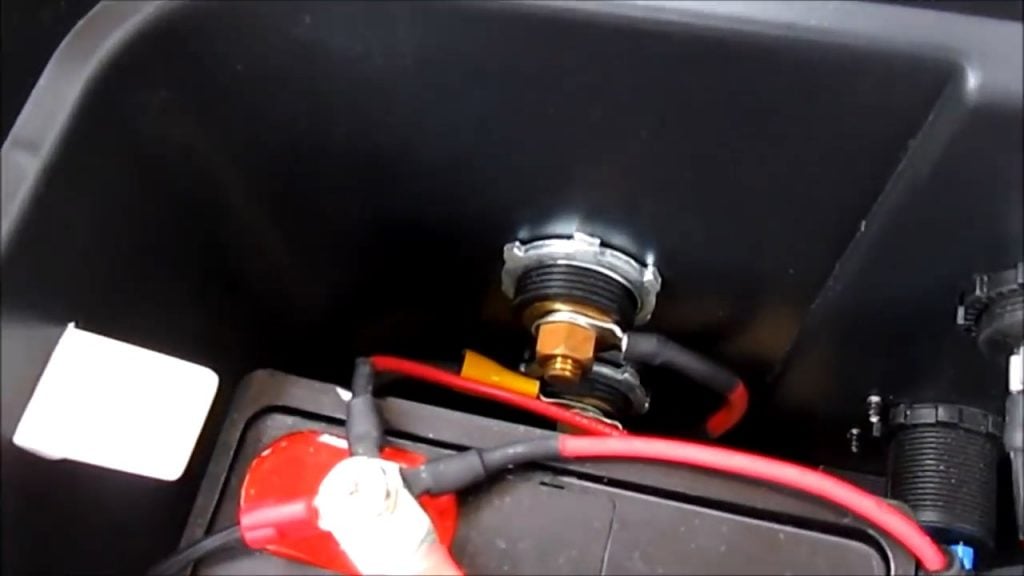
To provide flexibility and convenience in using the portable solar power generator, external heavy-duty battery terminals are installed to allow for easy attachment of jumper cables.
These terminals are designed to handle high currents, ensuring that the generator can be used with a wide range of appliances and devices.
Additionally, an SAE 2 pin port is installed to enable the generator to connect to an AC float charger. This feature is useful for situations where the generator needs to be charged from a standard AC outlet, such as in cases where the solar panel is not available or when the generator needs to be recharged quickly.
Image Credits : Jim Fisher DIY Portable Solar Power