STEP 1 : UNDERSTANDING HOW A GEOTHERMAL HEAT PUMP WORKS
This project discusses the construction of a geothermal heat exchanger for the purpose of cooling a garage. The process involves drawing cold water from a shallow well and passing it through a heat exchanger located inside the garage.
A fan attached to the heat exchanger then releases the cooled air into the garage, while the heat exchanger absorbs the existing heat inside the garage. The heated water is subsequently removed through an exhaust pipe.
The system is based on the principles of a geothermal heat pump, which utilizes the consistent temperature just a few feet below the earth’s surface.

The installation process involves digging a shallow well using a post auger, as well as connecting a water pump and pressure tank to the well pipe.
A one-inch poly pipe is buried inside a trench to connect the well pipe to the garage, through which the cold water is transported.
STEP 2 : DIGGING A WELL USING A POST AUGER
The shallow well is a critical component of the geothermal cooling system, as it allows for access to the cool and consistent temperature just a few feet below the surface of the earth.
This temperature remains constant throughout the year, regardless of the season.
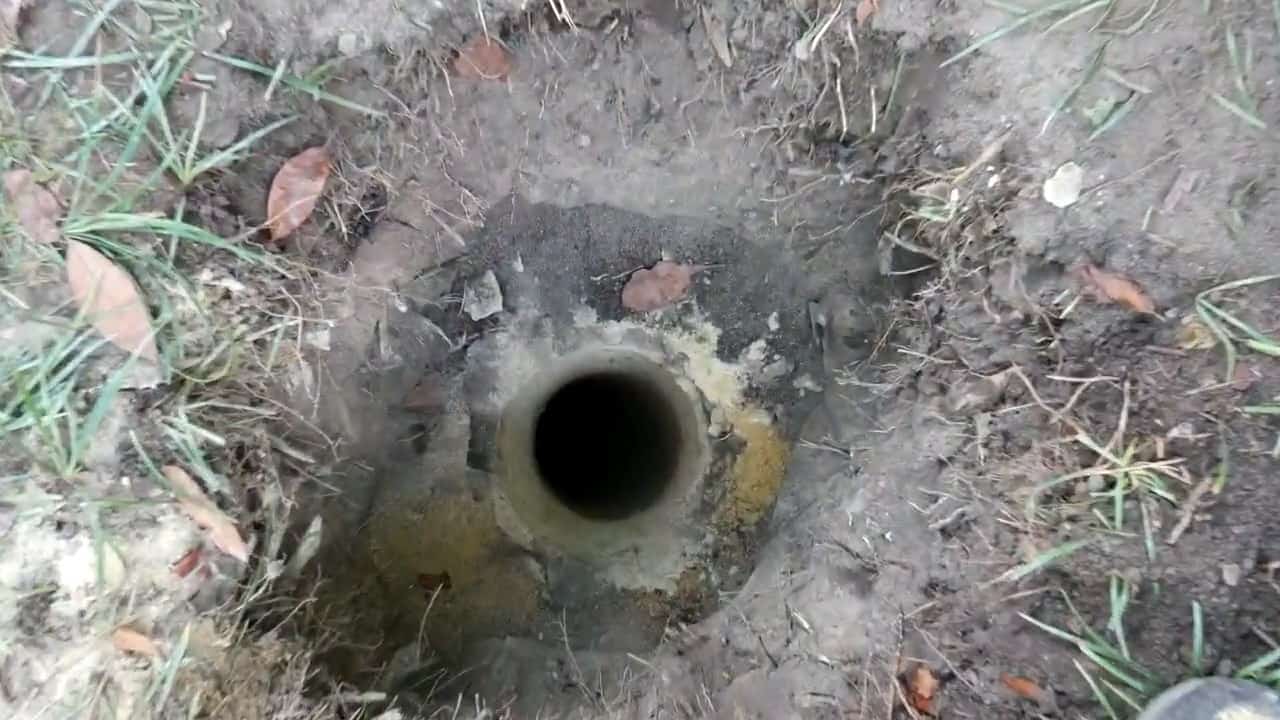
To harness the cold water below, a post auger is utilized to dig a hole until the water table is reached. A 3-foot long well point is attached to a 10-foot three-quarter inch pipe using a drive coupling, which allows for the water to be drawn up from the well.
The post auger is driven into the ground until it reaches the water table, at which point the well point is attached to the pipe and driven an additional two to three feet into the ground, until it is submerged below the water table.
STEP 3 : DIGGING THE TRENCH AND CONNECTING THE WELL PIPE
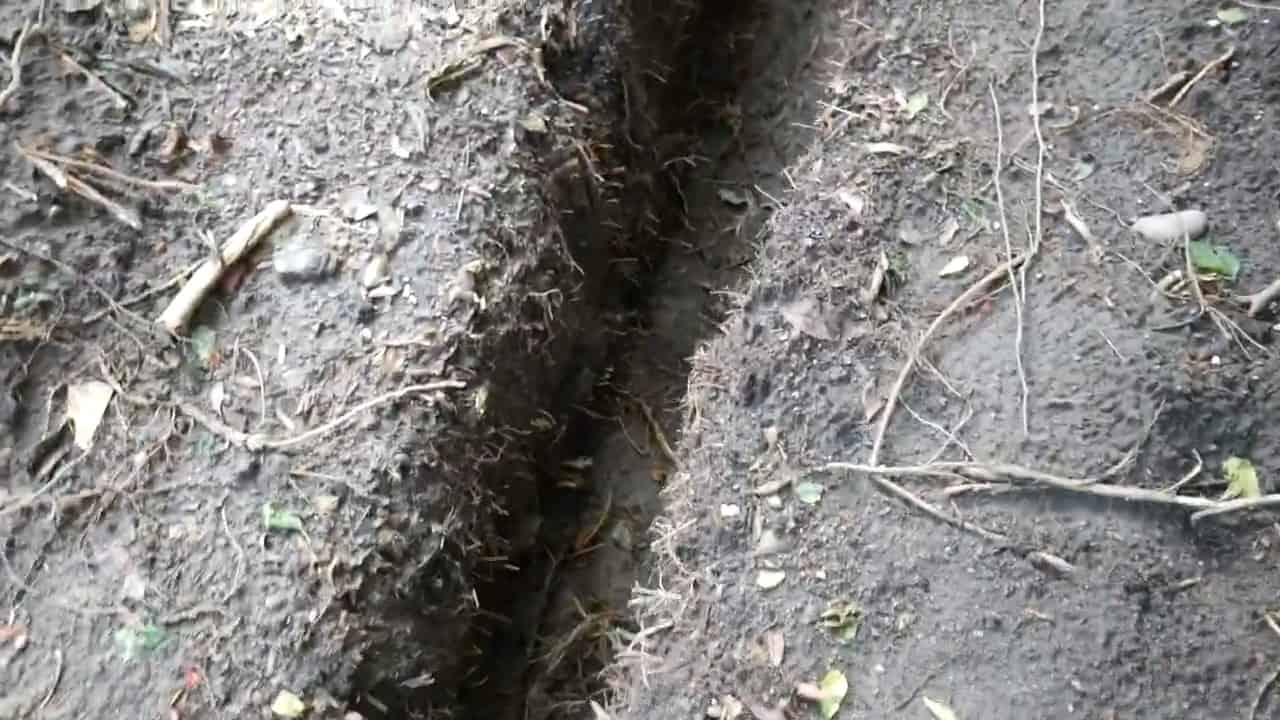
In order to transport the cold water from the well to the garage, a trench is dug that connects the two. This trench is typically two to three feet deep, and the distance between the well and the garage will depend on the specific layout of your property.
Once the trench is dug, a one-inch poly pipe is connected to the well pipe using a barbed coupling. This pipe will carry the cold water from the well to the garage.
The poly pipe is then buried inside the trench, which helps to keep it cool under the earth.
It is important to dig the trench down at least two feet, until you hit hardpan clay. This is the depth at which the temperature begins to be more constant, which ensures that the pipe remains cool and that the water remains at a consistent temperature.
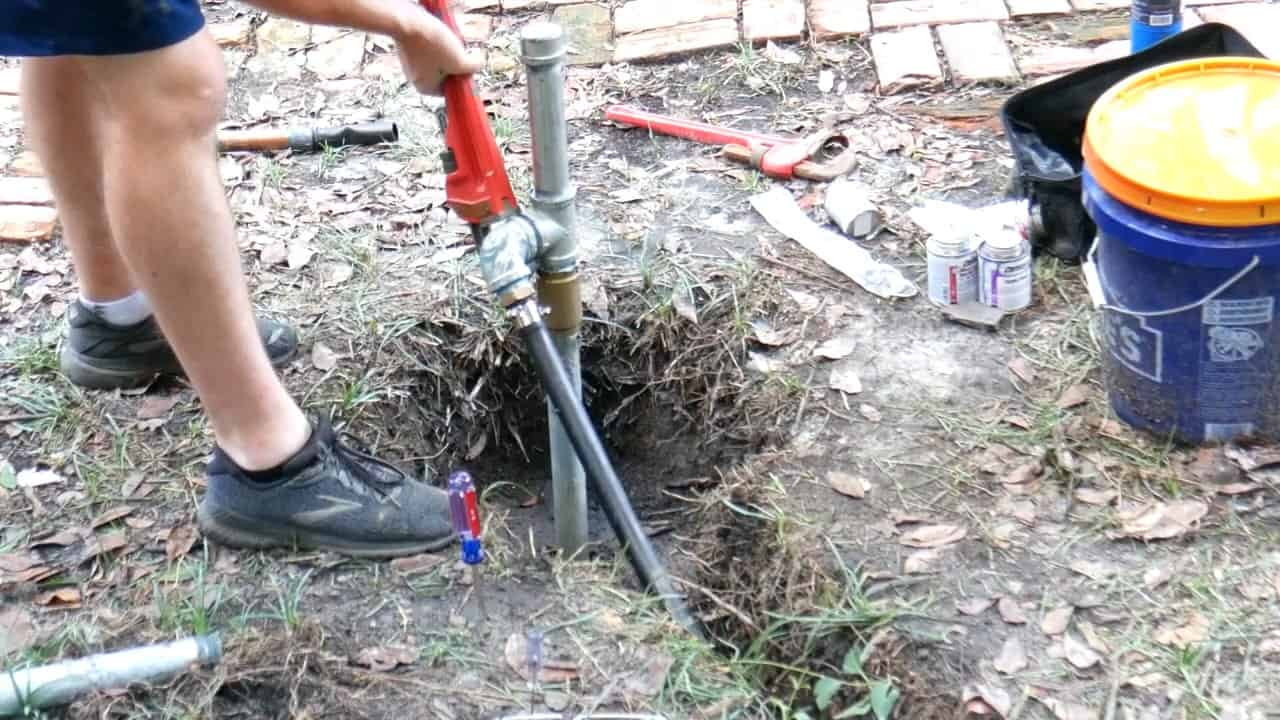
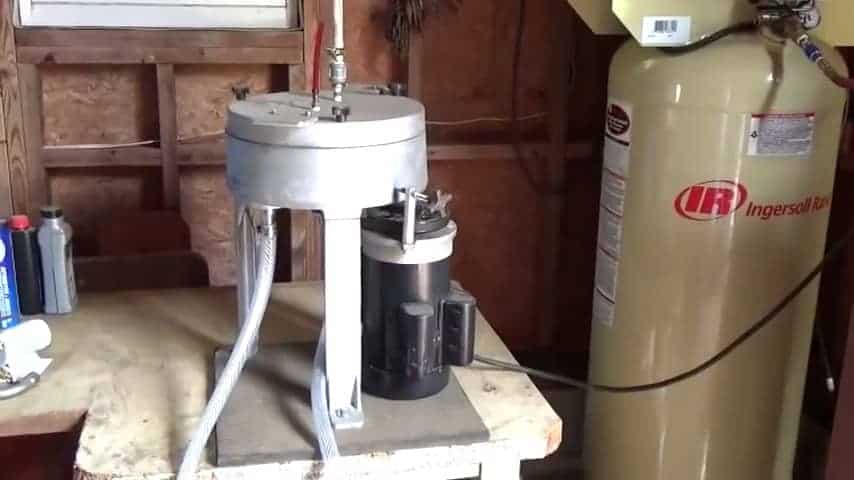
STEP 4 : CONNECTING THE JET PUMP
The other end of the one-inch poly pipe, which extends from the trench, is connected to a 1/2 HP Flotec Shallow well jet pump.
This pump is an important component of the geothermal cooling system, as it helps to move the cold water from the well to the heat exchanger located in the garage.
It is worth noting that the Flotec Shallow well jet pump is designed to be powered by a solar panel, which makes it an energy-efficient and sustainable solution.
It is important to keep the pump outside the garage, as it generates a significant amount of heat during operation. If the pump were kept inside the garage, the cooling effect of the water would be undone by the heat generated by the pump.
Therefore, it is recommended to install the pump in a shaded area outside the garage to ensure maximum efficiency of the cooling system.
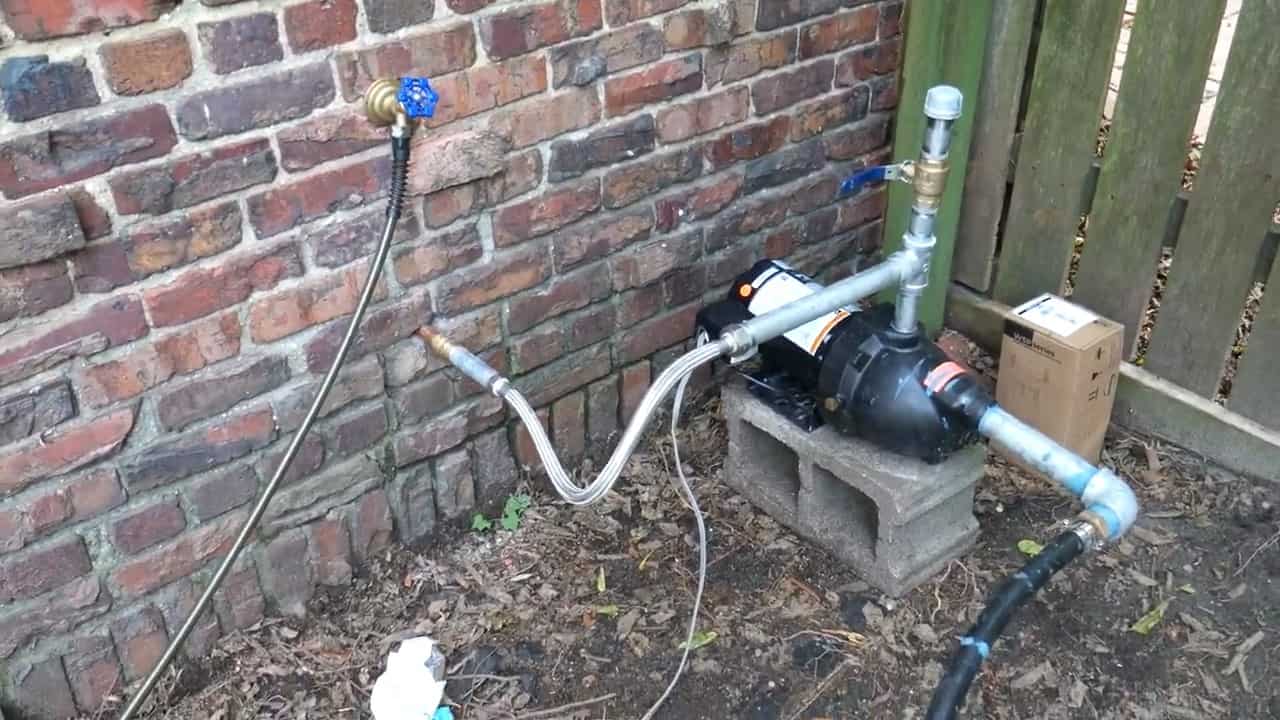
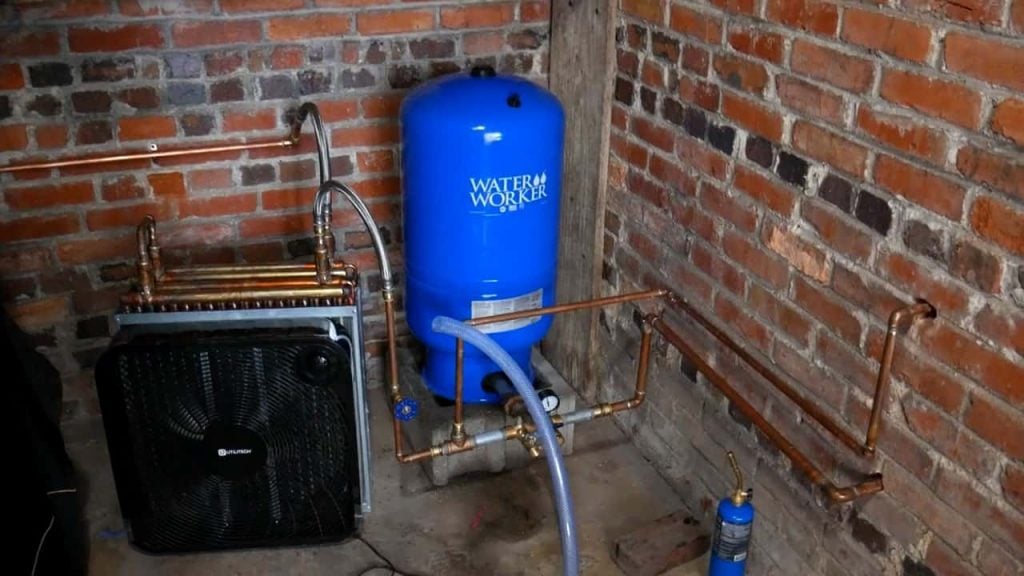
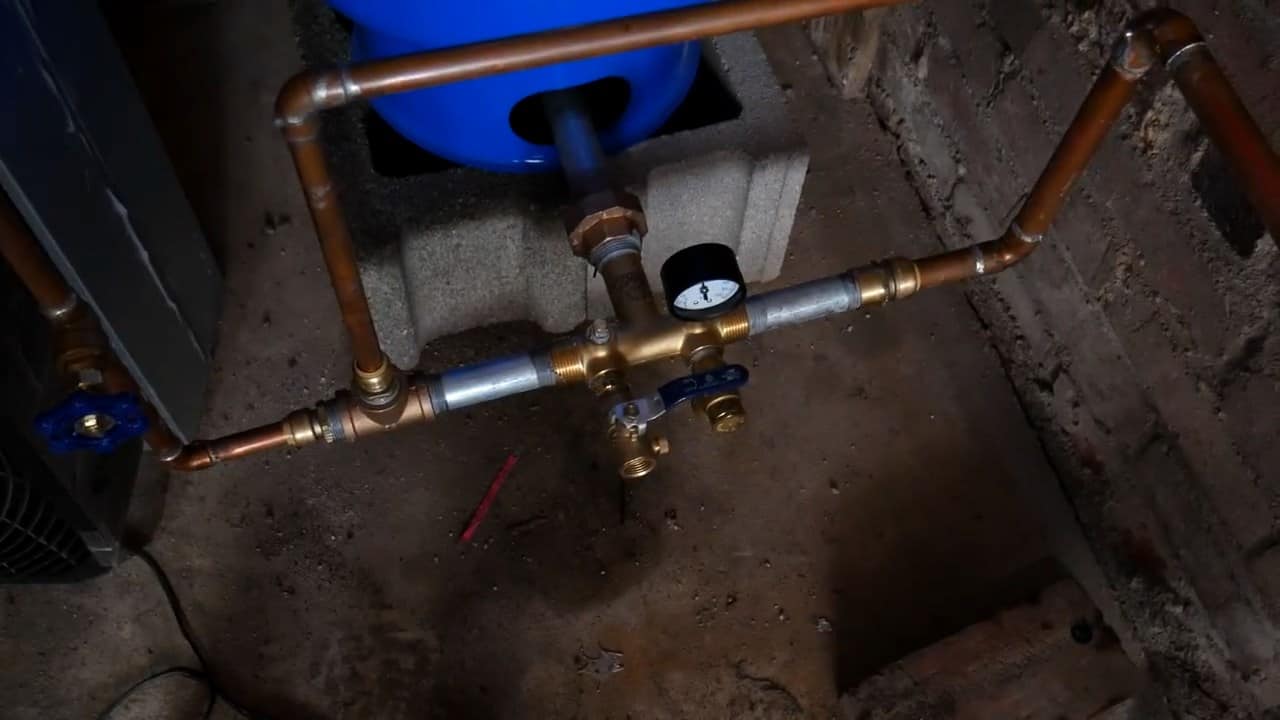
STEP 5 : INSTALLING A WATER PRESSURE TANK
The output of the pump is connected to a three-quarter-inch copper pipe inside the garage. It is then further connected to a water pressure tank with the help of a brass tee and a union.
A relief valve is also attached to the tee to empty the water tank if the pressure gets too high. A water pressure tank is used to prevent the pump from failure.It also acts as a buffer storage.
After the Flotec Shallow well jet pump moves the cold water from the well, the output of the pump is connected to a three-quarter-inch copper pipe that runs inside the garage.
To regulate the flow of water and prevent pump failure, a water pressure tank is connected to the copper pipe with the help of a brass tee and a union.
The water pressure tank acts as a buffer storage, ensuring that the pump doesn’t have to work too hard to maintain a consistent flow of water.
This helps to increase the lifespan of the pump and improve the efficiency of the cooling system.In addition, a relief valve is attached to the tee to empty the water tank if the pressure gets too high.
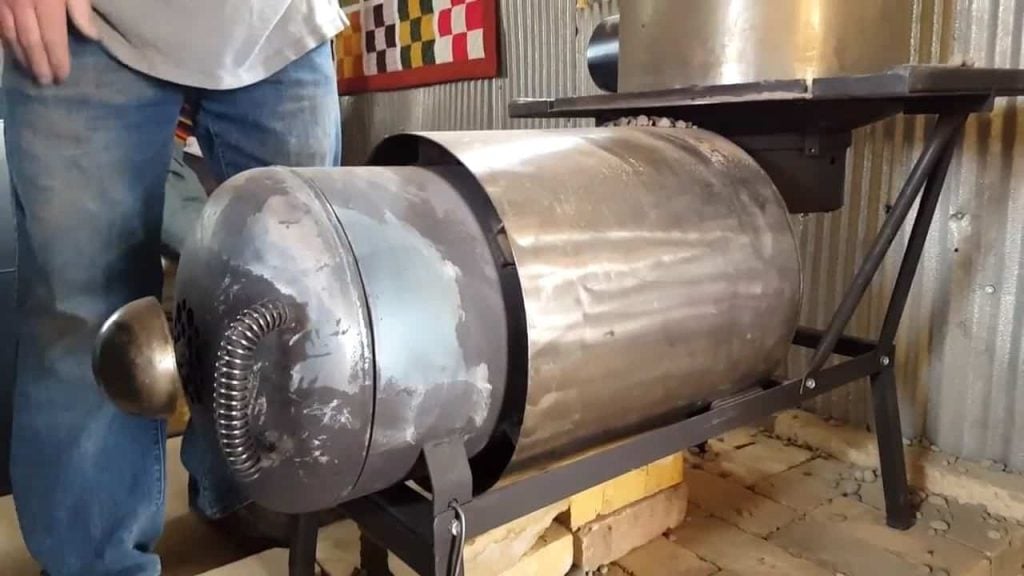
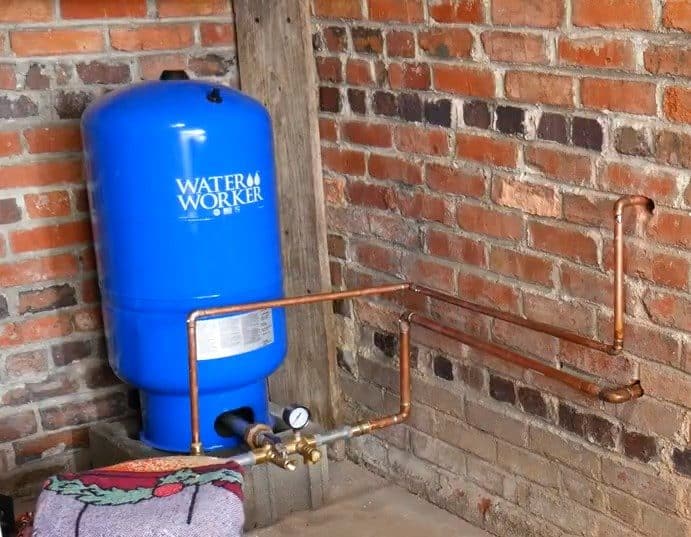
STEP 6 : CONNECTING THE HEAT EXCHANGER
The other end of the brass tee that connects to the water pressure tank is an important point where the cold water is divided into two pipes.
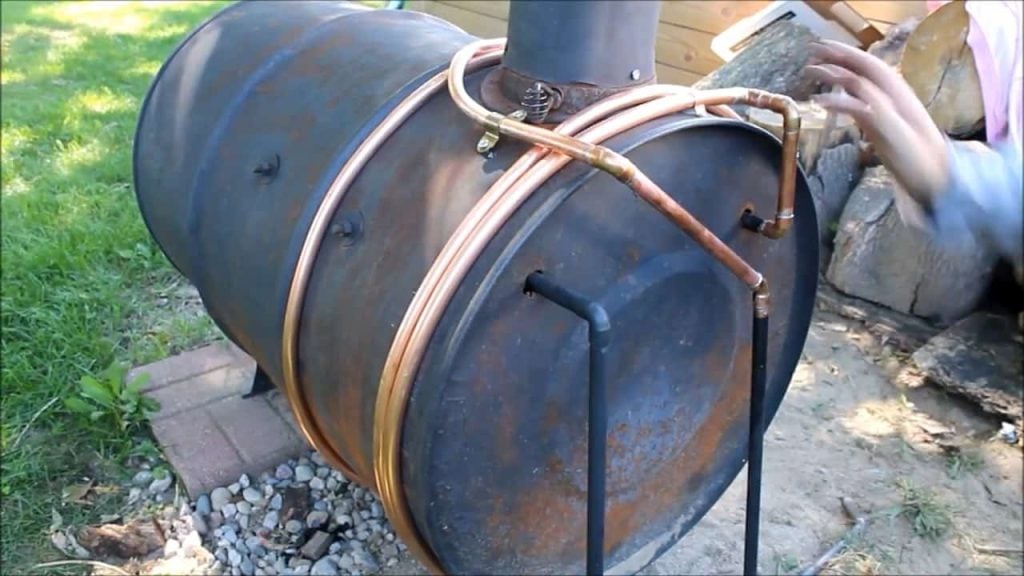
One pipe is connected to a faucet outside the garage, which provides a source of cold water for other uses, while the other pipe is connected to a radiator that acts as a finned tube heat exchanger.
The heat exchanger is the central component of the geothermal cooling system, responsible for capturing and transferring the heat from the hot air surrounding the garage to the cold water flowing through its finned coils.
The heat exchanger consists of a radiator with finned coils, which store the heat captured from the hot air. The cold water flows through the finned coils and absorbs the heat, effectively cooling the hot air inside the garage.
To facilitate the flow of water through the heat exchanger, two flexible hose pipes are used to connect the input of the heat exchanger to the water pressure tank and the output to an exhaust pipe.
This ensures that the water flows consistently through the heat exchanger, which enhances the efficiency of the cooling system.
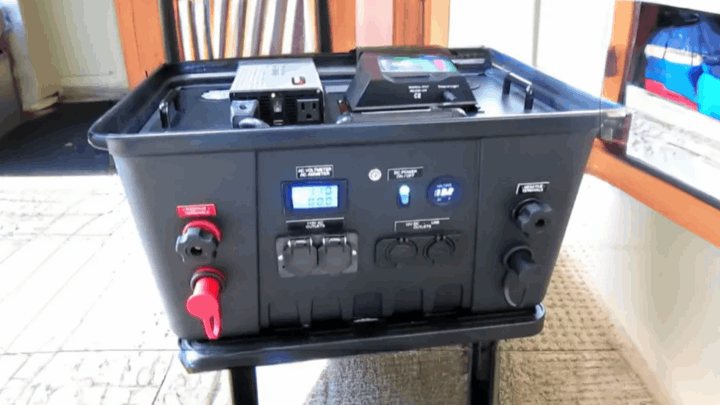
A box fan is placed in front of the radiator to blow the cool air into the garage, which creates a consistent flow of cold air. The fan can be powered by solar panels, making it a sustainable and cost-effective solution.

Once the water starts flowing through the radiator, the fan is started to blow the cool air into the garage. The fan helps to circulate the cool air throughout the garage, creating a comfortable and cool environment.
This geothermal cooling system offers a sustainable and cost-effective solution to keeping a garage cool throughout the year. With a solar-powered box fan attached to the radiator, the system operates with minimal energy consumption and is environmentally friendly.
Image Credits : Historic House DIY