In this guide, we will explore the step-by-step process of building a highly efficient, portable, and versatile wood stove from an ammo can.
This project is designed to not only provide heat to your space but also act as a cooking stove, baking oven, and a safer alternative to ground fires at camp sites.
What’s more, this ammo stove is compact and easily portable, and all its basic components are modular and can be stored inside the stove when not in use.
These components are also easily available at your local hardware store, making the project accessible to anyone interested in building their own wood stove.
STEP 1 : THE MATERIALS REQUIRED
Building a portable ammo can wood stove that is efficient and versatile requires several basic components and tools.
The first component you’ll need is an ammo box, specifically the “fat 50” variety, which can be purchased from an army surplus store for around $30.
This box will serve as the main body of the stove, providing a secure container for the wood and heating elements.
The second essential component is a titanium stove pipe that will cost approximately $100. This pipe is crucial in directing the smoke and heat from the stove out of the system, making it more efficient and safe.
To create the control dial and door of the stove, you can repurpose metal from old barbecues. This can save you money and give your stove a unique, DIY aesthetic.
You can easily find metal plates in old barbecues that can be cut to size and fashioned into the necessary components.
In addition to these essential components, you will need several tools to complete the build.
A grinder will be necessary to shape and cut the metal parts, a blow torch will be used to anneal and heat the metal, a hack saw will be used to cut the titanium stove pipe, and a drill press will be used to create holes in the ammo box for the pipe and hopper system.
One of the advantages of building a portable ammo can wood stove is its versatility in terms of fuel. Not only can you use wood logs, paper, or twigs, but the stove is also capable of running on wood pellets.
To make this possible, the stove features a gravity-fed hopper system that feeds the pellets intermittently, resulting in consistent heat over a longer period of time.
This feature makes the stove a great option for longer camping trips or as an off-grid heating solution.
To maximize the burn efficiency and reduce smoke, a divided combustion chamber is utilized. This means that the burn is forced to travel around a sealed baffle before exiting out of the stove pipe.
The baffle helps to retain more heat, while also providing a more complete burn of the wood or pellets. The result is less smoke and ash, and more heat being directed to where it is needed.
By using wood pellets instead of traditional firewood, you can reduce the amount of wood you need to carry with you, and it also makes starting and maintaining a fire much easier.
Additionally, the gravity-fed hopper system allows for a more hands-off approach to maintaining the fire, as the pellets will be automatically fed into the stove as needed.

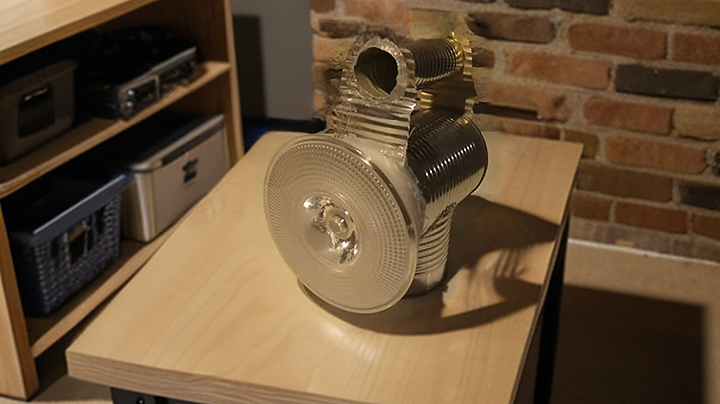
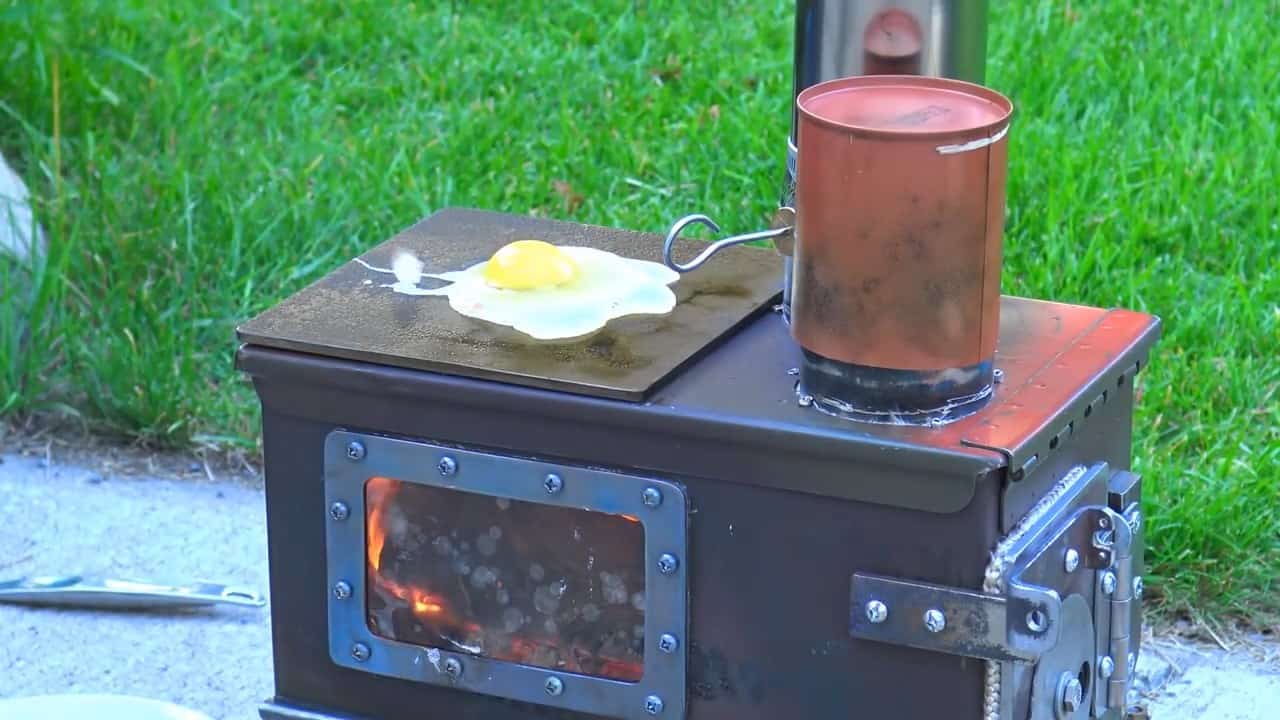
The portable ammo can wood stove is designed not only to provide heat and light but also to function as a cooking stove. For this purpose, a thick steel plate is used as a cooktop.
This steel plate is salvaged from an old barbecue and can absorb heat efficiently, making it perfect for cooking food. The plate is thick enough to prevent warping and is removable, making it easy to clean and protect the stove top.
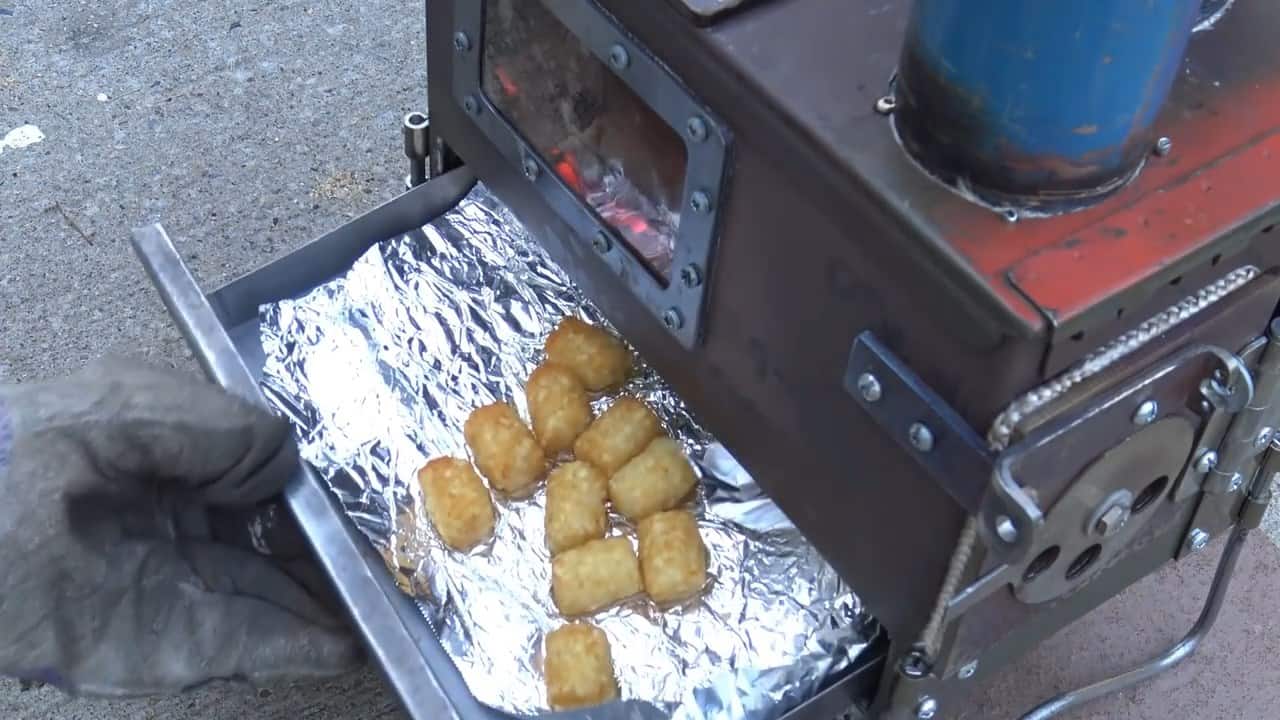
In addition to the cooktop, an innovative feature of this stove is the inclusion of a baking oven underneath the stove. This allows you to bake a variety of foods, including bread, pizza, and other baked goods.
The oven is designed to provide consistent heat to ensure that your food is cooked evenly.
The oven is located underneath the stove, which allows it to take advantage of the heat generated by the stove. The heat rises naturally, allowing it to circulate around the oven and provide an even temperature.
This means that you can bake food without having to worry about hot spots or uneven cooking.
STEP 2 : REPLACING THE RUBBER GASKET AND REMOVING HANDLES
The first step in building this portable ammo can wood stove is to remove the lid of the ammo can stove. This is a simple process, as the lid just slides off the hinges.
Once the lid is removed, the next step is to remove the rubber gasket on the backside of the lid using a plier.
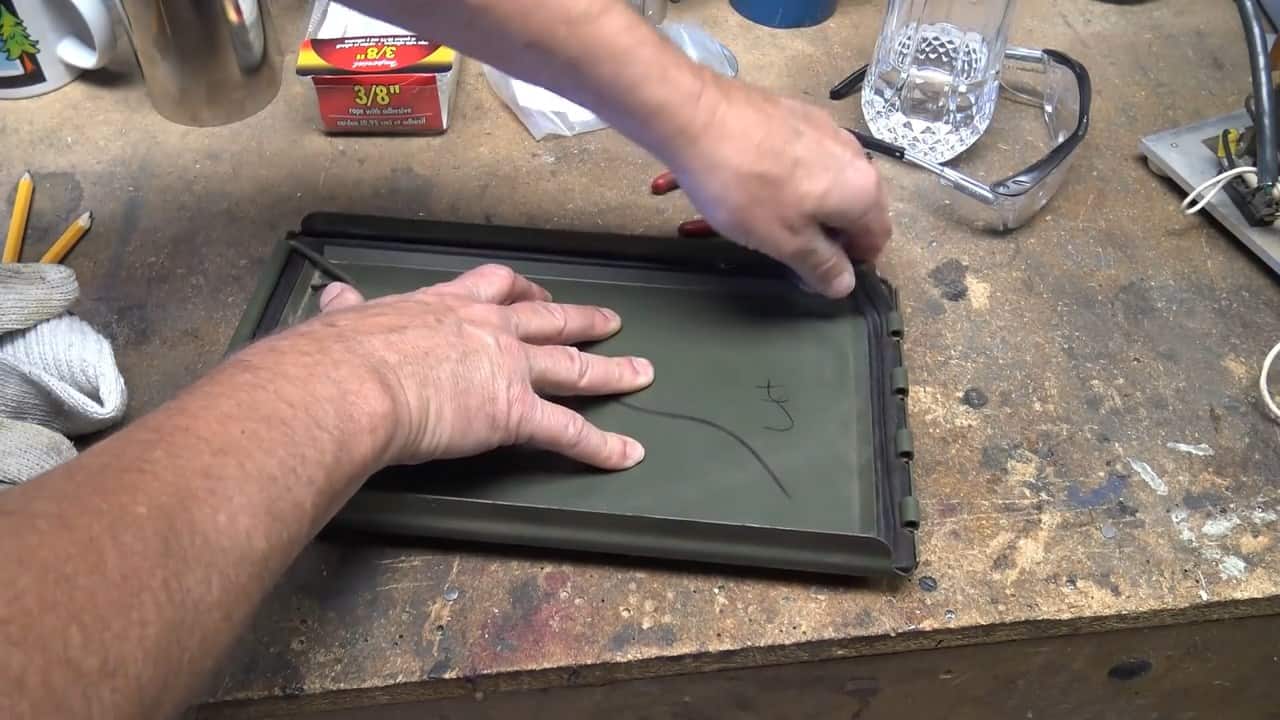
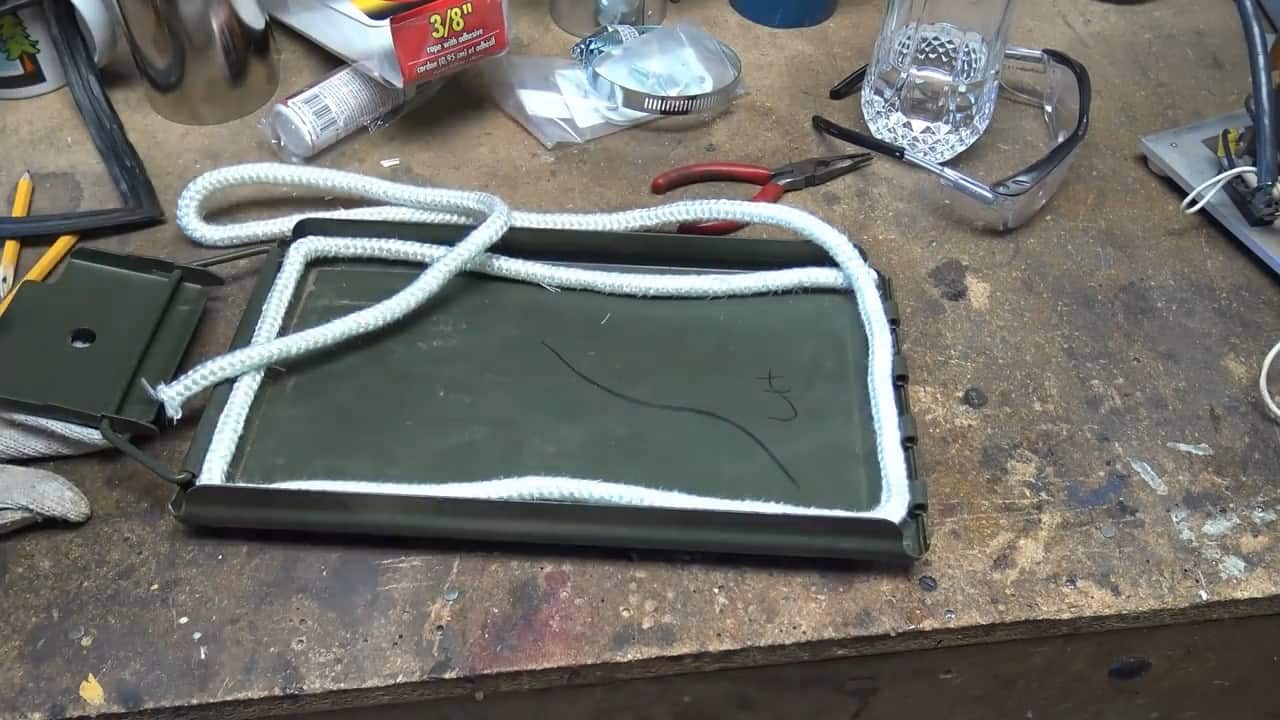
After removing the rubber gasket, the next step is to replace it with a new gasket made of 3/8th inch stove rope. This provides a heat-resistant seal that will prevent smoke from escaping the stove, ensuring that it functions efficiently.
The next step is to remove the handle on the lid. This is done by drilling along the spot welds on the sides of the handle just enough to weaken them.
Once the spot welds are weakened, the handle can be pulled off using a screwdriver.

STEP 3: INSTALLING THE STOVE PIPE
The next step in building the portable ammo can wood stove is to drill two holes of three inches each at the top surface of the stove.
These holes are needed to fit in the titanium stove pipe and for the gravity-fed hopper system.
To guide the drilling process, a three-inch propane fuel cylinder tube is used to make a pipe collar. These pipe collars will act as hopper support for the gravity-fed pellet mechanism and for securing the stove pipe.
The first hole for the pipe is made approximately five and a half inches away from the door hinge, while the second hole is made about one and a half inches away.
A jigsaw is used to cut the holes in the top surface of the stove.
After drilling the holes, the next step is to make flanges in the stovepipe collars. This is done by securing them against a wooden fixture and bending them using a hammer.
The edges are then heated with a torch to anneal the metal, making it harder and more durable.
To ensure a proper seal, it is important to remove the metal sheet inside the lid before inserting the stove collars. This can be done with a drill press or a jigsaw.
Once the metal sheet is removed, a smoke seal is created using fiberglass cloth around the collars.
The collars are then inserted into the holes drilled in the previous step. To secure the collars in place, the metal sheet is reinstated and held in place with some stainless steel rivets.
The smoke seal prevents any smoke or gases from escaping the stove, making it safe to use indoors or in enclosed spaces.
STEP 4 : DAMPER INSTALLATION
An adjustable damper is a crucial component of this wood stove as it allows for control of both the burning speed and the fire intensity.
This damper is installed inside one of the collars, and it also serves as a base for a steamer or a boiler when closed.
To make the damper, thin steel is cut out into a disc shape, which is the same size as the inside pipe diameter. Then, slots are drilled into the disc, and a shaft from a barbeque skewer is inserted to hold it in place underneath the collar.
The slots allow for the damper to be adjusted as needed to control the airflow and heat output of the stove. This feature is particularly useful for cooking, as it allows for precise temperature control.

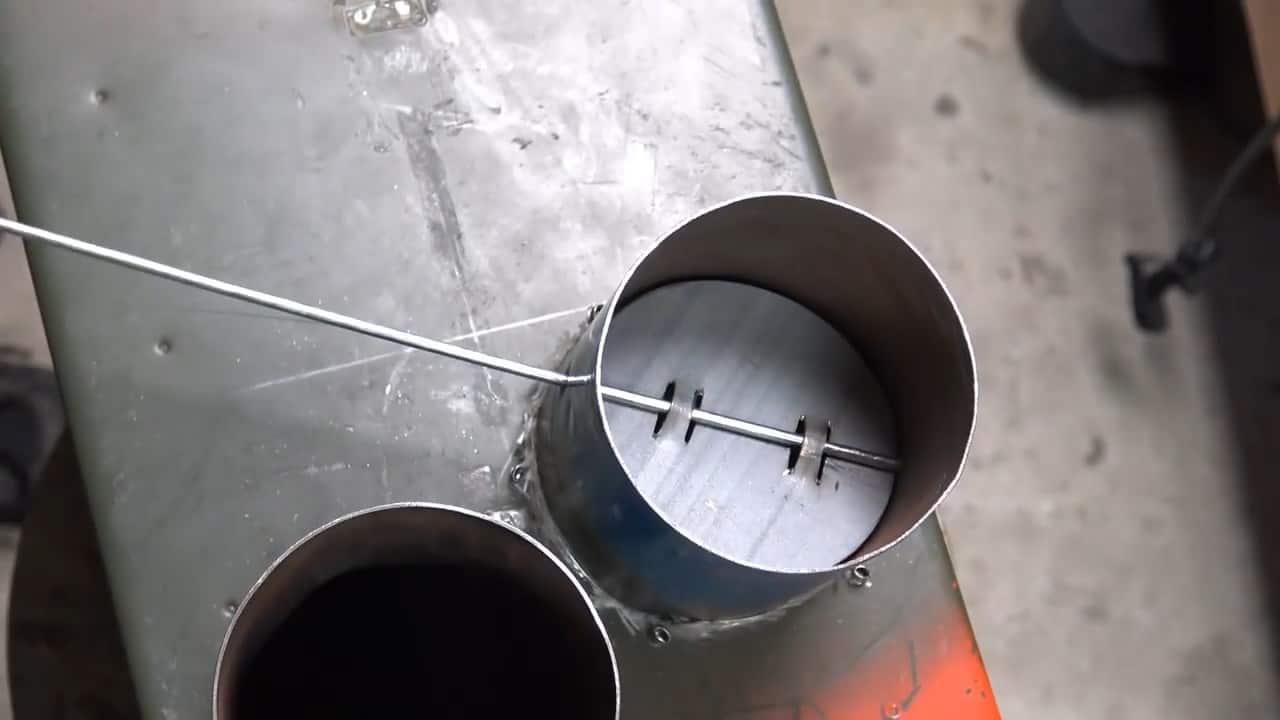
STEP 5 : DIVIDING THE COMBUSTION CHAMBER
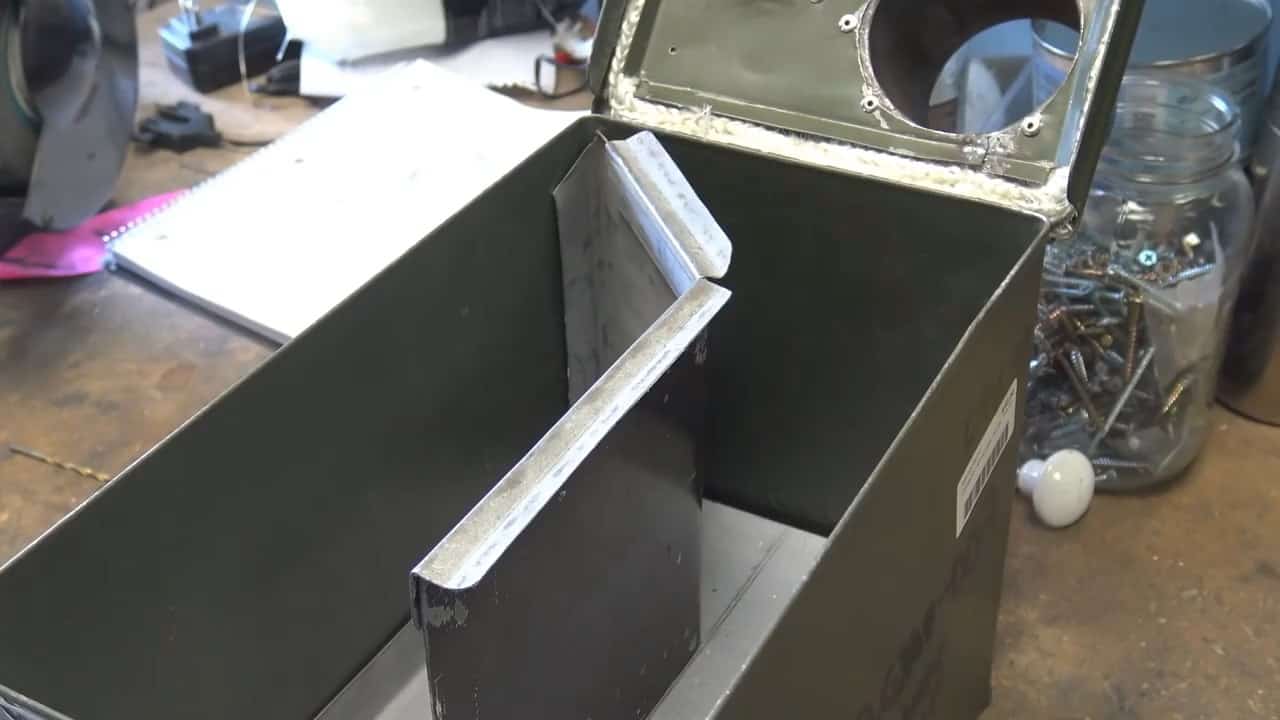
The next step involves installing two dividers inside the combustion chamber. The first one divides the combustion chamber, while the second one separates the oven from the stove.
The top divider acts as an inner wall, directing the combustion to travel around the corner before it exits through the stove pipe at the end. This design allows the stove to collect more heat while reducing the amount of smoke buildup inside.
The dividers can be made from any thin metal material that can withstand high temperatures. You can use a hacksaw to cut the dividers to size and shape, and secure them in place using screws or rivets.

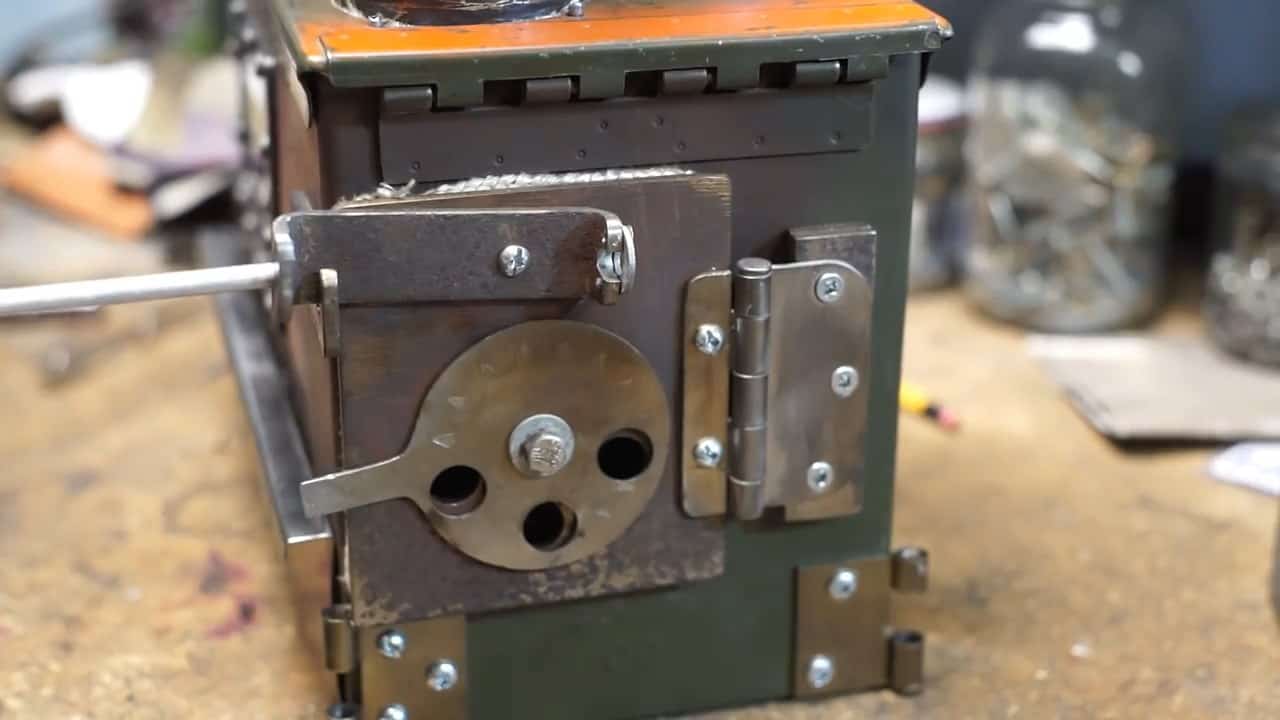
STEP 6 : INSTALLING THE SIDE DOOR
The side door is an essential component of the portable multi-purpose ammo box wood stove, and it allows for easy access to the fire and easier cleaning.
The door is made out of thick steel plate that was salvaged from an old barbeque.
The door is designed to be four inches high and three and three-eighth inches wide. To allow for proper airflow, the door has three holes for air intake, which can be adjusted using a small circle metal piece at the front.
The door is attached to the stove using a regular door hinge, which allows it to swing open and close with ease.
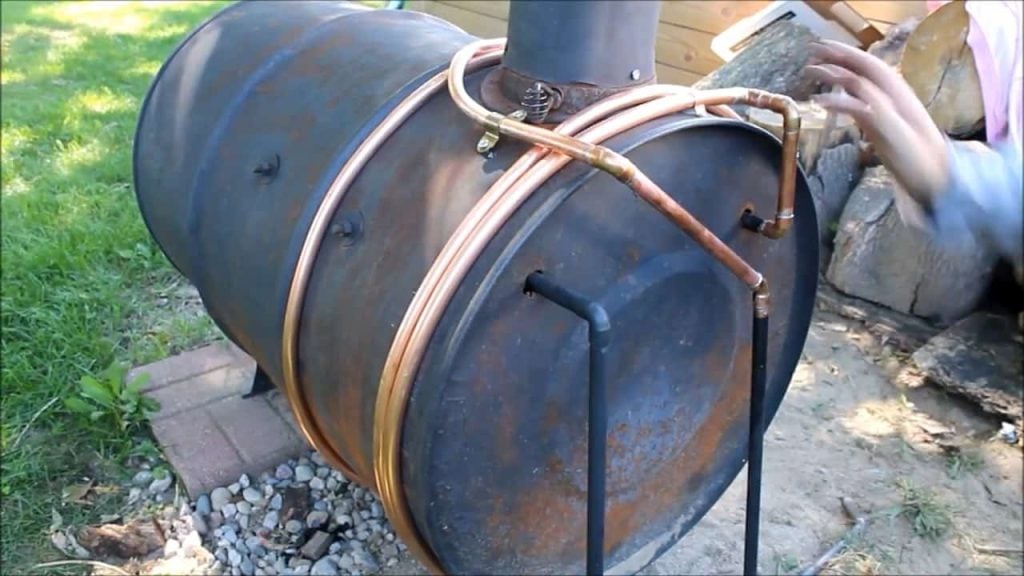
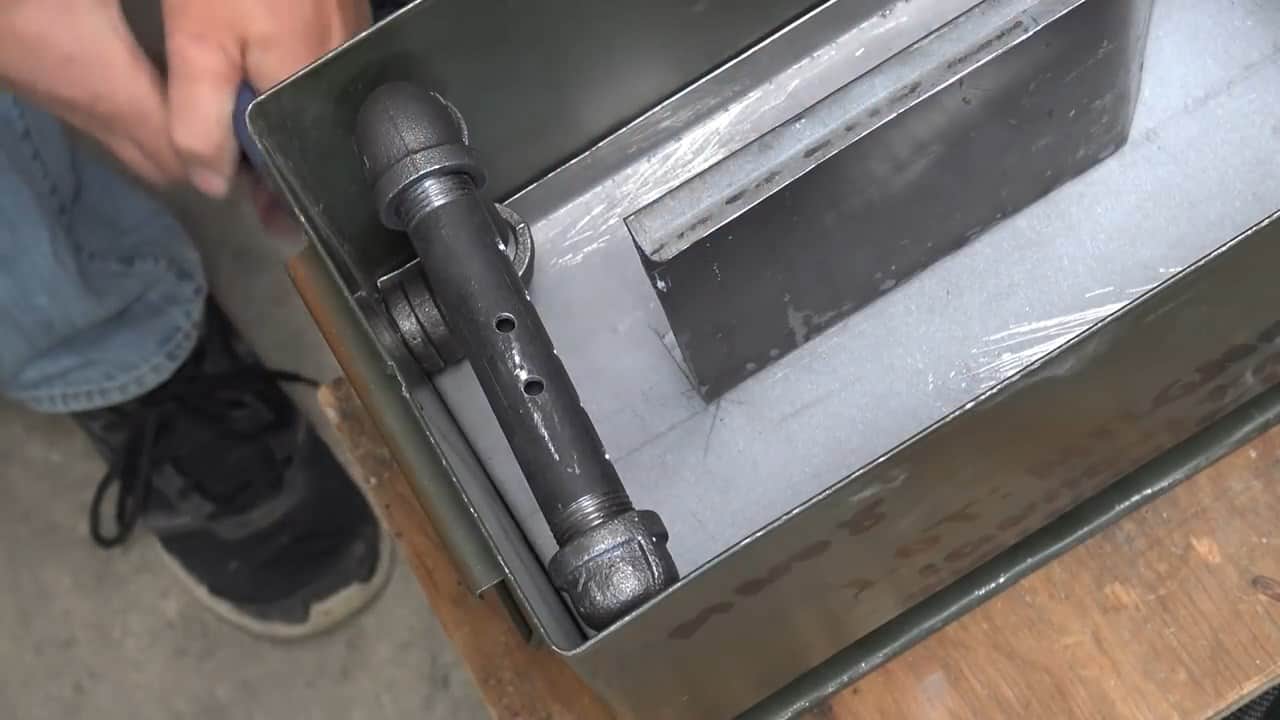
STEP 7 : SECONDARY BURN CHAMBER INSTALLATION
To improve the efficiency of the stove, a secondary burn system is installed inside the combustion chamber. This system ignites the air that comes into the upper part of the chamber where the smoke ascends.
To create this system, two half-inch black iron pipes are connected with two 90-degree elbows and an end cap.
To introduce fresh air into the combustion chamber, holes are drilled on the pipes. A hole is also made on the side of the stove for the air intake.
The pipes are then inserted into the combustion chamber and secured in place using a coupling and a spacer.
The holes drilled in the pipes allow fresh air to mix with the smoke and ignite it, resulting in a more complete burn. This results in a significant increase in the efficiency of the stove, as more of the fuel is converted into heat instead of being wasted as smoke.
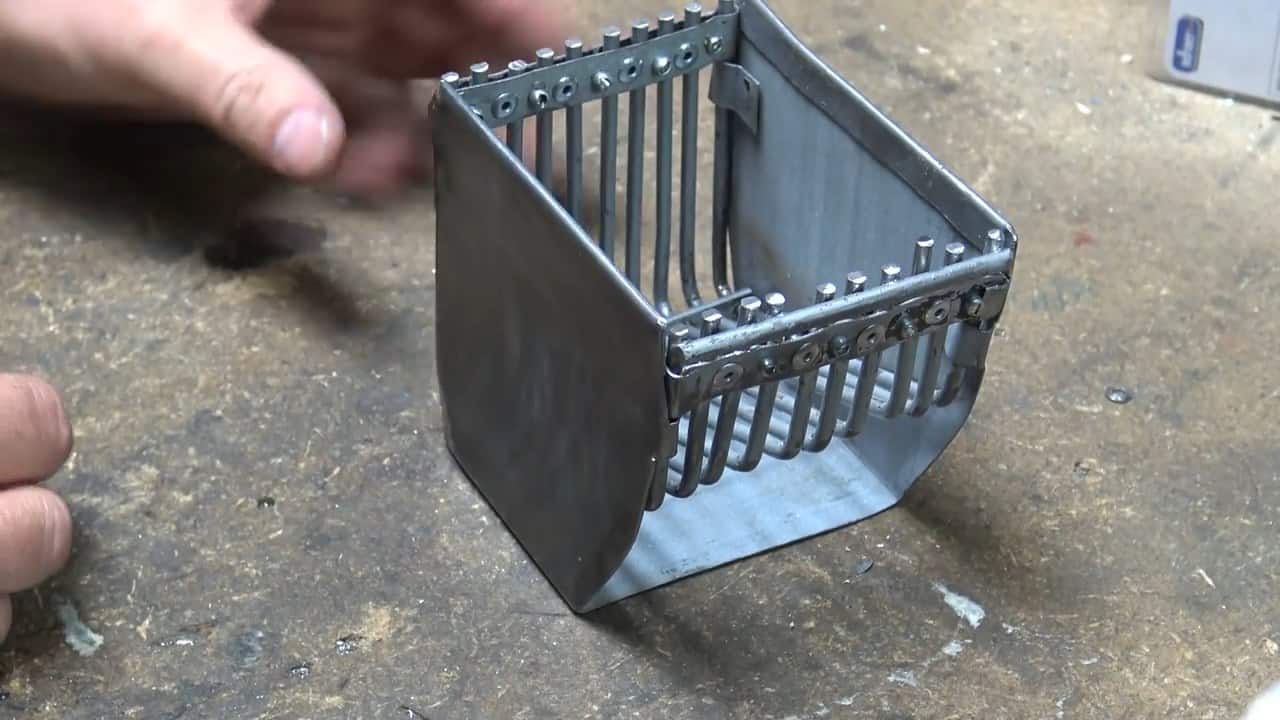
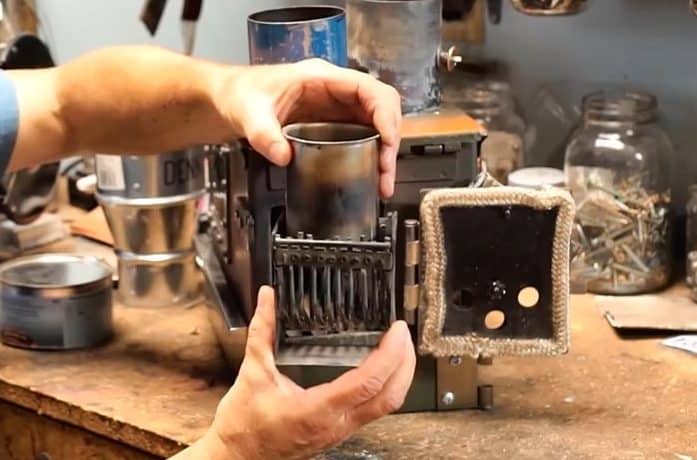
STEP 8 : GRAVITY FED HOPPER FOR SUSTAINED RELEASE
To create an efficient gravity-fed hopper system, a 3 x 4 inch duct adapter is used as a funnel inside the chamber. However, to prevent all the pellets from dropping suddenly to the bottom, a small cage is added using the metal rods from a door basket.
The metal rods are spaced 8mm apart and secured with straps across both sides using rivets. This creates a cage that holds the pellets and allows for a consistent feed into the combustion chamber.
To prevent the pellets from overflowing inside the cage, a two and a half inch tailpipe is placed at a specific distance below the hopper.
This tailpipe acts as a buffer to control the amount of pellets that enter the cage. As pellets are burned, the gravity-fed hopper system ensures that there is a sustained release of pellets at all times for a consistent burn.
With this gravity-fed hopper system, the stove can burn not only wood logs, paper, or twigs but also wood pellets. The intermittent feeding of pellets allows for a longer burn time while providing consistent heat.
STEP 9 : ADDING LIGHT SOURCE
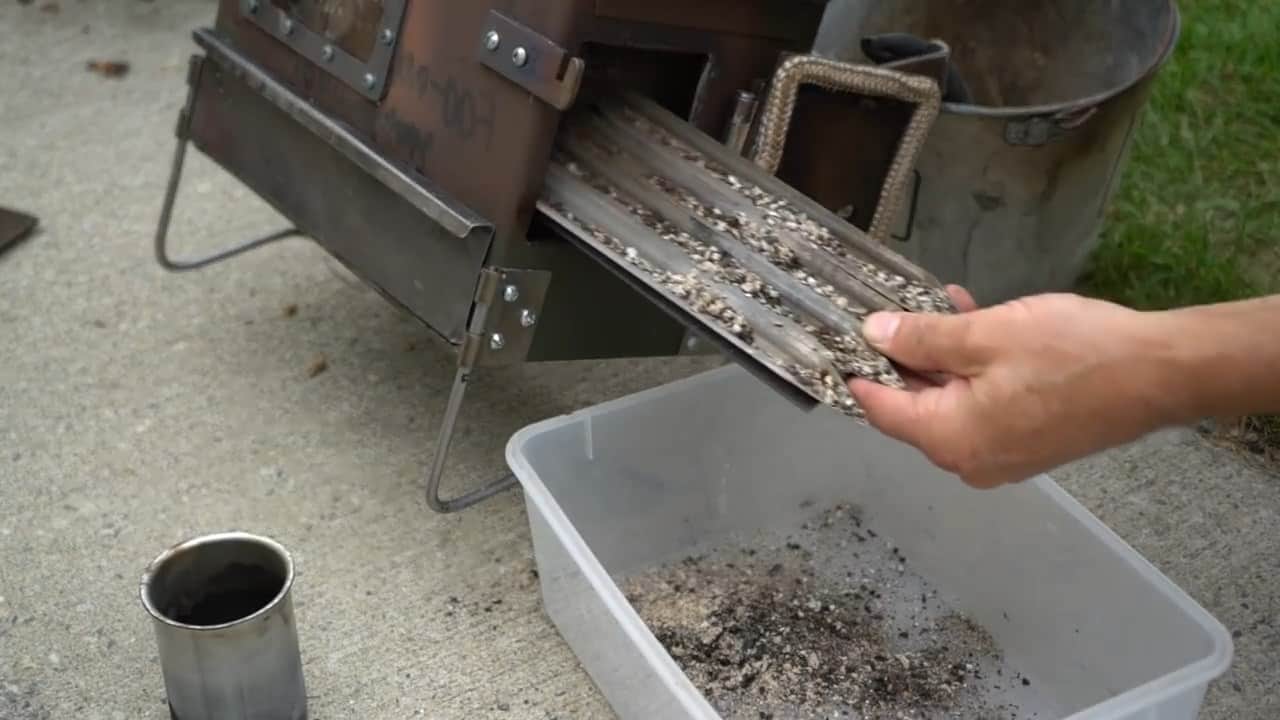
To prevent the bottom of the stove from burning out and improve airflow, stainless steel tent stakes are used and placed at the bottom of the stove.
These tent stakes are then riveted to a metal plate that is placed at the bottom of the stove.
The tent stakes serve as legs that elevate the stove from the ground, allowing for better airflow and preventing the bottom from coming in direct contact with the ground.
The metal plate also acts as an ash collector, making it easier to clean the stove.
To use the stove as a light source, a small window made of half-millimeter natural mica glass is added. This not only adds a nice touch but also allows you to see inside the stove without opening the door.
To install the window, fiberglass cloth is used to form a seal around the window. The cloth is wrapped tightly around the perimeter of the opening to create a tight seal. Once the seal is formed, the mica glass is carefully positioned in place.
To ensure the mica glass can expand and contract with changes in temperature, spacers made of metal strips are added around the edge. These spacers keep the mica glass from coming into direct contact with the metal frame.
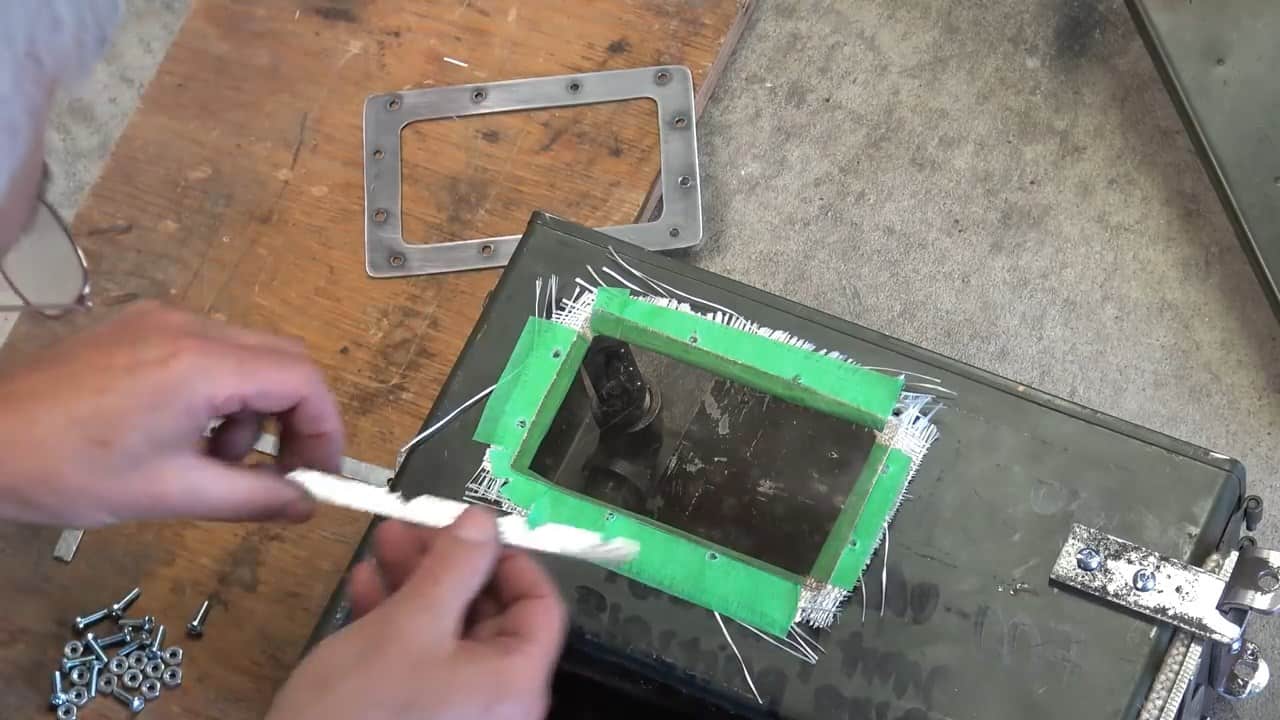
Finally, a metal frame is used to hold everything in place. This frame is secured with bolts and nuts to keep the mica glass in place and to prevent it from shifting or falling out during use.
Once everything is secure, the frame is attached to the stove using metal rivets or screws.

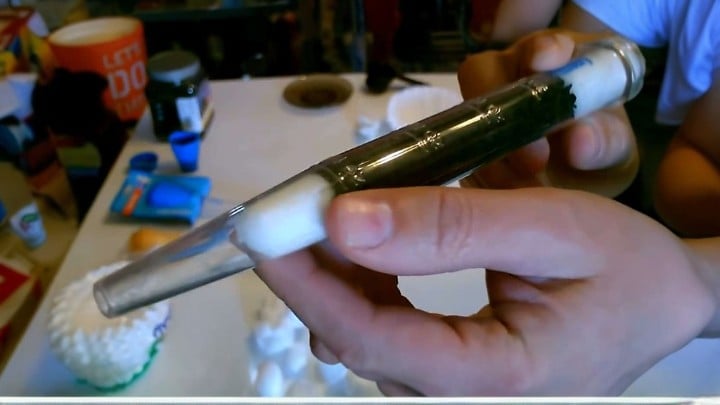
To create the portable stove pipe, titanium rolls are used due to their corrosion resistance and efficient heat distribution properties.
The first step is to unroll the titanium foil across a flat surface, ensuring that it is smooth and free from any dents or creases.
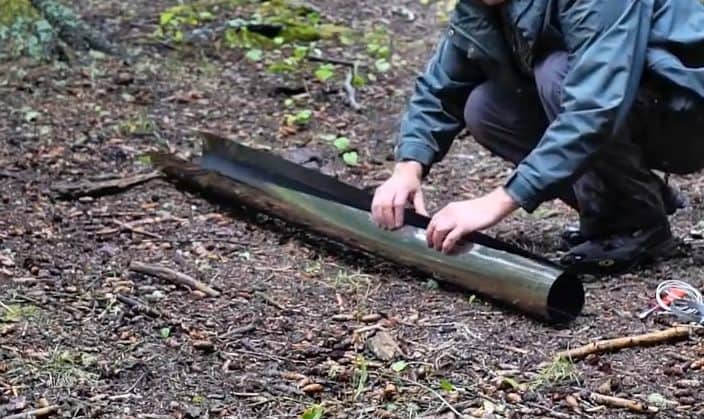
Next, the foil is carefully rolled into a cylinder shape, ensuring that it is not dented or crimped during the process. This can be achieved by rolling the foil slowly and carefully, and using clips to hold the edges of the foil in place as it is rolled.
It is important to space the clips evenly along the length of the pipe to ensure that the cylinder is of uniform size and shape. This can be done by measuring and marking the location of each clip before attaching them to the foil.
In conclusion, building your own portable ammo can wood stove is an efficient and cost-effective way to keep yourself warm, cook food, bake, and have an alternative to ground fires while camping.
With basic components easily available at your local hardware store and some basic tools, you can build a stove that is compact, portable, and easy to store.
Image Credits : Slim Potatohead