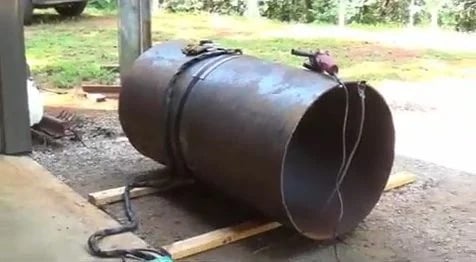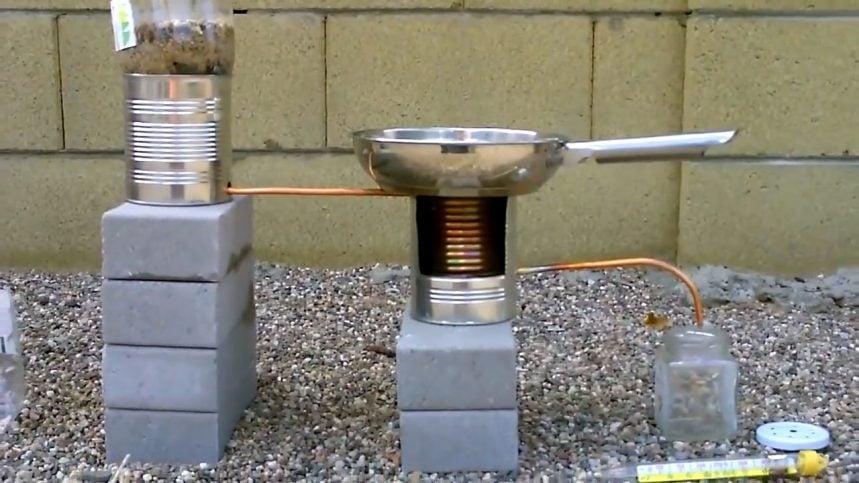
In this instructional guide, we present a comprehensive and detailed process for constructing a highly efficient, clean-burning, multi-purpose rocket stove utilizing an old NATO ammo can.
This small, portable, and smokeless stove is designed with a secondary burn system, which is the key feature that enables it to produce no smoke.
Additionally, this versatile stove can be used not only for heating purposes but also as a cooking stove, making it an excellent addition to any outdoor or survival gear.
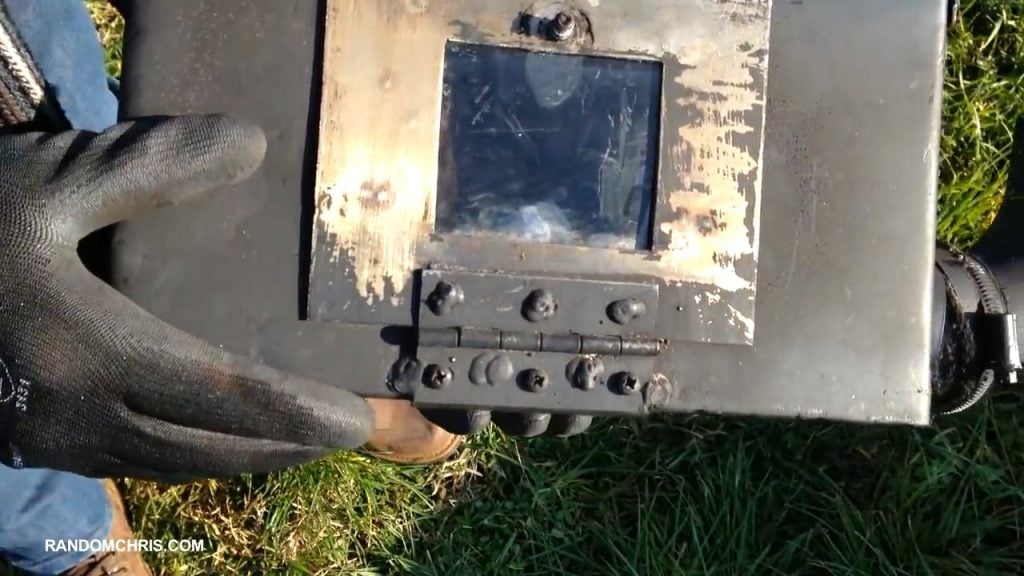
STEP 1 : REPLACING THE RUBBER SEAL
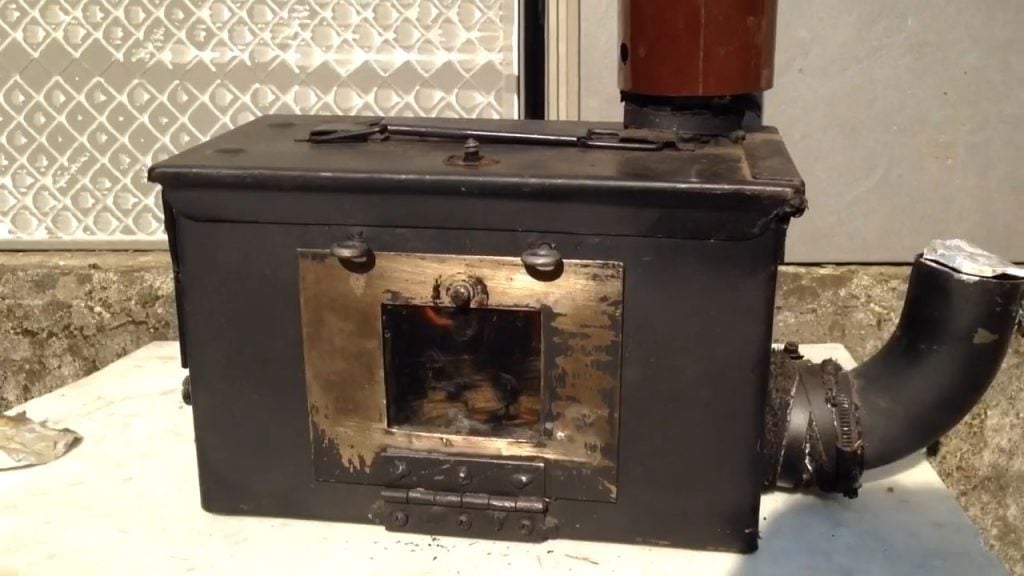
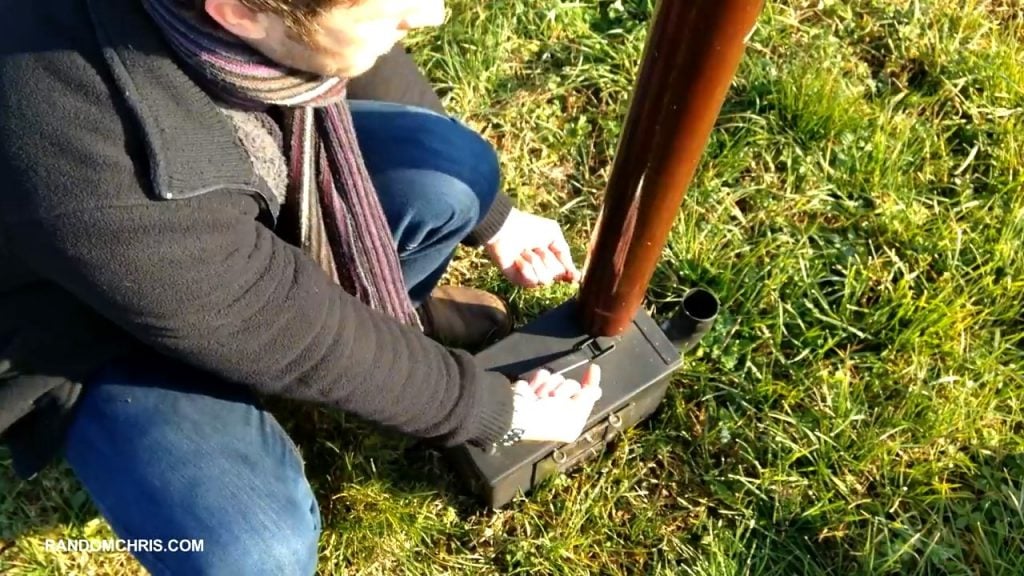
To start constructing this efficient rocket stove, the primary requirement is an old NATO ammo can. The initial step involves removing the rubber seal that is present around the top of the can and replacing it with a stove rope.
The stove rope’s function is crucial as it compresses when the stove is closed, creating a smoke-tight seal that prevents any smoke from escaping.
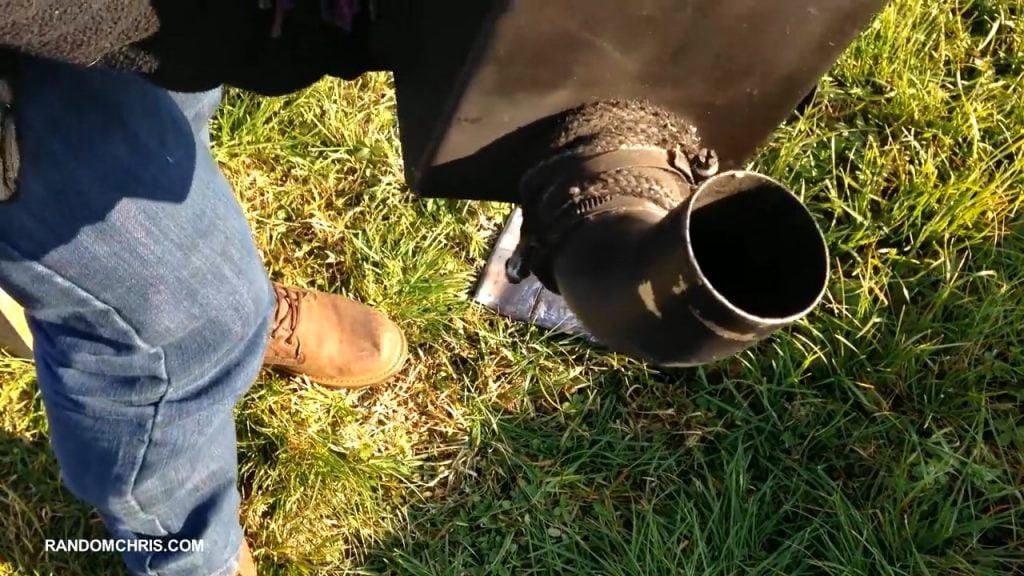
STEP 2 : MAKING A HOLE FOR THE FLUE PIPE
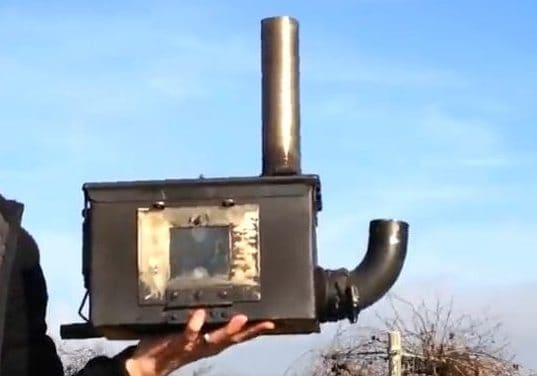
The rocket stove’s flue is located on the top and is constructed using a 2-inch stainless steel pipe that has two distinct sections, with the upper section sliding onto the lower section.
To build the flue, we begin by taking the top of the ammo can and placing the pipe on top, drawing around it to create the circumference required for the flue.
Next, we use a grinder to cut across the shape we have drawn. This process allows us to create the necessary space for the flue, which plays a crucial role in facilitating the smooth flow of air and smoke through the stove.

Achieving a smoke-tight seal around the flue area is essential to ensure the rocket stove operates efficiently and safely.
To achieve this, we wrap some stove rope around the flue area that we have cut, and then we insert the pipe, using a jubilee clip around the bottom of the stove.
The stove rope is then compressed against the pipe and the inside of the ammo can to create a tight seal. This ensures that no smoke can escape from the stove, and all the smoke and fumes are safely channeled out through the flue.
As the rocket stove heats up and reaches its working temperature, it begins to function by drawing in cold air from below and expelling it out at the top.
This is an essential aspect of the stove’s design, as it creates an upward flow of air that effectively draws all the smoke from the stove upward and out through the flue.
STEP 3 : STOVE DOOR MECHANISM
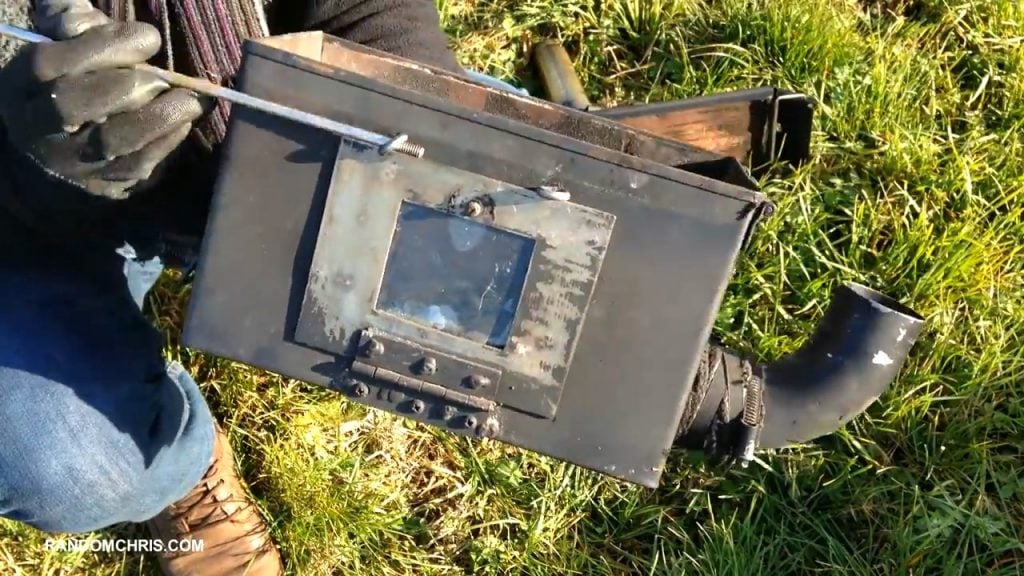
The rocket stove door closing mechanism is a crucial component of the stove’s overall design, and we employ two turnbuckles to ensure its proper operation.
The door features two closing mechanisms, with the first being a quarter-turn latch. This mechanism enables the user to rotate the latch to open the door, close it, and then rotate it again to lock the door securely in place.
The second closing mechanism uses a long piece of metal that can be turned a quarter turn to lock the door tightly and fit the turnbuckles securely.
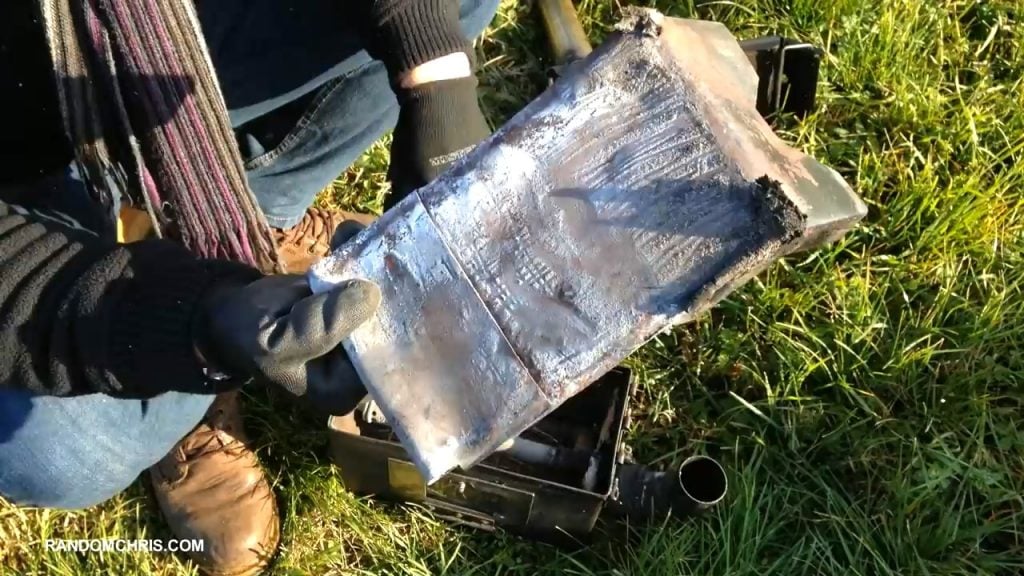
STEP 4 : BAFFLE PLATE FOR MORE HEAT
The stove baffle plate is constructed using 0.8mm thick thin steel, and its role is to assist in generating more heat by directing the flow of gases from the fire through a narrow opening.
To make the baffle, we measure it against the stove and bend the steel into the appropriate shape. By keeping the air from escaping the burn chamber, the baffle plate promotes more efficient combustion and ensures that all the fuel inside the stove is burnt completely and cleanly.
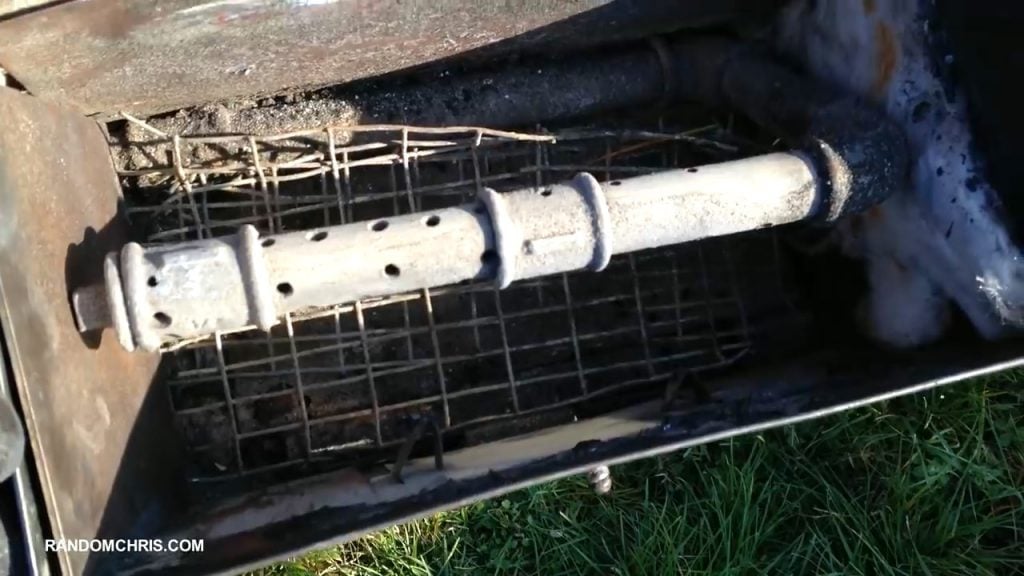
STEP 5 : ADDING A SECONDARY PIPE
The rocket stove includes a secondary pipe that is made of galvanized steel and enters the stove from the back, passing across the stove through a small hole.
The pipe is drilled with small holes and plays a critical role in facilitating the stove’s efficient operation.
As the stove is in operation, the pipe draws in cold air from outside, which is pre-heated on its way down across the burn chamber.
The pre-heated air then rises and is expelled naturally through the small holes in the pipe. This process helps to sustain the stove’s combustion, providing a continuous supply of oxygen and allowing the fuel to burn cleanly and completely.

The placement of the secondary pipe just under the baffle plate is a key aspect of the rocket stove’s design, enabling it to function with optimal efficiency.
As the pre-heated air rises and is expelled through the small holes in the pipe, it reignites any smoke that may be present, ensuring that it is burnt completely on its way across the upper section of the stove

STEP 6 : INSULATING THE STOVE
The insulation of the rocket stove plays a critical role in achieving optimal efficiency. To accomplish this, we use fiberglass and stainless steel to insulate three sides of the stove.
The insulation is strategically placed to promote a more efficient secondary burn, which enables the stove to operate with maximum effectiveness.
It is important to note that only enough insulation is required to reach the necessary temperature for a secondary burn.
If we over-insulate the stove, the heat would dissipate through the flue, resulting in less efficient operation.
Therefore, we carefully place the insulation to balance the stove’s need for heat retention with the need to direct that heat towards the cooking surface.
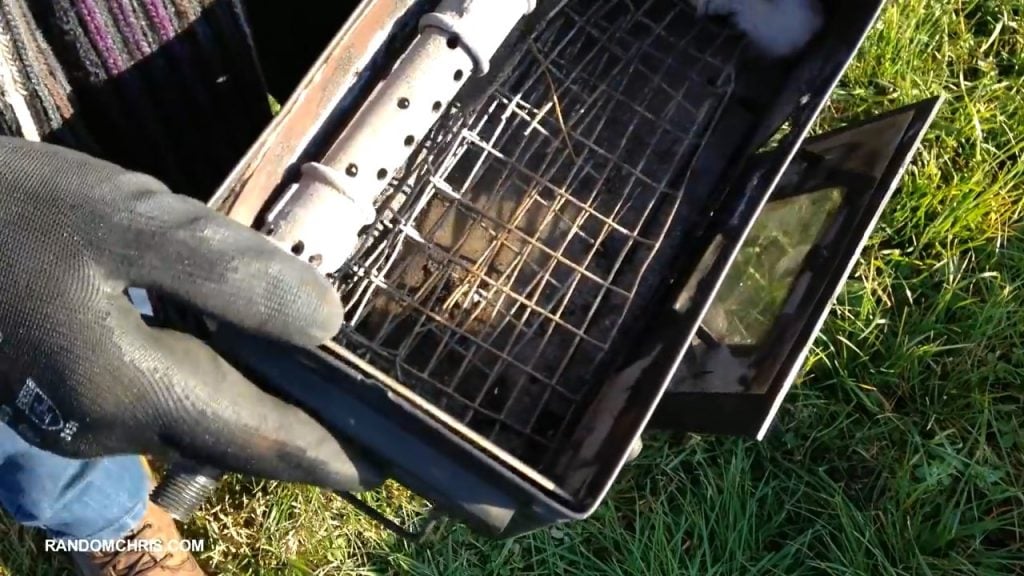
The bottom of the stove is insulated using half-inch Rockwool and on top, we have some chicken wire that stops the burning fuel from sitting on the bottom of the stove and being starved of oxygen.
It allows the oxygen to get underneath and burn all the way around the wood efficiently.
The primary air is drawn in through an air intake at the side of the stove. To attach it to the stove, bend the pipe around the side and place a jubilee clip and stove rope around to insulate it.
So when the stove is in operation, you can add sticks, twigs, pellets or anything you want without opening the door.
Image Credits : Christopher Barr – Random Chris