In this project, we’re using equal parts of sand and plaster to make a simple backyard foundry that’s powerful enough to melt scrap metal in seconds.
With this homemade furnace, we have the power to liquefy aluminum in the backyard and cast just about any object we can think of.
STEP 1 : THE MATERIALS NEEDED
To create the backyard foundry, you will require a big bag of play sand and plaster of Paris. These materials are widely available at your local hardware store, and the total cost should be under $20.
Play sand is the preferred option due to its fine texture and ability to withstand high temperatures.
Plaster of Paris is a versatile material commonly used in art and construction due to its hardening properties when mixed with water.
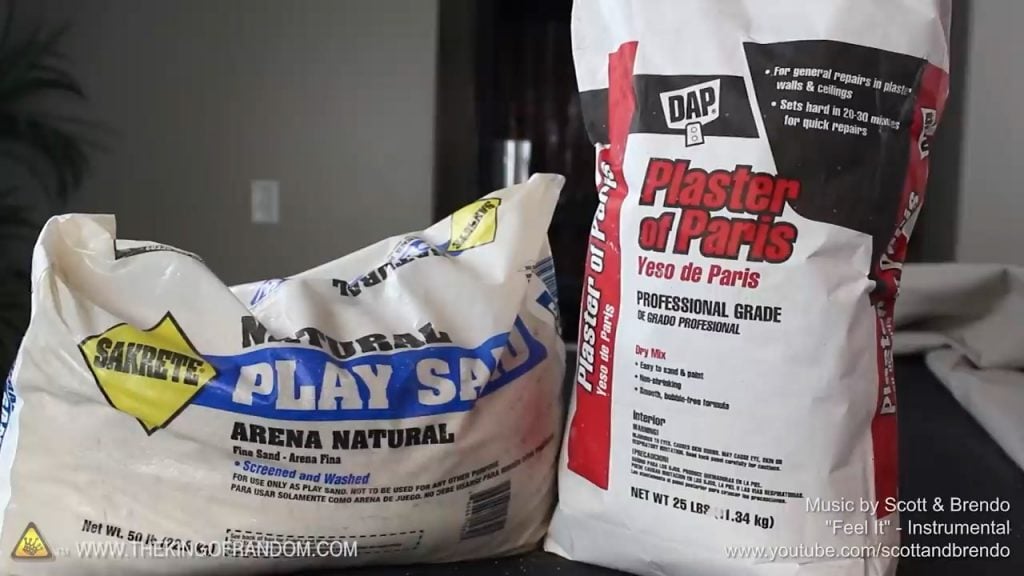
In addition to the play sand and plaster of Paris, you will also require a 10-quart steel bucket and a tablecloth.
The steel bucket will serve as the base for the foundry, and its size is perfect for holding the necessary amount of sand and plaster.
It is essential to choose a bucket made of steel, as plastic or other materials may melt due to the high temperatures involved in the melting process.

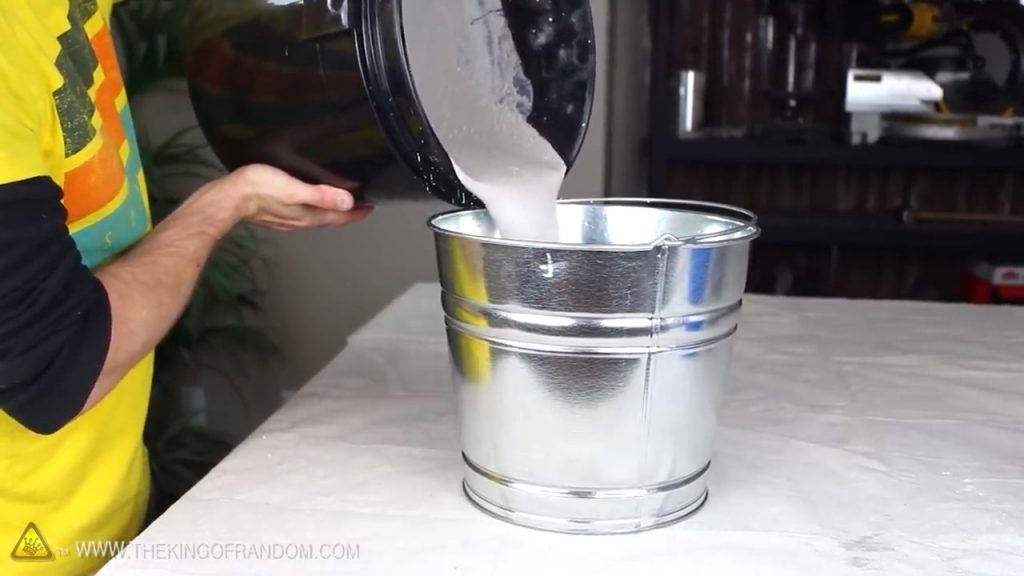
To create the refractory lining for the foundry, you will require specific quantities of plaster of Paris, sand, and water.
For this purpose, you need one and one-third buckets of plaster of Paris, which is equivalent to 21 cups.
Additionally, you will need one and three-quarters buckets of sand, which is also equivalent to 21 cups.
Finally, one and one-fourth buckets of water, equivalent to 15 cups, are necessary to complete the mixture.

STEP 2 : MIX EVERYTHING TOGETHER
After collecting all the necessary materials, you must mix them thoroughly to create the refractory lining for your foundry. It is crucial to ensure that all the dry powder is wet to achieve the proper consistency.
Therefore, take the sand and plaster of Paris mixture and add the required amount of water gradually while stirring continuously.
The mixture should be stirred for a couple of minutes until it becomes fairly runny and all the same color.
STEP 3 : TRANSFER THE MIX
Once you have achieved the proper consistency of the refractory lining mixture, transfer it to the steel bucket up to 3 inches from the top.
This transfer should be done promptly to ensure the mixture does not harden before reaching the bucket.
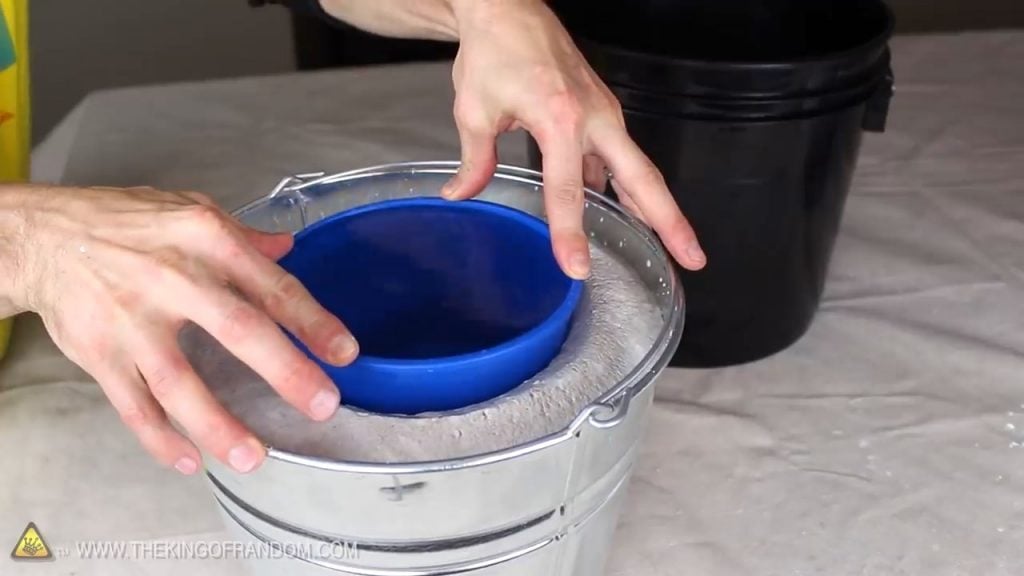
The steel bucket serves as the foundation of the foundry and will contain the sand and plaster mixture. Next, use a plastic measuring bucket to form the center of the foundry.
The measuring bucket should be placed at the center of the steel bucket and pressed into the mixture to create a hollow space in the center of the foundry.
This space will serve as the crucible for melting the metal. Allow the mixture to dry for about three minutes, during which time it will begin to harden and take shape.
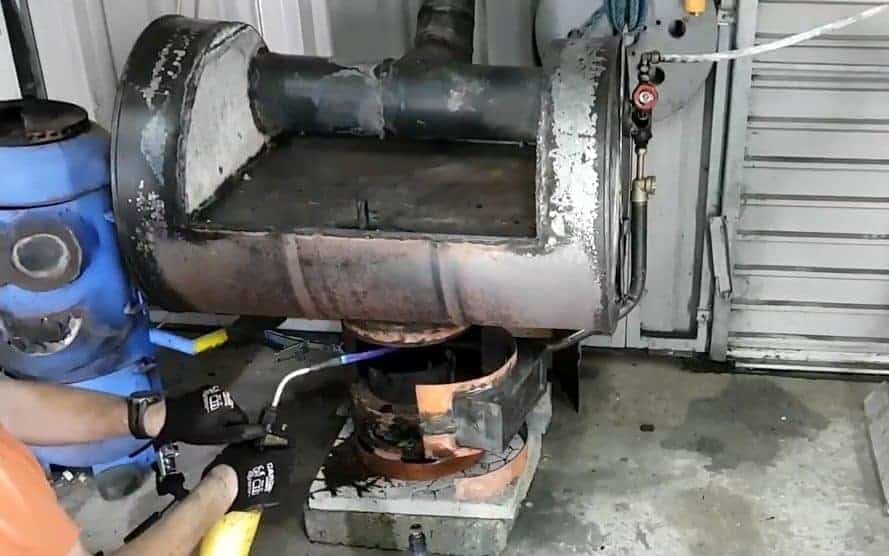
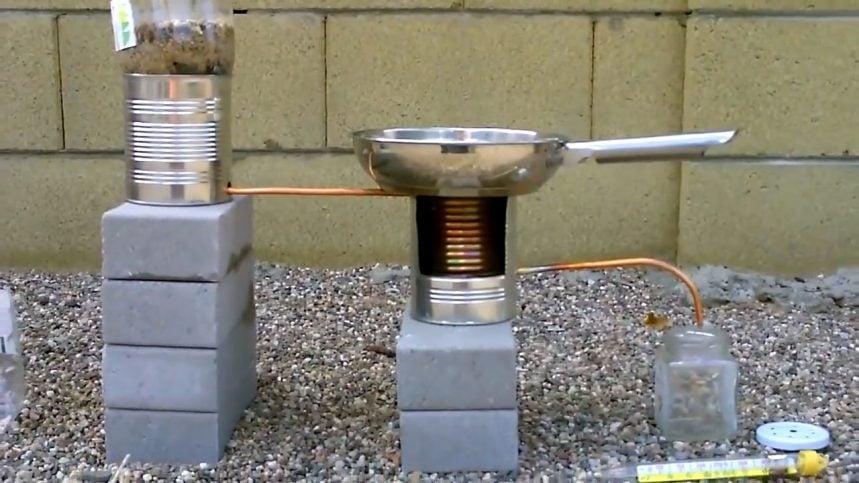
STEP 4 : MAKING A CUSTOM CRUCIBLE
The next step is to create a custom crucible. This can be done by repurposing an old steel fire extinguisher.
However, it is essential to ensure that the extinguisher has been depressurized to prevent any mishaps during the process.
To depressurize the tank, turn the extinguisher upside down and press the nozzle to release any remaining pressure.
Once depressurized, you can unscrew the valve from the top of the extinguisher, making it safe and easy to cut the extinguisher in half with a hacksaw.
The half that will serve as the crucible should be the bottom half of the extinguisher.

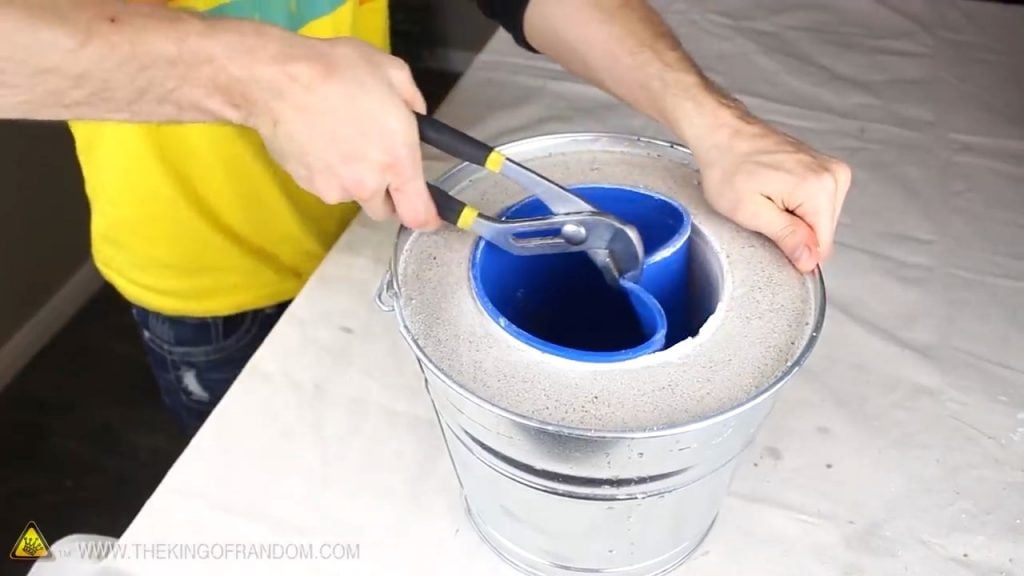
At this point , the plaster should have set, and it is time to remove the bucket from the refractory lining. Start by dumping any water remaining in the bucket, which will make it easier to remove.
Then, use a pair of channel locks to grip the bucket firmly and pull it out of the refractory lining.
Once the bucket is removed, you will have created a perfect mold for the custom crucible made from the steel fire extinguisher.
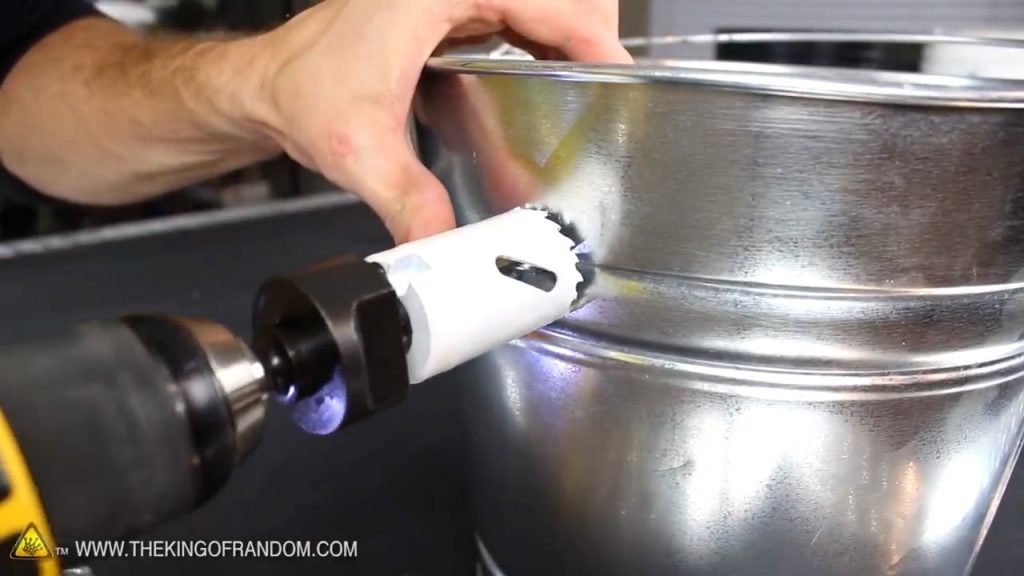
STEP 5 : ADDING AN AIR SUPPLY PORT
The next step in the construction of the mini metal foundry is to create an air supply port. This will help in controlling the temperature and maintaining proper combustion in the foundry.
To make the air supply port, use a 3/8 inch hole saw and a metal cutting blade to cut a hole in the side of the foundry.
The size of the hole should be sufficient to accommodate a one-inch steel blower tube. After cutting the hole, carefully clean and smooth the edges to ensure that the blower tube fits snugly into the hole.
STEP 5 : INSTALLING THE BLOWER TUBE
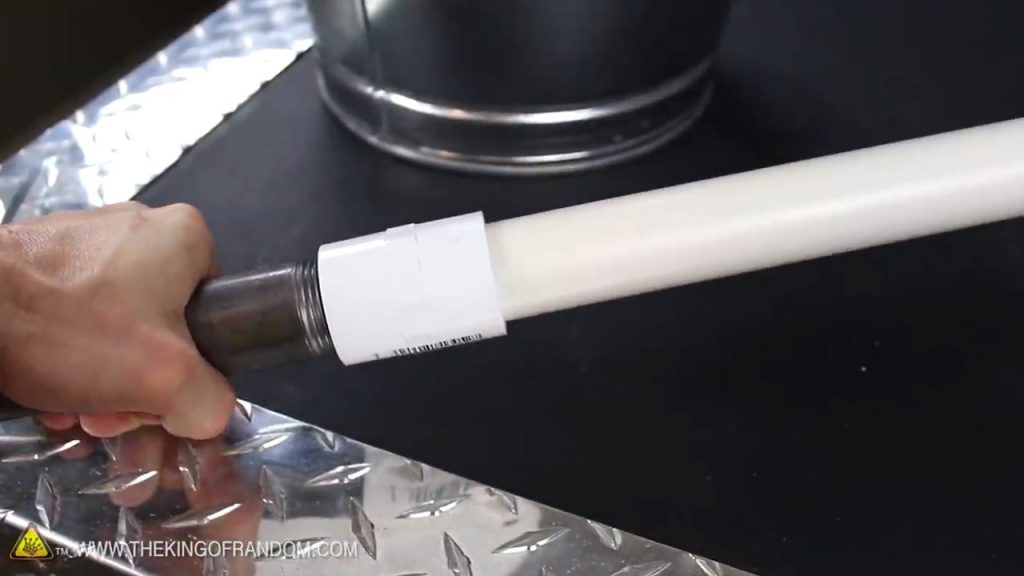
To create the blower tube, you will need a one-inch steel pipe, a one-inch PVC coupling, and a one-inch PVC pipe. Begin by screwing the threaded half of the coupling onto the steel pipe.
The threads should be securely tightened to avoid any leaks. On the other end of the coupling, attach the slip adapter, which can easily slide onto the PVC pipe.
STEP 6 : BUIDLING A LID
The next step is to construct a lid that will retain the heat and maintain the high temperature required for melting the metal. To make the lid, you will need a couple of 4-inch U bolts.
Begin by filling a 5-quart bucket with insulating mix, which could consist of sand, perlite, or vermiculite. Make sure the insulating mix is firmly packed in the bucket.
Next, insert the U bolts into the insulating mix, ensuring that they stand upright. The U bolts should be positioned in such a way that they align with the air supply port in the foundry.
Once the U bolts are firmly in place, they will provide a support structure for the lid. The insulating mix will help to retain the heat and prevent any heat loss from the foundry.

To ensure safe and efficient operation of the mini metal foundry, it is essential to create a vent hole in the lid. This can be accomplished by using a 3-inch hole cutting saw to cut a hole in the center of the lid.
The vent hole allows for the release of any pressure that may build up in the foundry during operation.

In addition to its primary use of melting soda cans, the mini metal foundry can also be repurposed as a blacksmithing forge or a barbecue for summertime grilling.
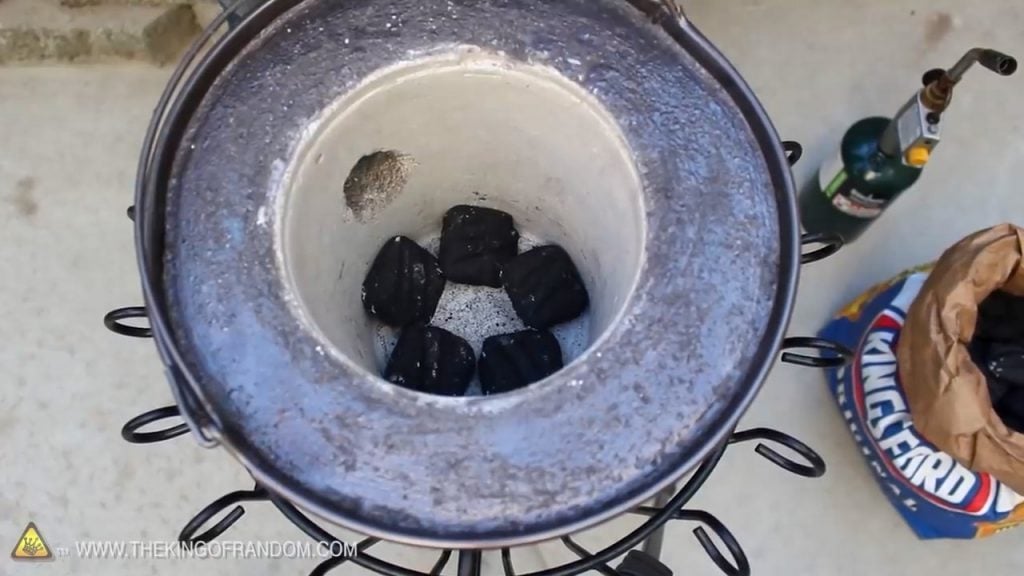
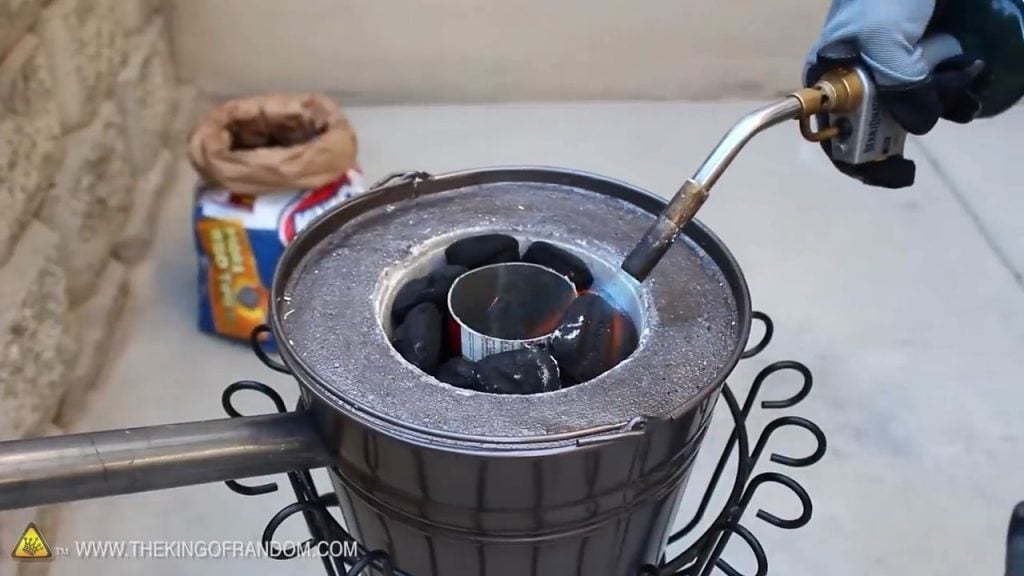
Before melting the scrap metal in the mini metal foundry, it is important to prepare the crucible. To do this, evenly place 5 charcoal briquettes at the bottom of the crucible, which is made out of a steel fire extinguisher.
The briquettes serve as a fuel source that will help to generate heat and smelt the metal quickly once the foundry is fired up.
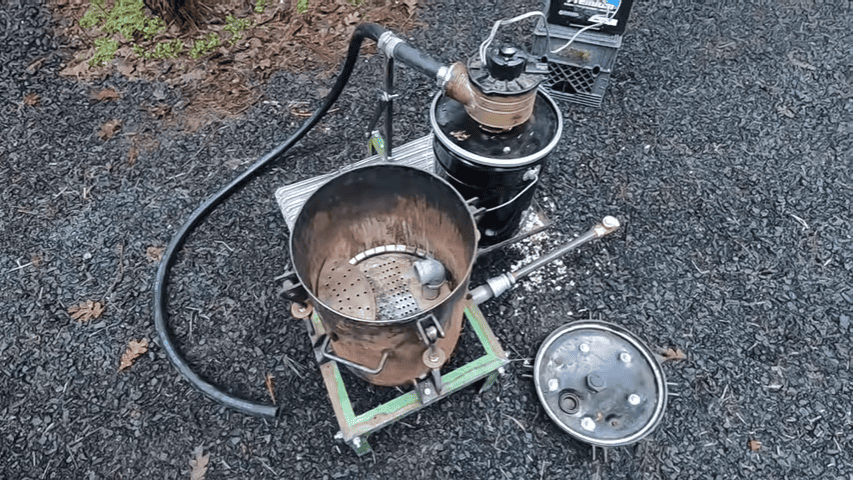
STEP 7 : ADDING A HAIR DRYER BLOWER
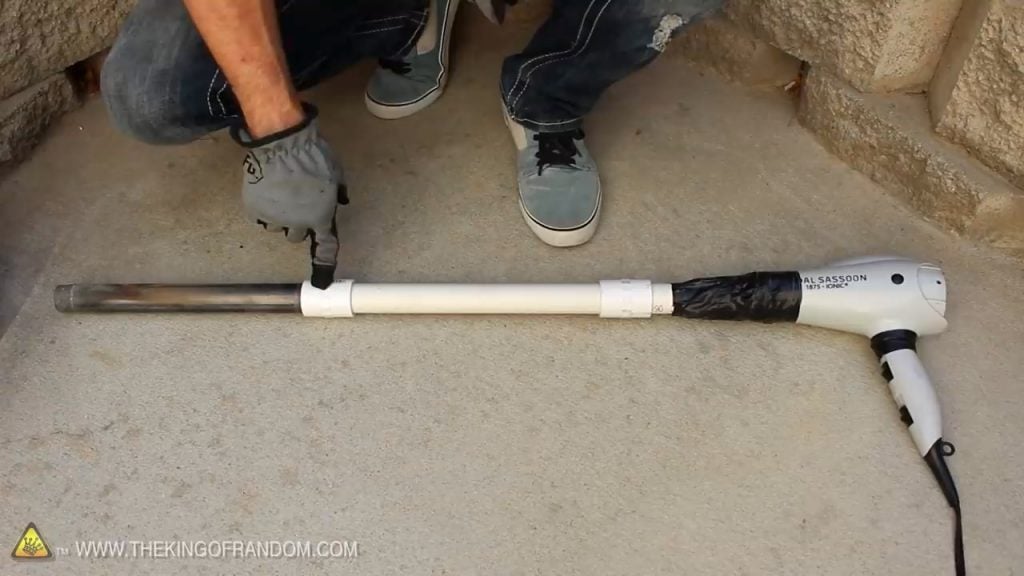
To provide the necessary airflow to the mini metal foundry, a hairdryer can be attached to a PVC pipe. First, the hairdryer is taped to the PVC pipe using strong adhesive tape.
Then, a couple of one-inch couplings are attached to the pipe to connect it to the steel tube, which serves as the blower.
The couplings not only help to connect the PVC pipe to the steel blower tube but also provide a quick-release feature. This makes it easy to take apart the blower when needed and store it in a compact space.
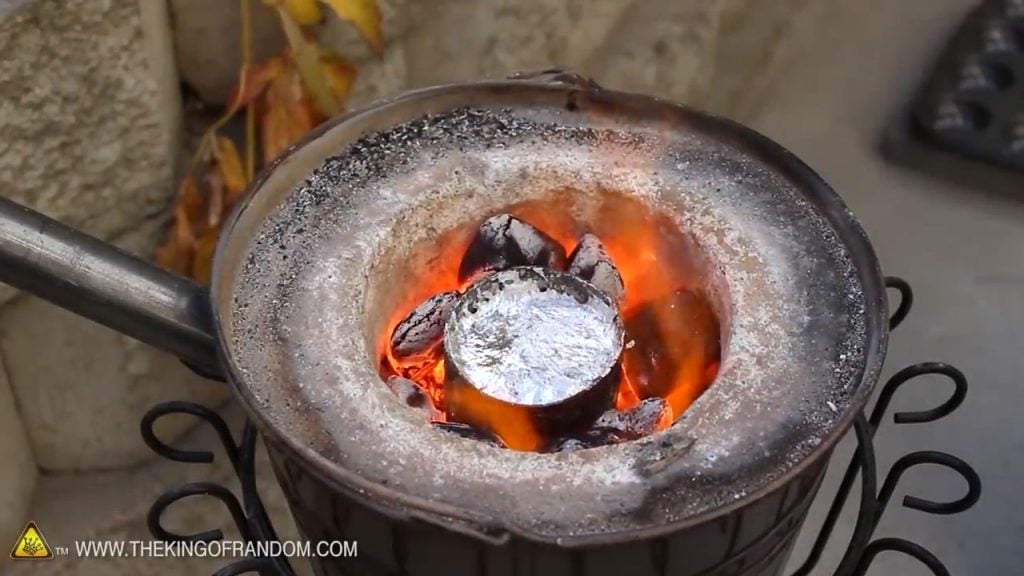
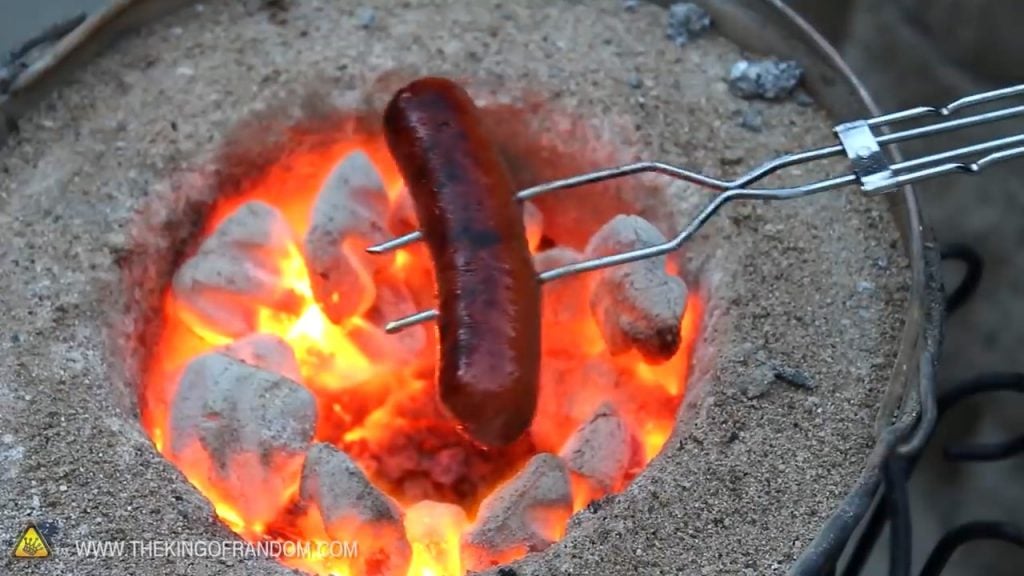
To begin melting the scrap metal in the mini metal foundry, charcoal is filled to the top of the crucible, and a propane torch is used to ignite it.
The torch should be applied to the center of the charcoal until it begins to burn evenly.
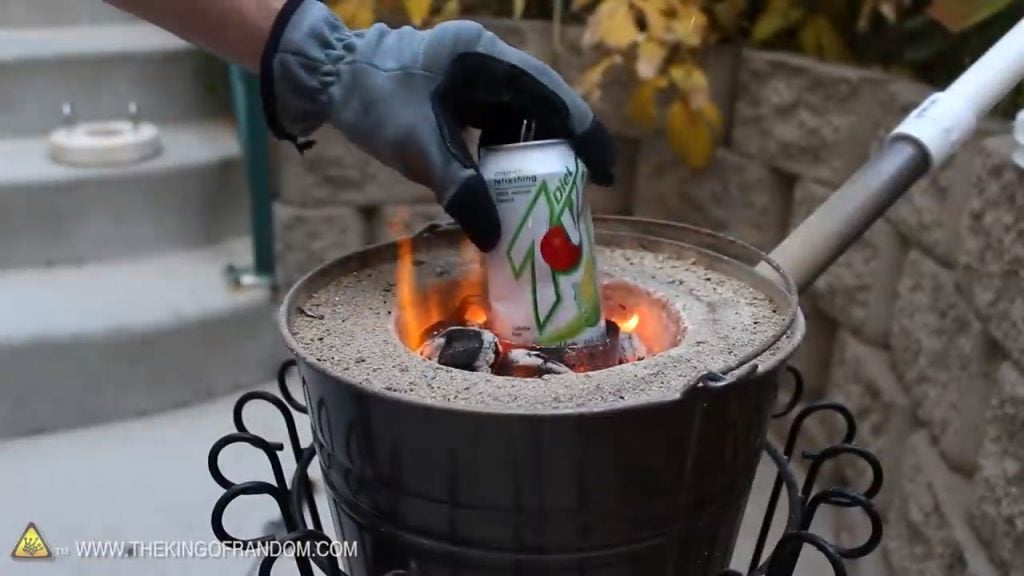
Once the charcoal is ignited, the hairdryer can be turned on and set to the low setting. The hairdryer blows a steady stream of oxygen onto the charcoal, which helps to increase the temperature and keep the fire burning hot.
The lid that was constructed earlier serves a crucial purpose in conserving energy during the metal melting process.
The lid is designed to fit snugly on top of the mini metal foundry, which helps to trap the heat inside the furnace.
Once the scrap metal has been melted and reached a liquid state, the next step is to isolate the aluminum from the other materials.
This is done by carefully removing the crucible from the mini metal foundry while ensuring a secure grip with tongs to prevent any accidents.
Once the crucible is removed from the foundry, the liquid scrap metal is poured into a steel mold to allow it to cool and solidify.

In order to isolate aluminum, first, we remove the crucible making sure we have got a very secure grip with our tongs, and slowly pour the liquid into a steel mold.

Once the aluminum has completely solidified, it will take on the shape of the mold.
In this case, the mold used is designed to produce ingots, which are blocks of metal that have a standard size and shape for easy storage and transportation
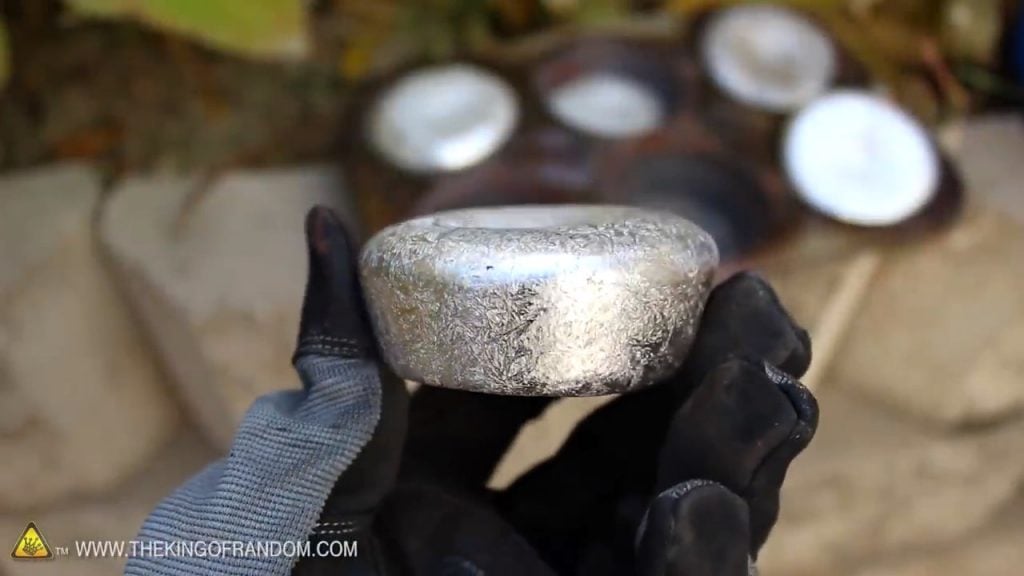
Image Credits : TKOR