In today’s world, where energy costs are constantly on the rise, finding alternative ways to heat your home or workspace is becoming increasingly important.
One such solution is a rocket mass heater, which is not only efficient but also portable, making it ideal for those who want to take their heating solution with them wherever they go.
This project offers a step-by-step guide to building a rocket mass heater that uses reclaimed and repurposed materials, making it not only cost-effective but also environmentally friendly.
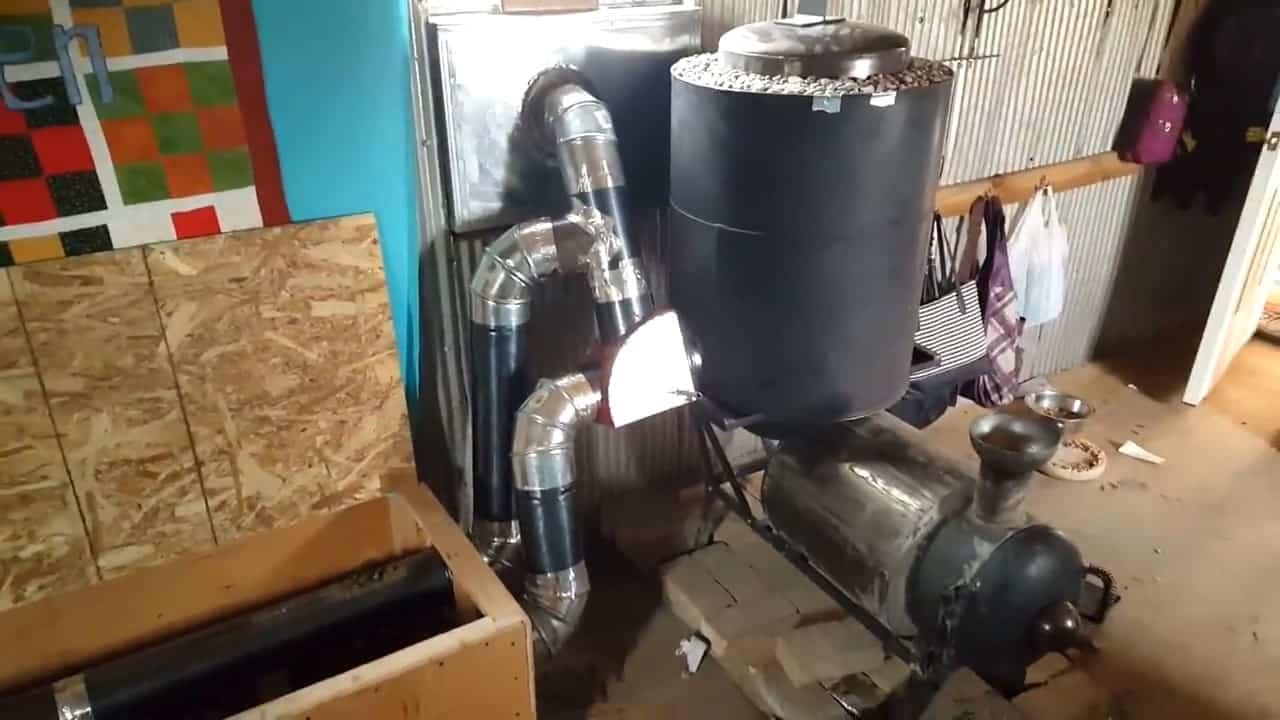
The rocket mass heater is powered by a rocket stove, which is a specially designed J-shaped burn chamber.
The fuel is loaded into the shorter side of the J, and the fire burns sideways and at the bottom of the chamber.
The draw is created by a tall vertical heat riser, which causes the gases to come out of the chimney and circulate around the inside of the barrel.
The barrel acts as a radiant heat source, warming the surrounding room.
One of the most significant advantages of a rocket mass heater is that it can stay warm long after the fire is out.
The gases from the fire then go through a valve in the barrel and into a series of tubes encased in mass, such as aircrete or cob.
These tubes allow the gases to shed their heat into the mass, which stores it as a thermal battery. The gases make their rounds through the tubes and eventually go out through the exhaust pipe.
STEP 1 : THE MATERIALS REQUIRED
To build the rocket mass heater, you’ll need several key components, including a burn chamber, heat riser, bench for containing the tubes, exhaust pipe, and insulation material.
One effective insulation material to consider is aircrete, a high-temperature cement mix that is lightweight and has excellent insulating properties.
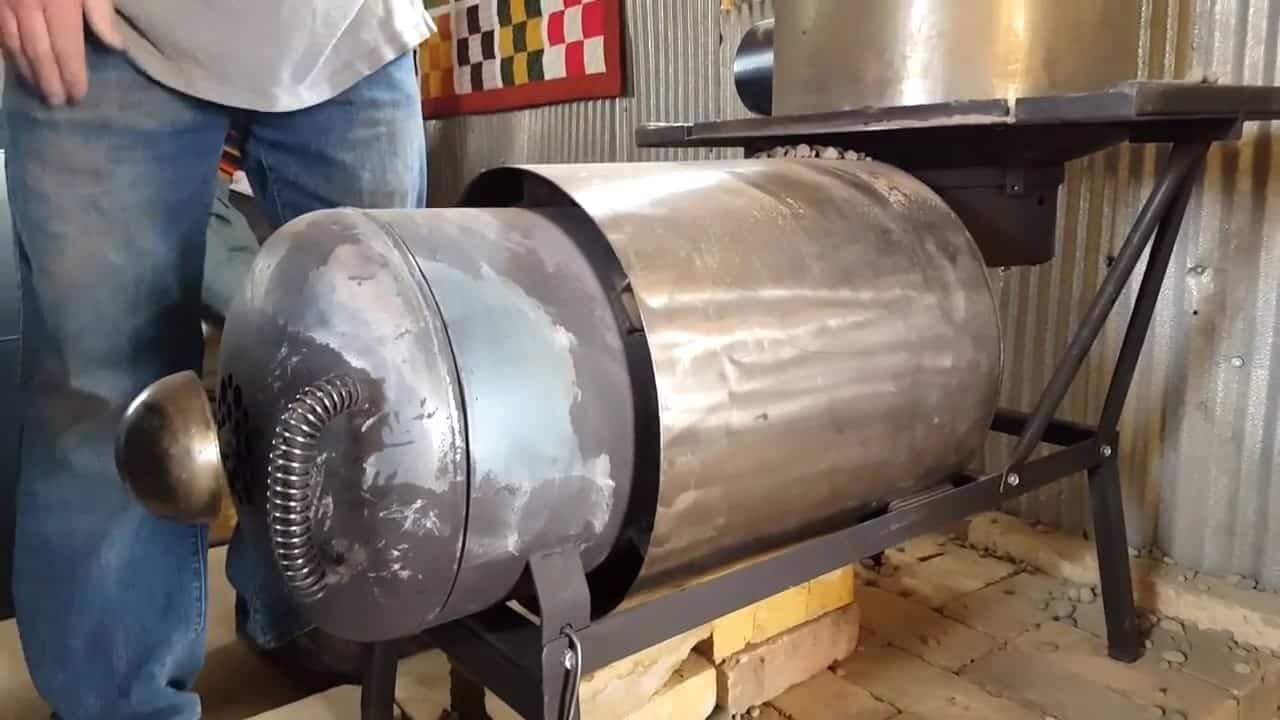
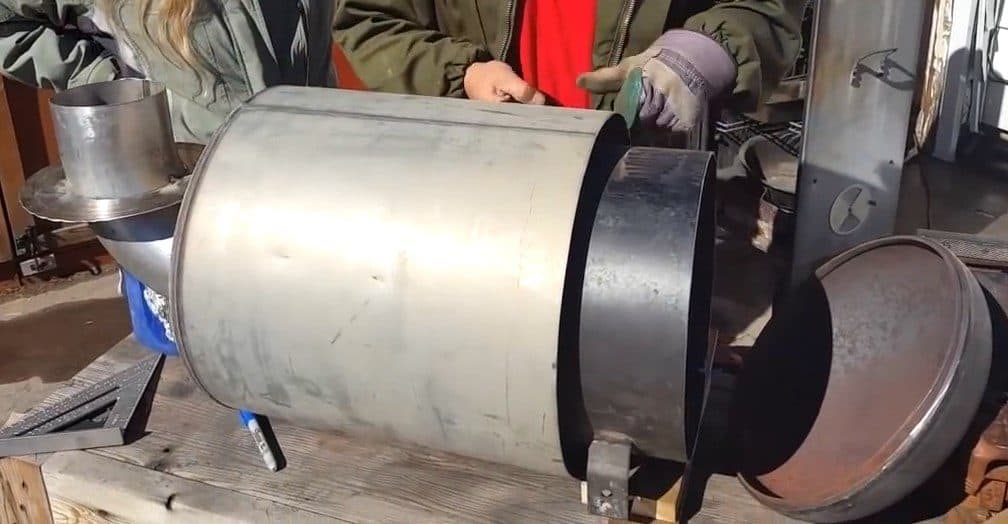
The burn chamber is constructed from an old sheet metal pressure tank and a stainless steel water heater tank. The pressure tank is insulated with aerated concrete and sits inside the water heater tank.
The aerated concrete provides a layer of insulation between the two tanks and helps to ensure that the heat is contained within the burn chamber.

STEP 2 : CONNECTING THE COMBUSTION CHAMBER TO THE CHIMNEY
Connecting the combustion or gasification chamber to the heat riser chimney is an essential part of building a rocket mass heater.
To ensure maximum efficiency, this connection is made using a specially designed pipe that is insulated and refractory-lined.
The pipe used to connect the combustion chamber to the heat riser chimney consists of a three-inch pipe that is insulated inside a six-inch pipe.
This insulation helps to retain heat and directs the gases towards the heat riser. Additionally, the pipe is insulated with a refractory mix, which helps to prevent heat loss and improve the overall efficiency of the heater.
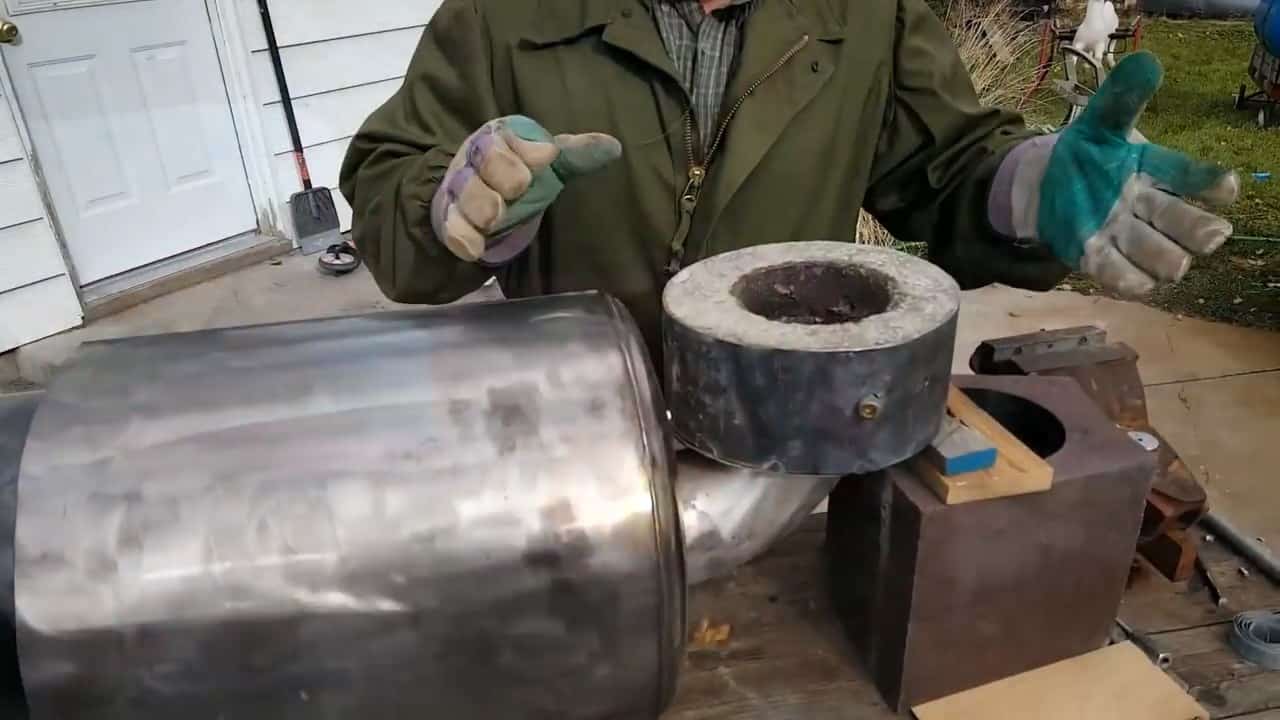
To further enhance the efficiency of the rocket mass heater, a vortex chamber is connected to this pipe. The vortex chamber is made from a saw blade and a leftover piece of pressure tank material.
It is then insulated with refractory material, which helps to prevent heat loss and ensures that the heat is directed towards the heat riser.
Six glue stick 3/8th inch air holes are drilled at right angles around the refractory material. This creates a vortex effect that enhances the burn by providing an extra air suction effect.
As the heat rises and creates a negative pressure up the riser, it swirls around the vortex chamber, creating an optimal burn environment.
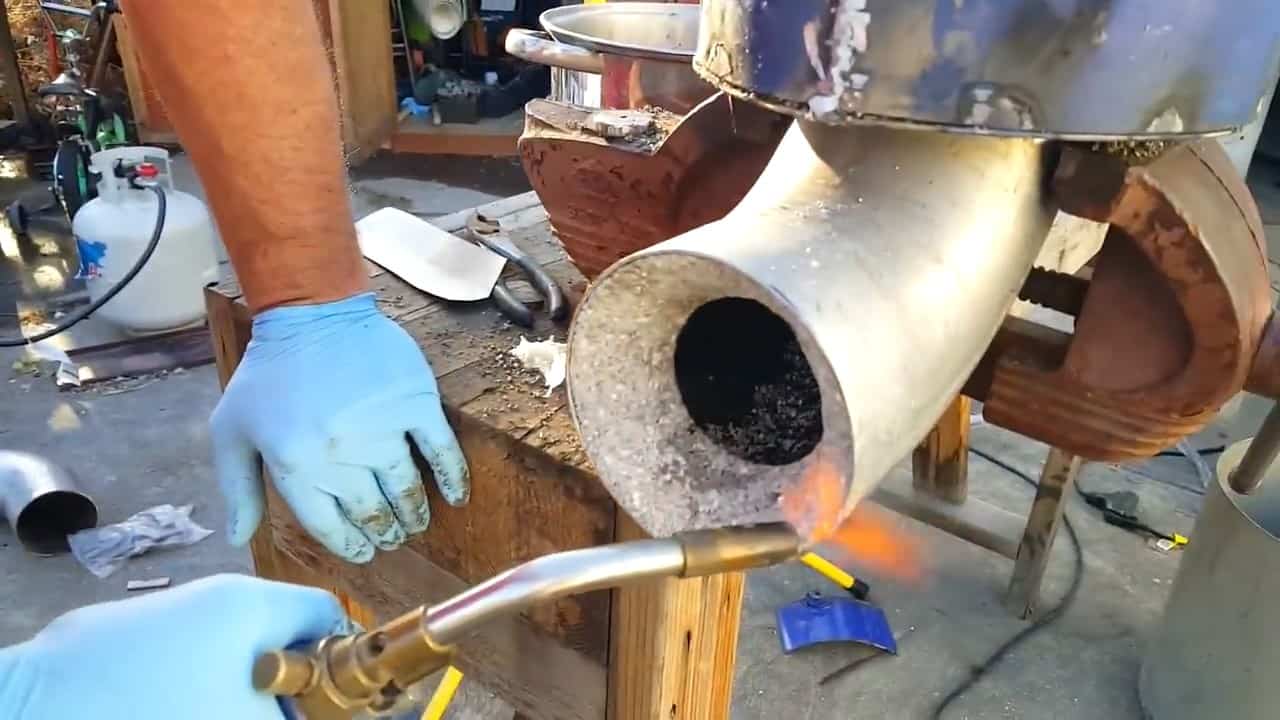
By introducing a vortex air intake system, the initial combustion creates enough heat to release more gases than there is oxygen to burn.
This enhances the burn output and improves the efficiency of the rocket mass heater.
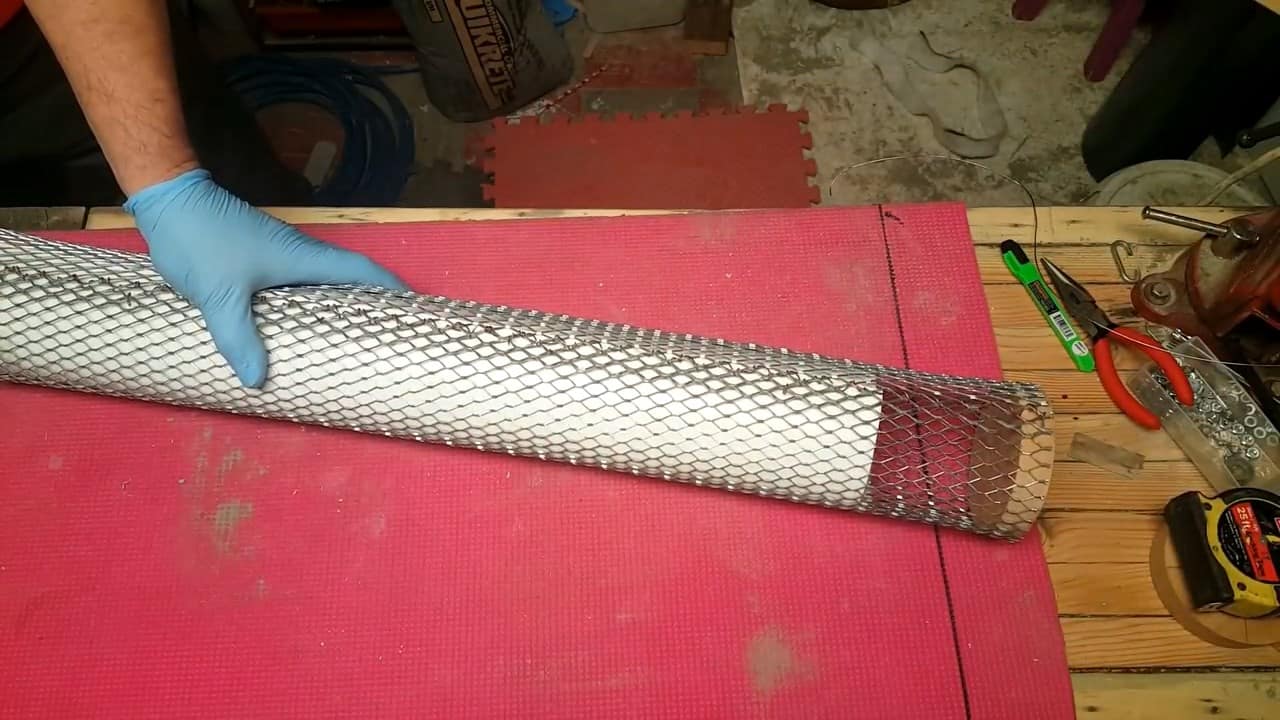
STEP 3 :BUILDING AN AIRCRETE HEAT RISER
To make the heat riser of the rocket mass heater, we will be using a special material called aircrete, which is an aerated concrete refractory material. This material is ideal for creating an insulated heat riser that is both durable and efficient.
To create the mould for the four-inch heater riser, we will be using metal mesh fabric, sarnafil roofing material, and a thin gauge wire.
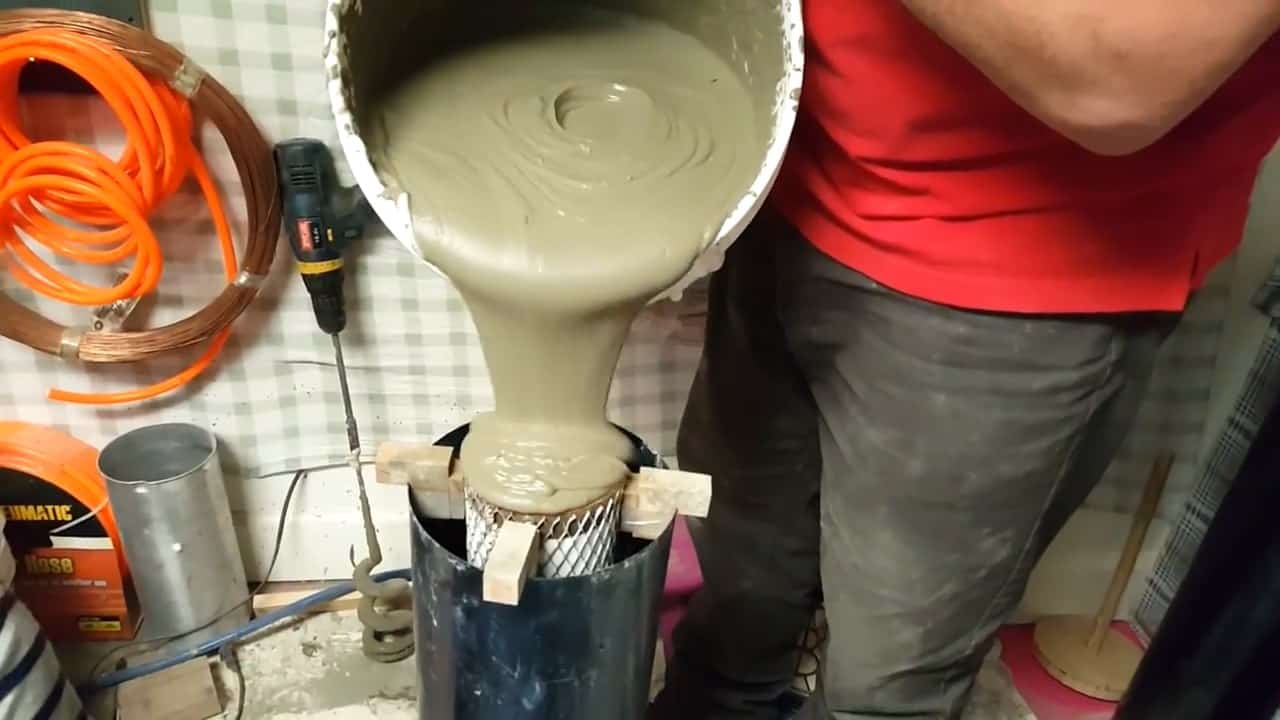
Once the mould is prepared, we fill it with clay sand up to the top. Next, we put this mould inside the six-inch stove pipe and pour aircrete through the sides all the way up to the top.
After pouring the aircrete, we let it sit to cure.
Once the aircrete is cured, we pull out the sand from the center of the heat riser and eject the liner that went against the inner fabric webbing that acted as a mold for the aircrete.
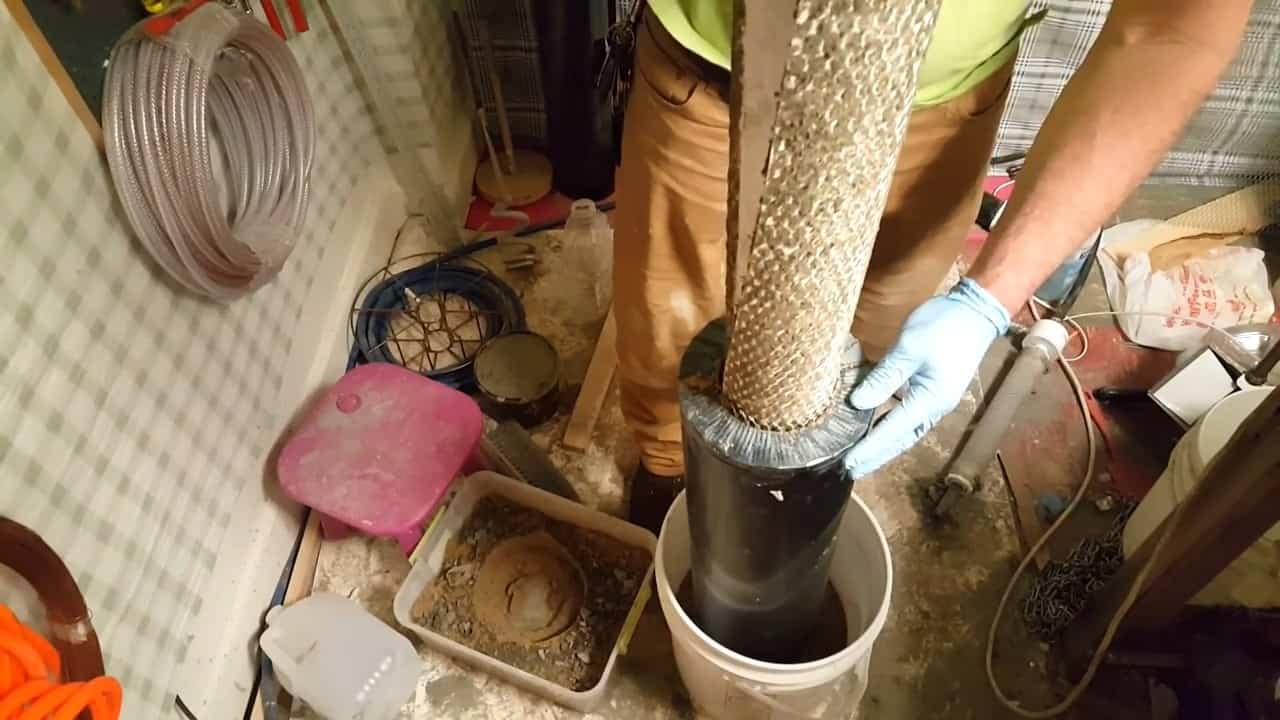
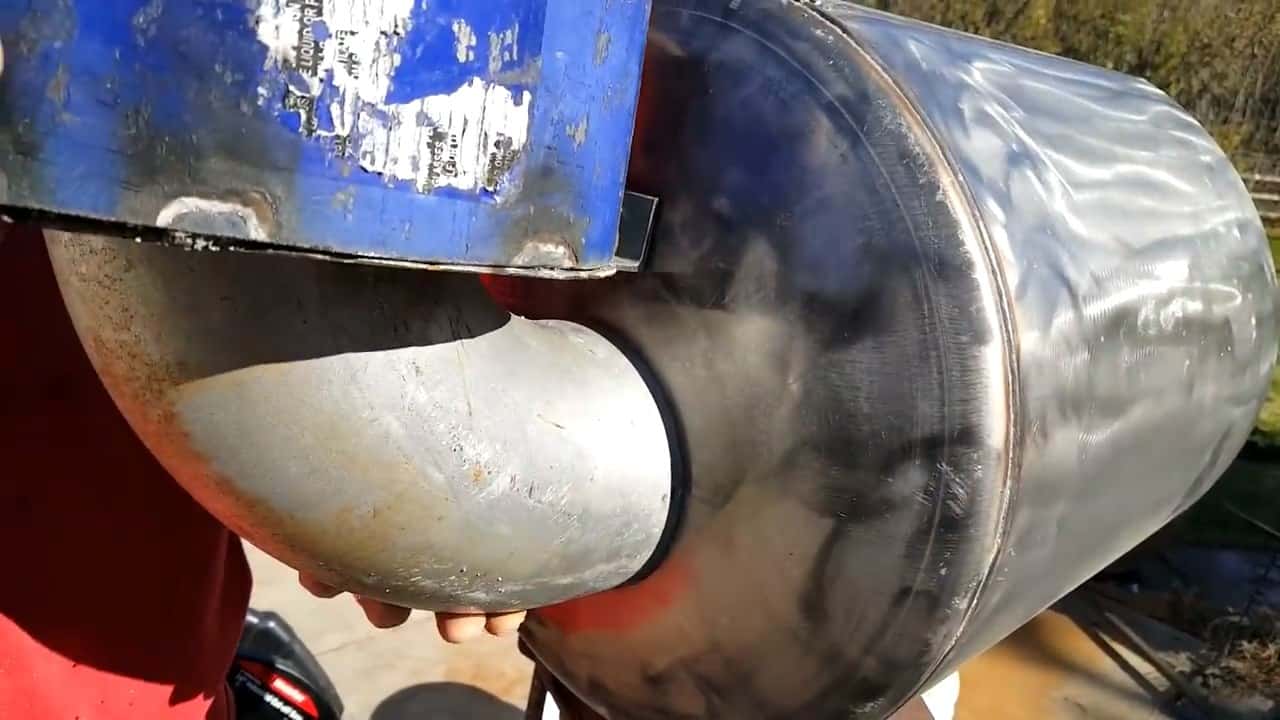
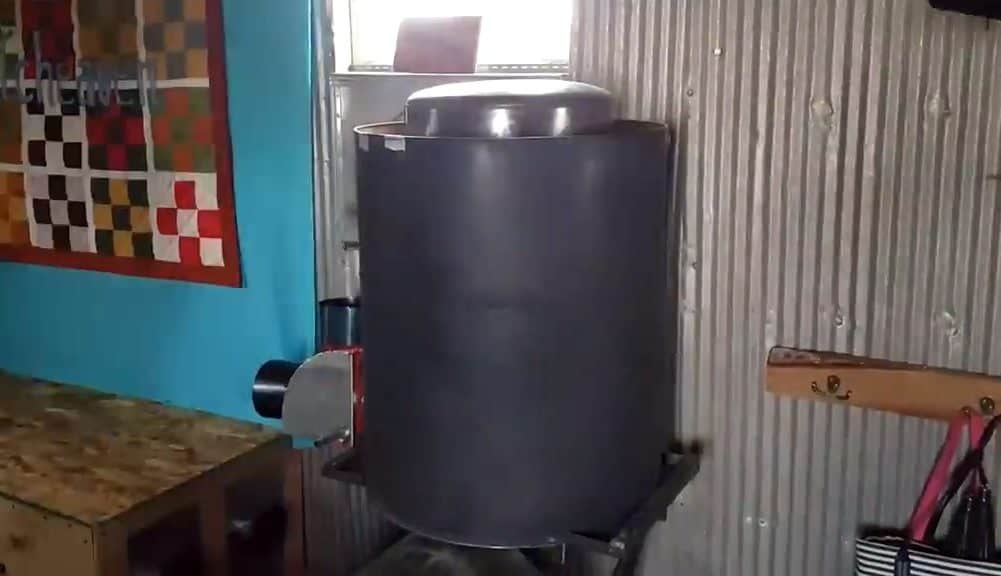
The aircrete heat riser is then installed on top of the vortex chamber. To further improve the insulation of the heat riser, it is double insulated with an old water tank and an old 55-gallon oil barrel.
The water tank is insulated from the 55-gallon barrel using some pea gravel, which helps to prevent heat loss and ensures that the heat is directed towards the heat riser.
The insulated water tank also has an outlet pipe at the bottom for extension into the mass bench. This is an important feature of the rocket mass heater as it allows the hot water to be circulated throughout the bench, providing long-lasting heat to the room.
STEP 4 : CONNECTING THE MASS BENCH
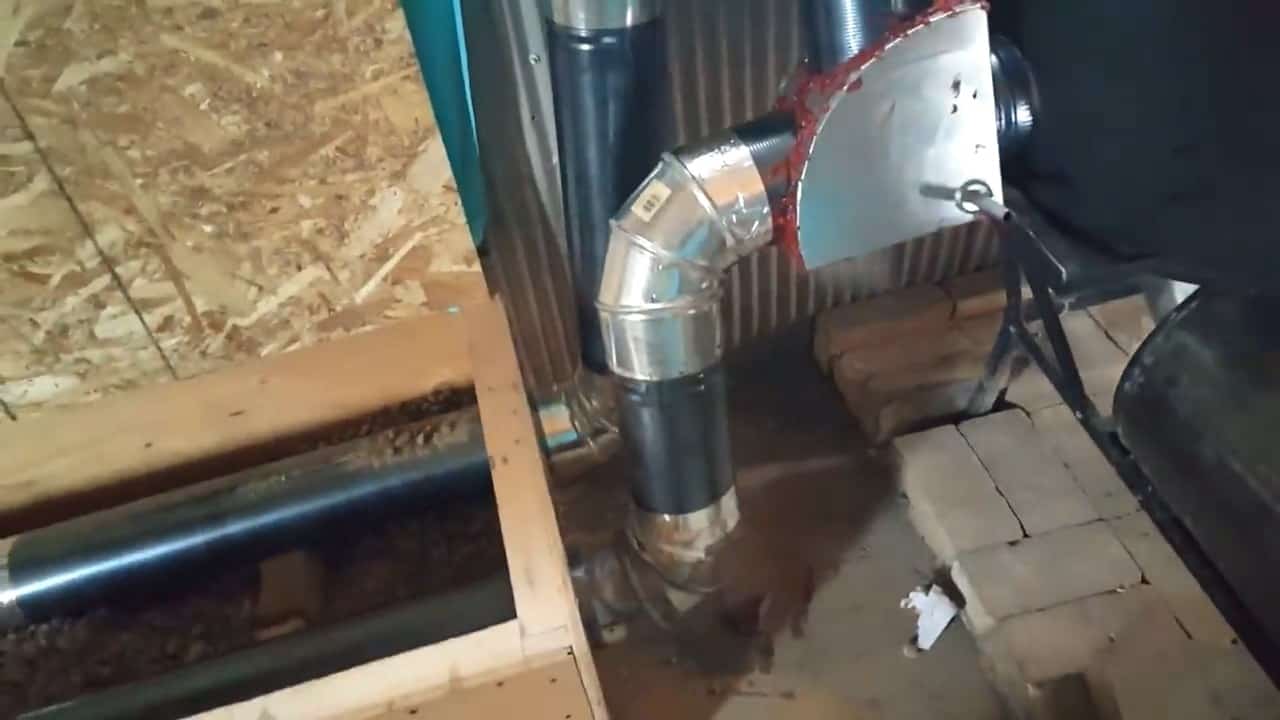
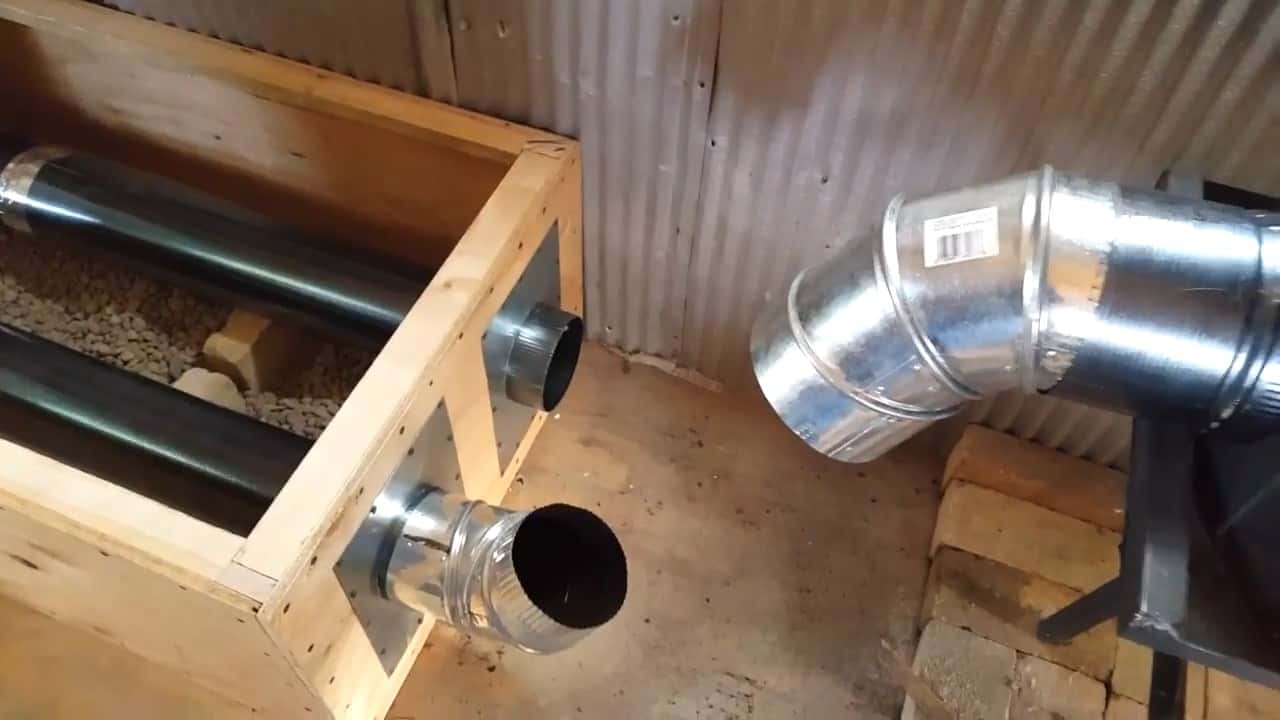
After the gases pass through the heat riser of the rocket mass heater, they go through an exhaust pipe that comes out of the insulated heat riser.
This exhaust pipe has a two-foot drop to a directional valve that connects two pipes.
One of the pipes acts as a flue chimney that goes out into the outdoors through the window, while the other pipe goes into the mass bench.
The purpose of this valve is to redirect the air to pass through the bench once the heat riser is warm enough.
This design ensures that the rocket mass heater operates efficiently and effectively, providing warmth and comfort to the living space.
Redirecting the air into the mass bench allows for the heat to be stored and slowly radiated over a longer period of time, which further increases the efficiency of the system.

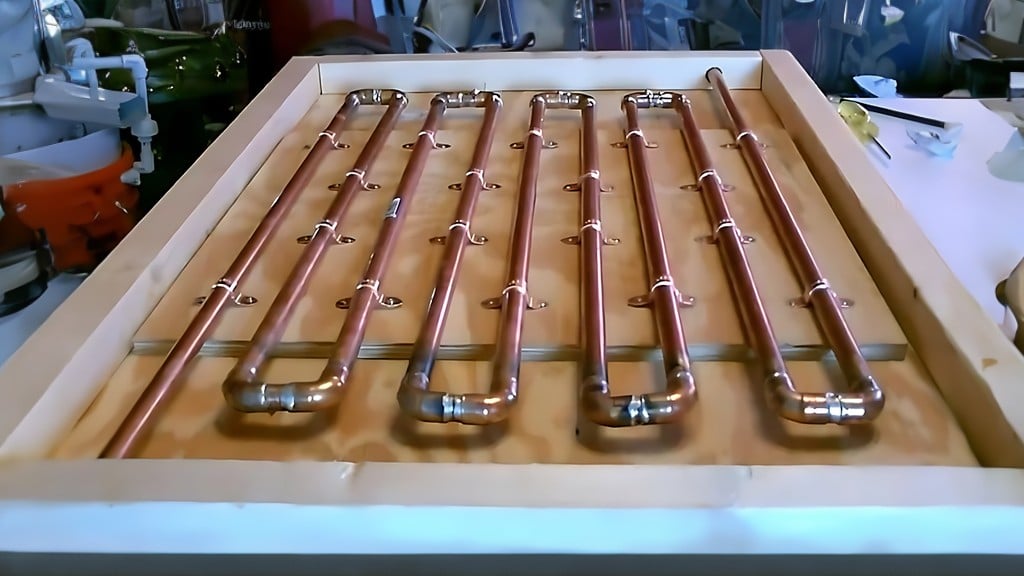
The eight-foot-long wooden mass bench is a crucial component of the rocket mass heater system. This bench houses the six-inch stove pipes coming out of the exhaust of the heat riser.
To prevent any heat loss through the floor, a mylar reflective insulation sheet is placed on the floor.
The mass bench is then filled with pea gravel, which acts as an excellent insulator and heat sink. As hot air passes through the stove pipes into the mass bench, the pea gravel absorbs the heat and stores it.
The heat is then slowly released over a period of time, providing warmth and comfort to the living space.
To ensure that the air flows through the bench only when the heat riser is warm enough, the pipe coming out of the bench is connected to the directional valve mentioned earlier.
This valve allows us to redirect the air to pass through the bench only when the heat riser has warmed up sufficiently.
STEP 5 : DOUBLE WALLED CHIMNEY PIPE
To ensure proper ventilation and to prevent the accumulation of harmful gases inside the room, a flue chimney pipe is required to take the exhaust gases outside.
In this project, a double-walled stove pipe is used for the flue chimney. It consists of a five-inch pipe inserted inside a seven-inch pipe with a space between them.
This space is insulated with an aerated concrete refractory material to prevent heat loss and to ensure that the exhaust gases are carried out effectively.
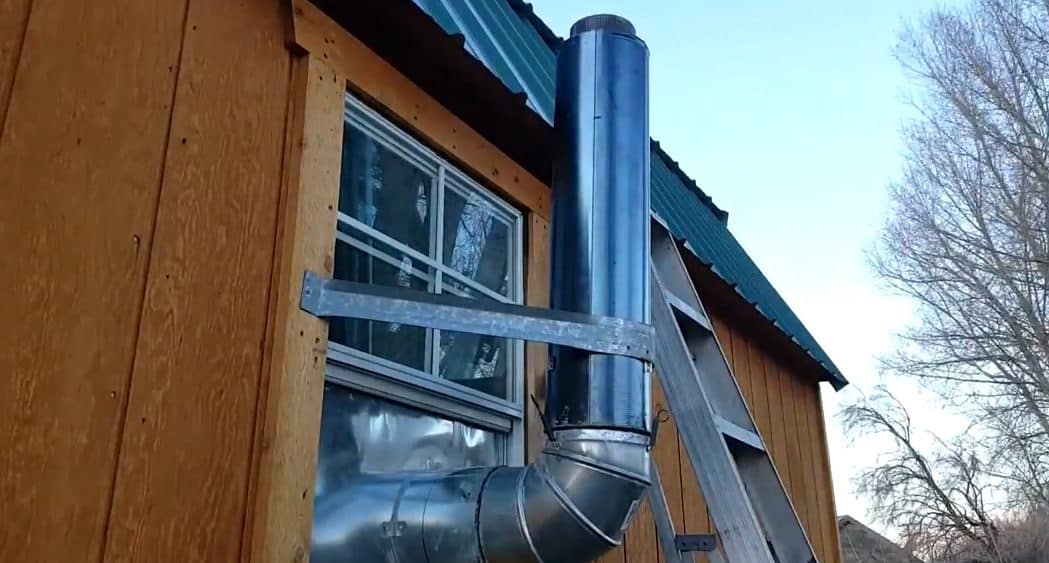
One important factor to consider in this step is the element of acceleration. As the gases drop down two feet from the heat riser into the bench, they lose momentum and may not be effectively carried up the flue chimney.
To counteract this problem, the insulated exhaust pipe is designed to provide an extra element of acceleration, ensuring that the gases are effectively carried up and out of the building.
Image Credits : Honey Do Carpenter |