In this project, we will be exploring the construction of an off-grid rocket mass heater, which is a unique and sustainable method of heating water without the need for propane or electricity.
Not only does this system provide a reliable source of hot water, but it also doubles as a cooktop, making it a versatile addition to any off-grid living space.
One of the most impressive features of this rocket stove is its incredible efficiency. It is designed to create a tremendous amount of heat from just a small amount of wood, making it a cost-effective and environmentally friendly way to heat water and cook food.
STEP 1 : MATERIALS REQUIRED
To build your very own off-grid rocket mass heater and cooktop, you’ll need to gather a few essential materials. First, you’ll need a copper coil that will serve as the heat exchanger for your hot water. You can find copper coils at most hardware or plumbing supply stores.
Next, you’ll need to create a mold for your rocket stove using PVC pipes. This will help ensure that your stove is the right size and shape for optimal heating efficiency.
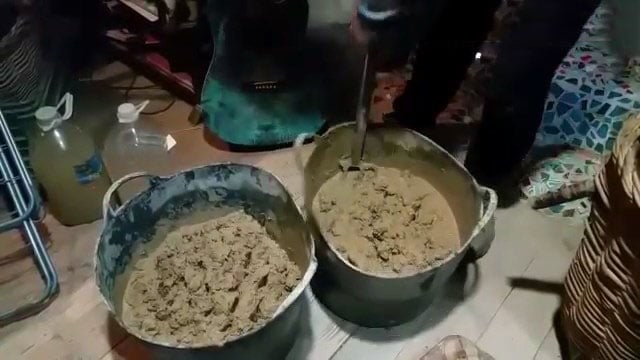
You’ll also need a mixture of clay and sand, which you’ll use to create the walls of your stove.To provide support for your stove, you’ll need to construct a sturdy frame. This can be made from metal or wood, depending on your preference.
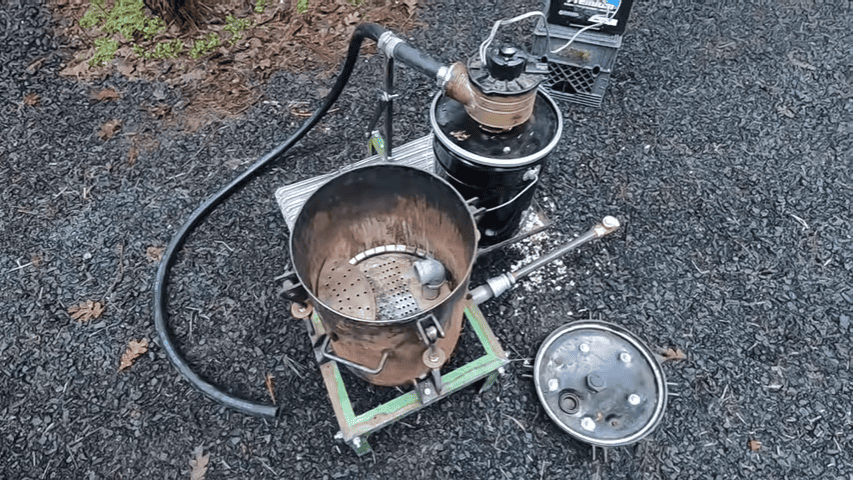
Once your stove is built, you’ll need a storage tank or drum to hold your hot water. This can be any type of container that can handle hot water.
You’ll also need some oil to coat the inside of your stove and prevent the clay from cracking.Finally, you’ll need wood as fuel for your stove.

STEP 2 : BUILDING THE FRAME USING COB MIXTURE
To provide a stable base for the rocket mass heater, a wooden frame is used, which can be made from an old chair or other sturdy wooden piece.
The cob mixture, which is a blend of clay, sand, and water, is then poured on top of the frame as it is raised up. This creates a base layer for the stove that will withstand the high temperatures generated by the combustion process.
The cob mixture is then sculpted to the desired shape and size to accommodate the stove’s components, such as the combustion chamber and the flue.
Once the cob mixture has hardened, the PVC pipe mold can be removed to reveal the cob structure underneath. This process creates a durable and long-lasting base for the rocket mass heater, which can be used for years to come.

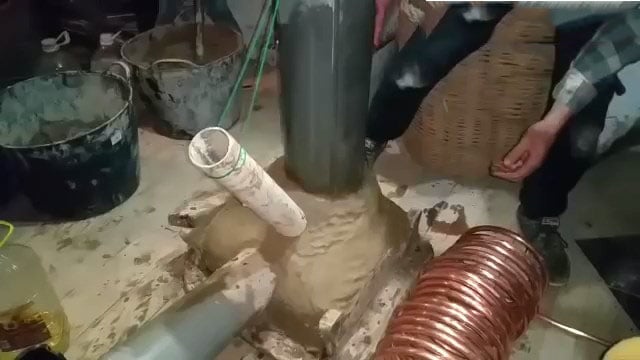
STEP 3 : MAKING AIR AND FUEL INTAKE MOULDS
After constructing the frame and covering it with the clay and sand mixture, the next step is to create the necessary holes for air and fuel intake.
To do this, PVC pipes are used as molds. One hole is made at the base of the stove for air intake, which will help to regulate the temperature of the stove. Another hole is made at an angle to the base to allow for the insertion of fuel.
It’s important to ensure that these holes are properly placed and sized, as they will affect the overall efficiency of the stove.
The air intake hole should be positioned in a way that allows for optimal airflow, while the fuel intake hole should be big enough to accommodate the wood but not so big that it causes excessive heat loss.
To create the holes, the PVC pipes are pressed into the clay and sand mixture and then removed once the mixture has dried.
The resulting holes should be smooth and free of any debris or excess material. This will help to ensure proper air and fuel flow through the stove, which will maximize its heating potential.
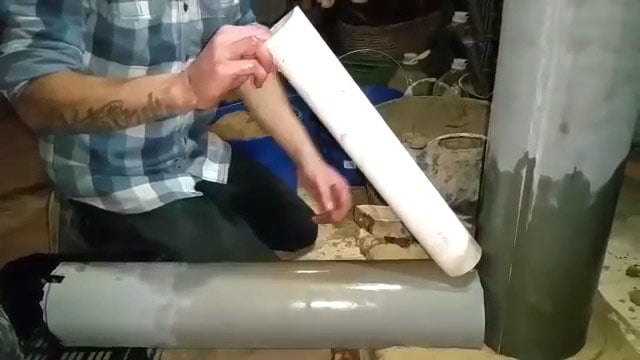
Before creating the holes for the air intake and fuel intake, it’s important to prepare the PVC pipes that will act as molds. To make the removal process easier, the pipes are lubricated with oil.
Once the pipes are oiled, they are positioned in place to form the shape of the stove. The first PVC pipe is placed horizontally at the base of the support frame to create the air intake hole.
The second PVC pipe, which will form the body of the stove where the copper coil is wrapped, is placed vertically on top of the support frame at an angle to the base.
After ensuring that the PVC pipes are in the correct position, the clay and sand mixture is carefully packed around them to create the mold for the stove.
The mixture should be tightly packed to prevent any air pockets from forming, which could compromise the structural integrity of the stove.
Once the mold is complete, it’s left to dry for several days
As we continue to apply the clay and sand mixture, we raise the mud up to the desired height, keeping in mind the dimensions of the stove’s body.
Once we have achieved the required height, we place another PVC pipe at an angle to create the fuel intake. This pipe should be placed in such a way that it allows for easy access to the fuel, but also ensures that the fuel remains inside the stove.
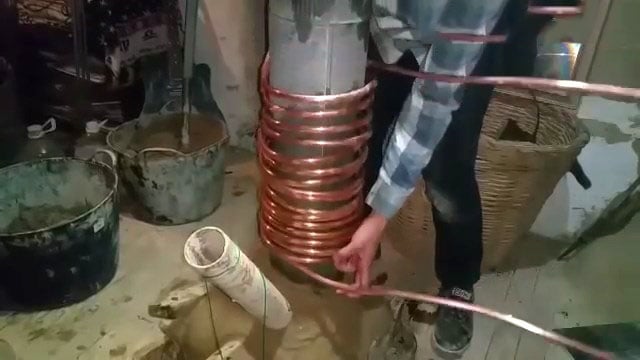
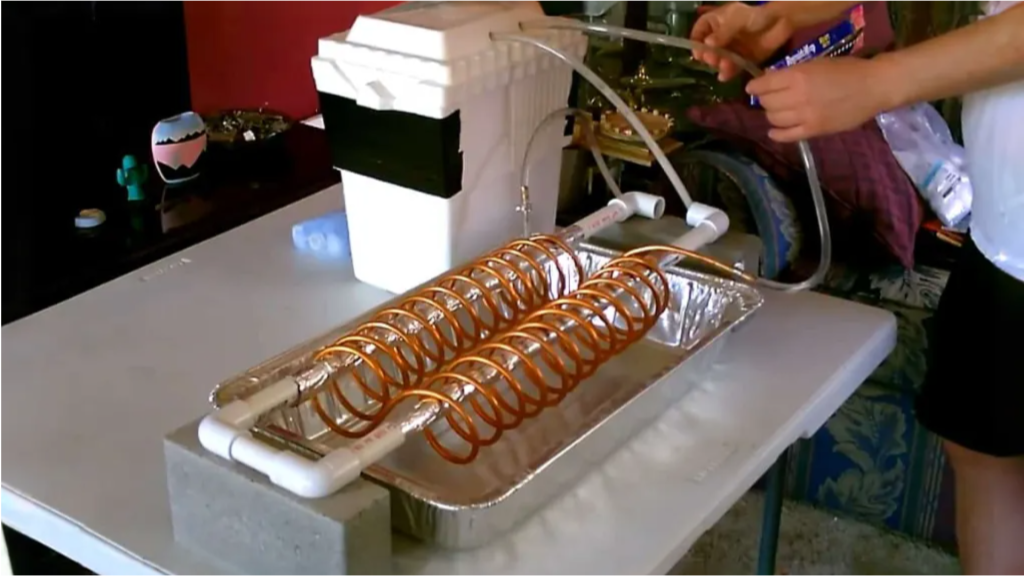
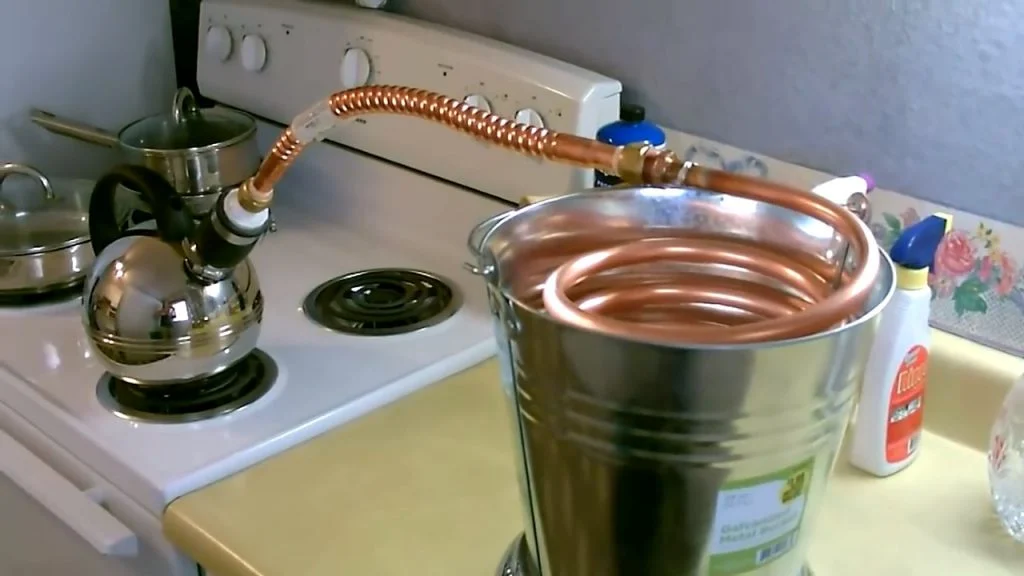
STEP 4 : INSTALLING THE COPPER COIL
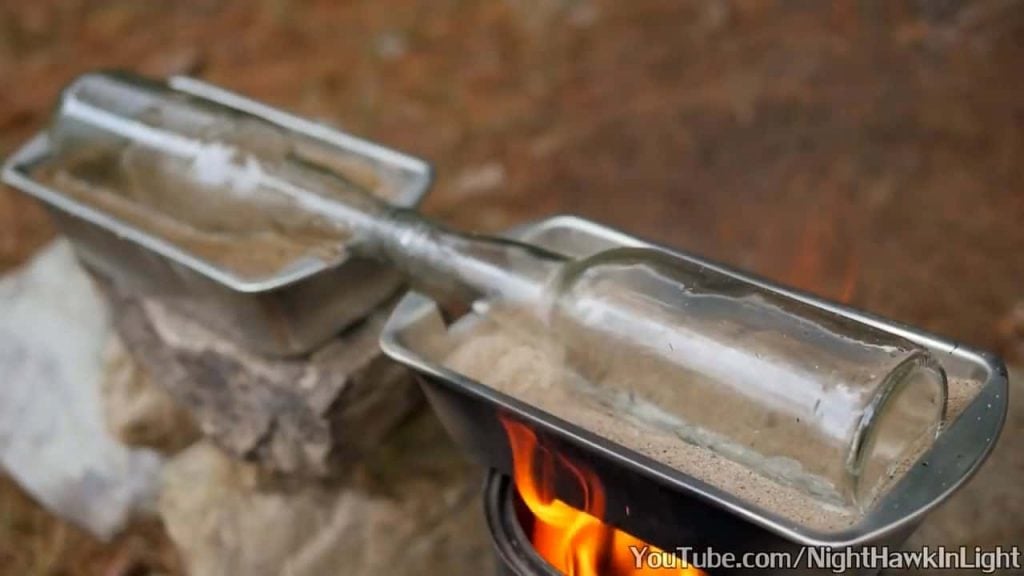
To begin with, the copper coil is an essential component in this project as it plays a crucial role in heating the water. To insert the coil, we use a well-greased PVC pipe as a mold to create a burn chamber.
This chamber is where the coil is positioned and heated up with the water inside.
Once the PVC pipe is in place, we carefully insert the copper coil into it, ensuring that it is properly aligned and centered.
The coil is then extended at both ends, with one end serving as the intake for cold water, and the other end serving as the outlet for hot water.
It is important to note that the bottom side of the coil should be used for the intake of the cold water while the top side should be used for the hot water outlet.
This is because hot water rises to the top while the cold water sinks to the bottom. Therefore, placing the coil in this way ensures maximum efficiency in heating the water.
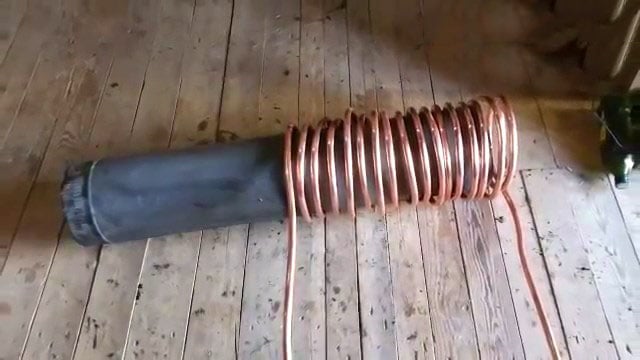
STEP 5 : PACKING THE COIL
Once the copper coil has been placed inside the greased-up PVC pipe, the next step is to pack the clay and sand mixture around the coil and the sides of the PVC pipe.
It is important to ensure that the copper coil is completely covered with the clay mixture, leaving no exposed areas. The clay mixture acts as an insulator, helping to retain the heat and increase the stove’s efficiency.
As the clay and sand mixture is being packed around the coil, it should be done in layers to ensure proper compaction.
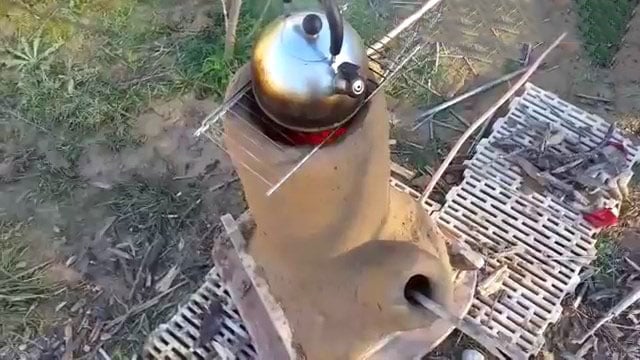
The mixture should be packed firmly to avoid any air pockets that could potentially weaken the structure. The process continues until the clay is packed up to about five to six inches above the end of the PVC pipe.
The reason for this is that the top of the stove will be used for cooking or boiling water. By leaving enough space above the copper coil, it allows for a flat surface to place pots or pans.
The stove can be used for various purposes such as cooking meals, boiling water for tea, or even baking bread.
After packing the clay and sand mixture, it is important to let it dry completely before removing the PVC pipes. Once the pipes are removed, any excess clay can be scraped away and the surface smoothed out
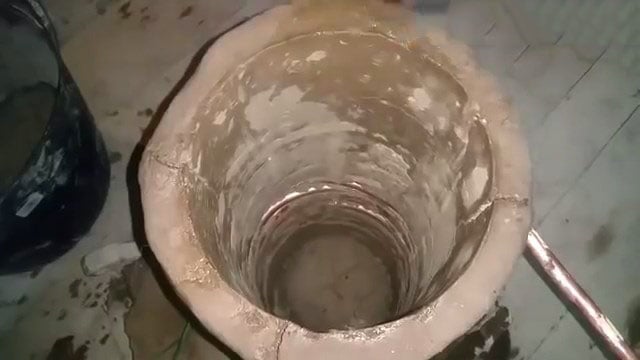
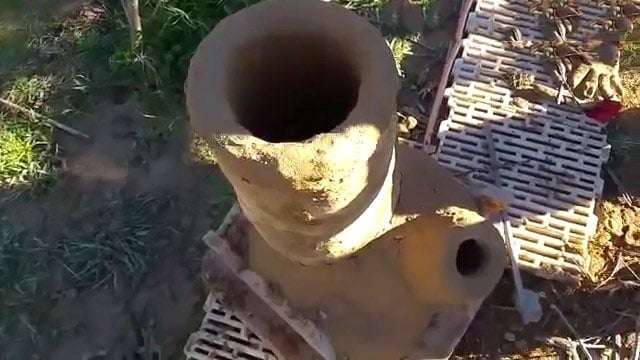
STEP 6 : REMOVING THE PVC PIPES
After the clay and sand mixture has dried and set, we carefully remove the PVC pipes to reveal the newly formed holes for the air intake, fuel intake, and burn chamber.
To ensure that these holes are fully connected, we dig out the back end of both the air intake and fuel intake holes to create an elbow-shaped hole.
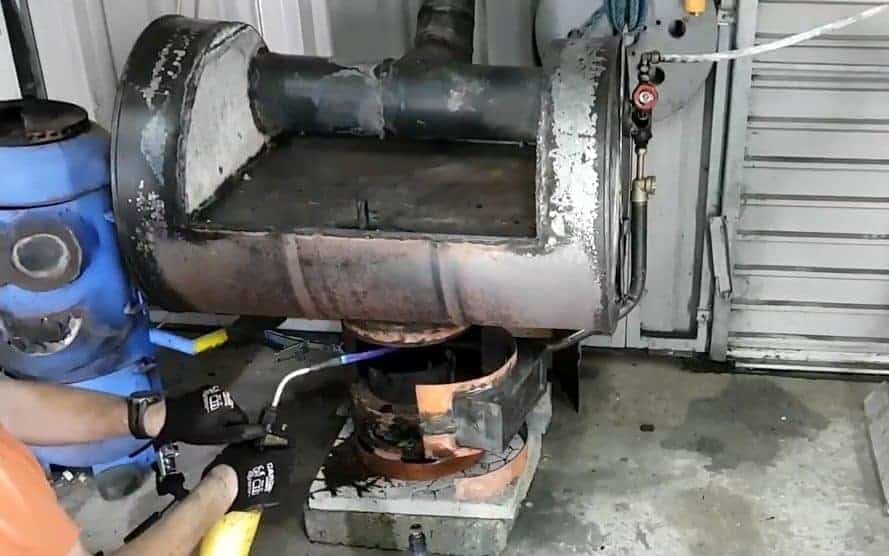
STEP 7 : CONNECTING THE PIPE TO THE BARREL
After the clay and sand mixture has dried and set, it’s time to connect the copper coil to the water storage barrel. First, connect the intake pipe to the bottom of the barrel, where cold water will settle.
Then, connect the upper end of the copper coil to the top of the barrel, where hot water will be collected
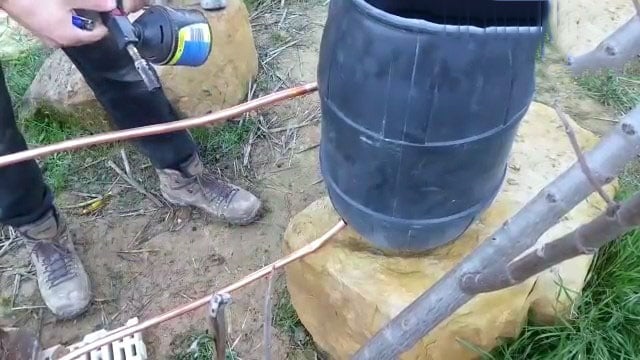
The heated water from the copper coil is then circulated to the water storage barrel through the principle of thermosiphon and natural convection.
The hot water naturally rises through the upper end of the coil and is pumped onto the top of the barrel, while the cold water flows into the stove through the lower end of the coil due to its higher density.
The natural circulation of water is a key feature of the rocket mass heater as it does not require an external source of energy to operate. The hot water expands as it is heated, becoming less dense and rising up the coil to the storage tank. This cycle continues until the water reaches the desired temperature.
It is important to ensure that the rocket stove is installed below the storage tank, creating a height difference between them. This ensures that the cold water naturally descends into the stove, allowing for a continuous flow of water without any backward flow.
Overall, the rocket mass heater is a highly efficient and sustainable method for heating water without the use of propane or electricity. The natural circulation of water through the system helps to conserve energy and reduce waste, making it an excellent off-grid option for heating and cooking.
Image Credits : Offgrid Secrets