In today’s world, where energy conservation has become a significant concern, passive solar thermal water heaters have emerged as a cost-effective and eco-friendly solution to cater to our heating needs.
In this project, we delve into the process of building a passive solar thermal water heater using pex pipes and a 4 X 8 plywood piece. Pex pipes, known for their durability and strength, make for an ideal choice in constructing the heater.
The design of the heater enables it to attain a temperature range of 120 – 150 F on a typical sunny day, which can be used for heating your domestic water, space or room heating, or just heating a swimming pool.
One of the most noteworthy aspects of this project is the flexibility that it offers in terms of materials. If pex pipes are not readily available, cheaper irrigation pipes can also be used, though the durability and strength may not be as good as pex pipes.
With this passive solar thermal water heater, not only do we help to minimize our carbon footprint, but we also create a sustainable and efficient means of meeting our heating requirements.
STEP 1 : BUILDING THE BOX
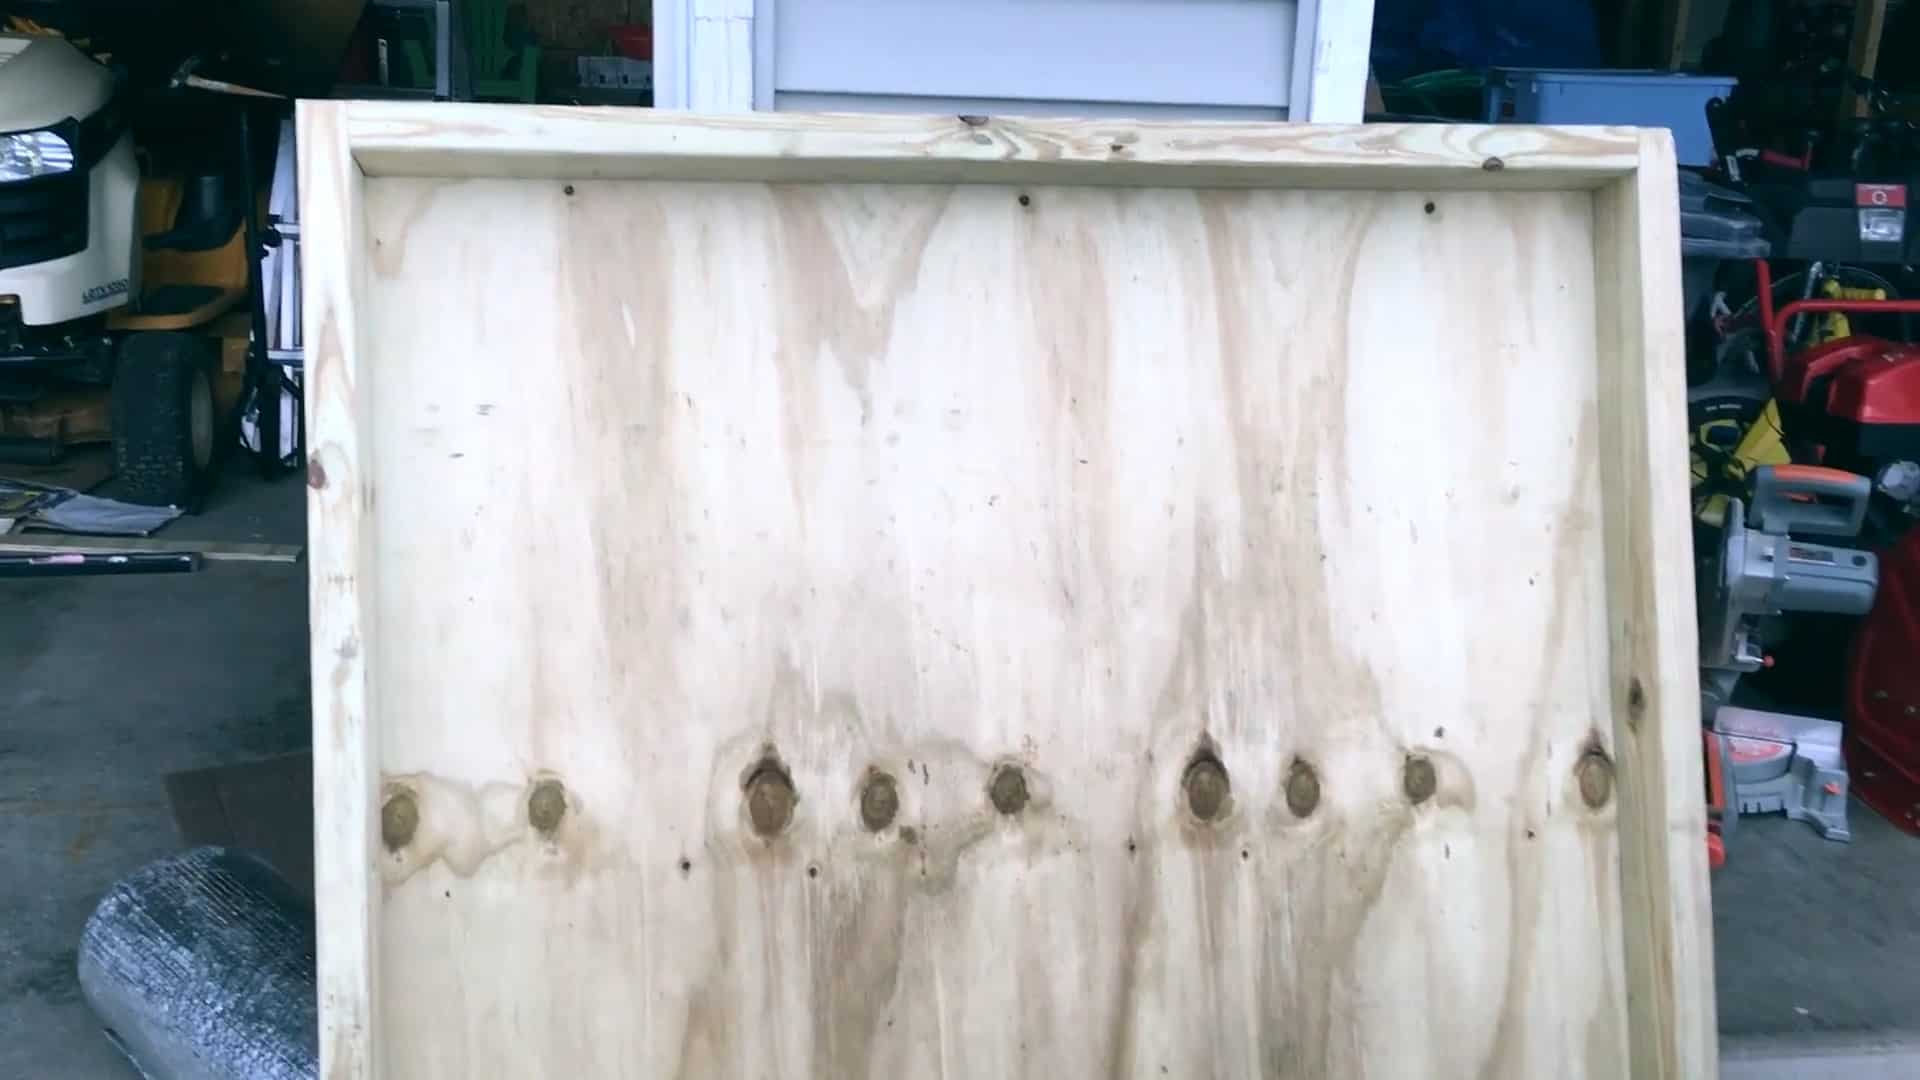
The box that contains the pipes is made of 4 X 4 plywood. Four pieces of 2 X 4 pressure treated lumber are joined along the sides using screws to make the frame.
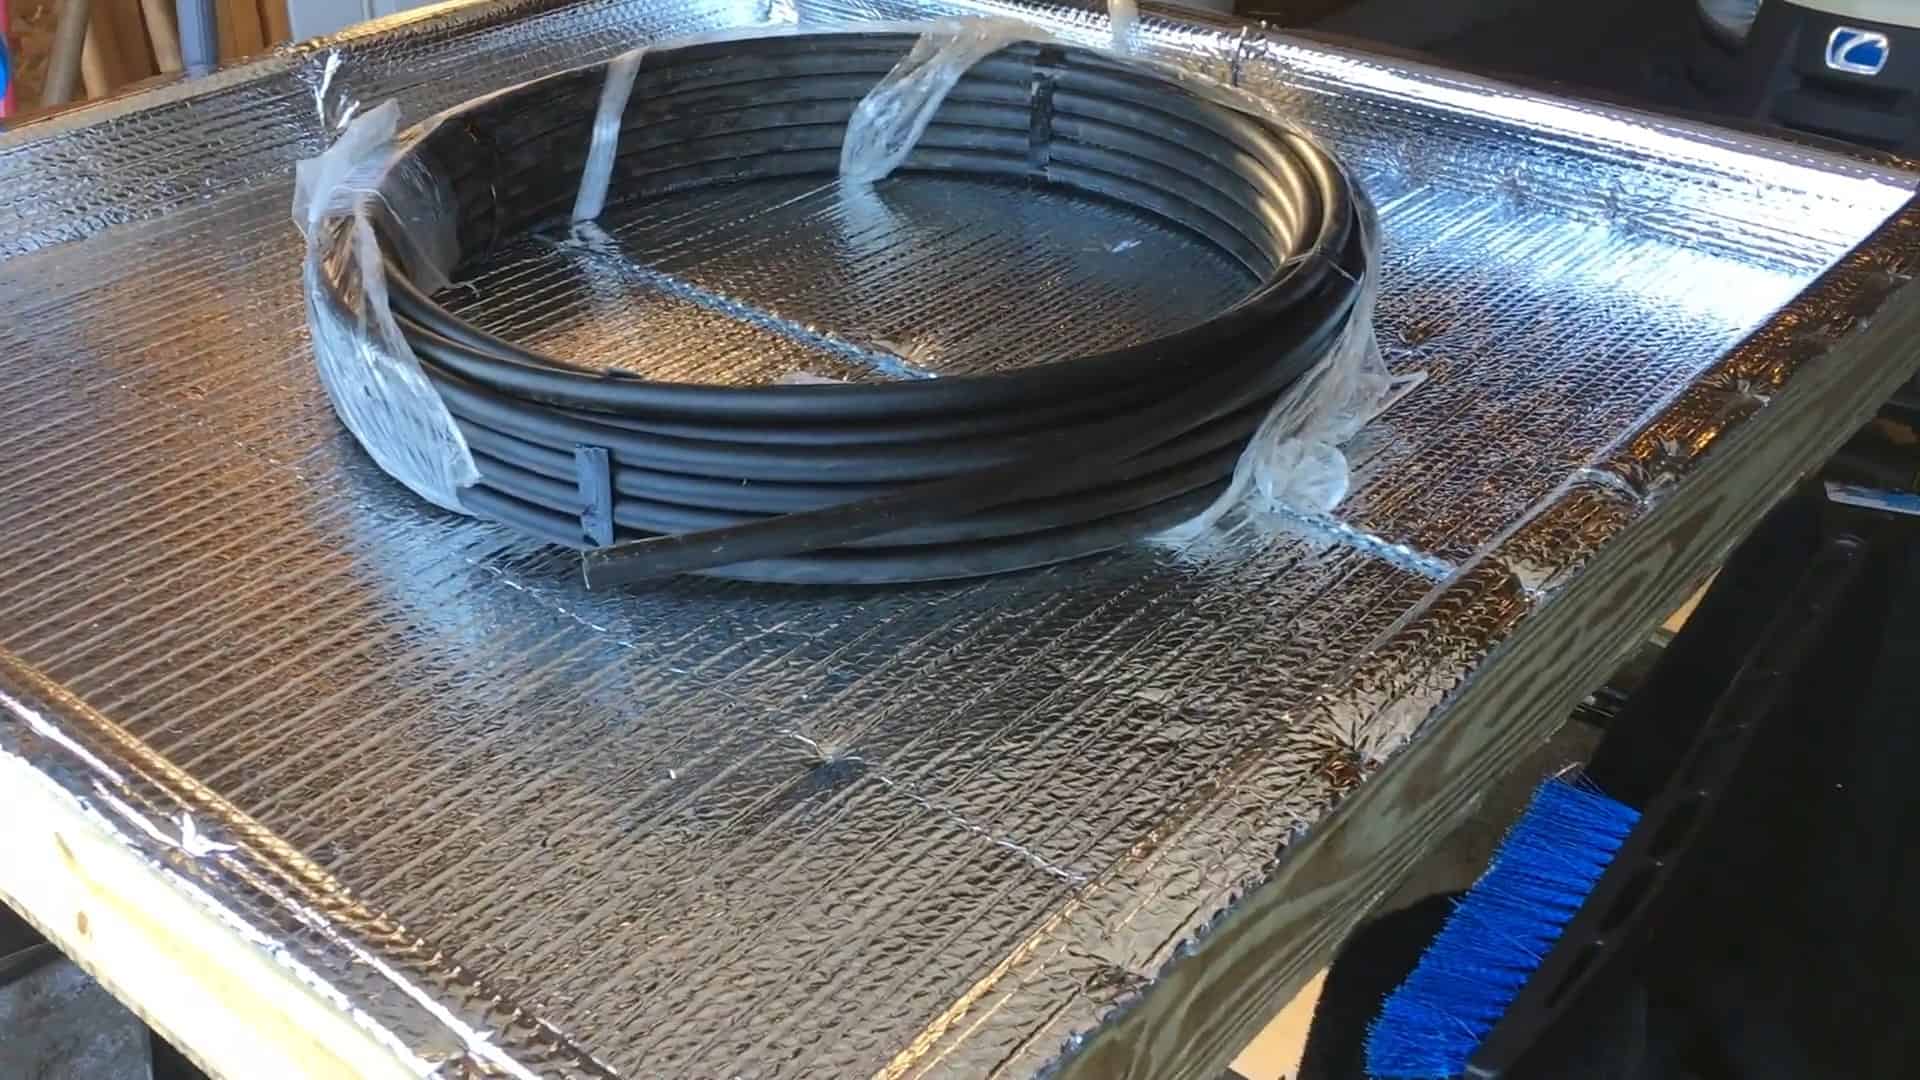
We staple in some bubble insulation along the dimensions of the box. Since the insulation material is silver, it will reflect heat. To avoid this,we coat it with flat black paint to attract solar heat.
To construct the box that contains the pipes, we will use 4 X 4 plywood. We will join four pieces of 2 X 4 pressure-treated lumber along the sides using screws to make the frame.
This will provide a sturdy structure for the pipes to be placed inside.
To ensure that the heater is energy efficient, we will insulate the box using bubble insulation. However, since the insulation material is silver, it will reflect heat away from the box.
To prevent this, we will coat the insulation with flat black paint. This will help to attract and retain the solar heat within the box.
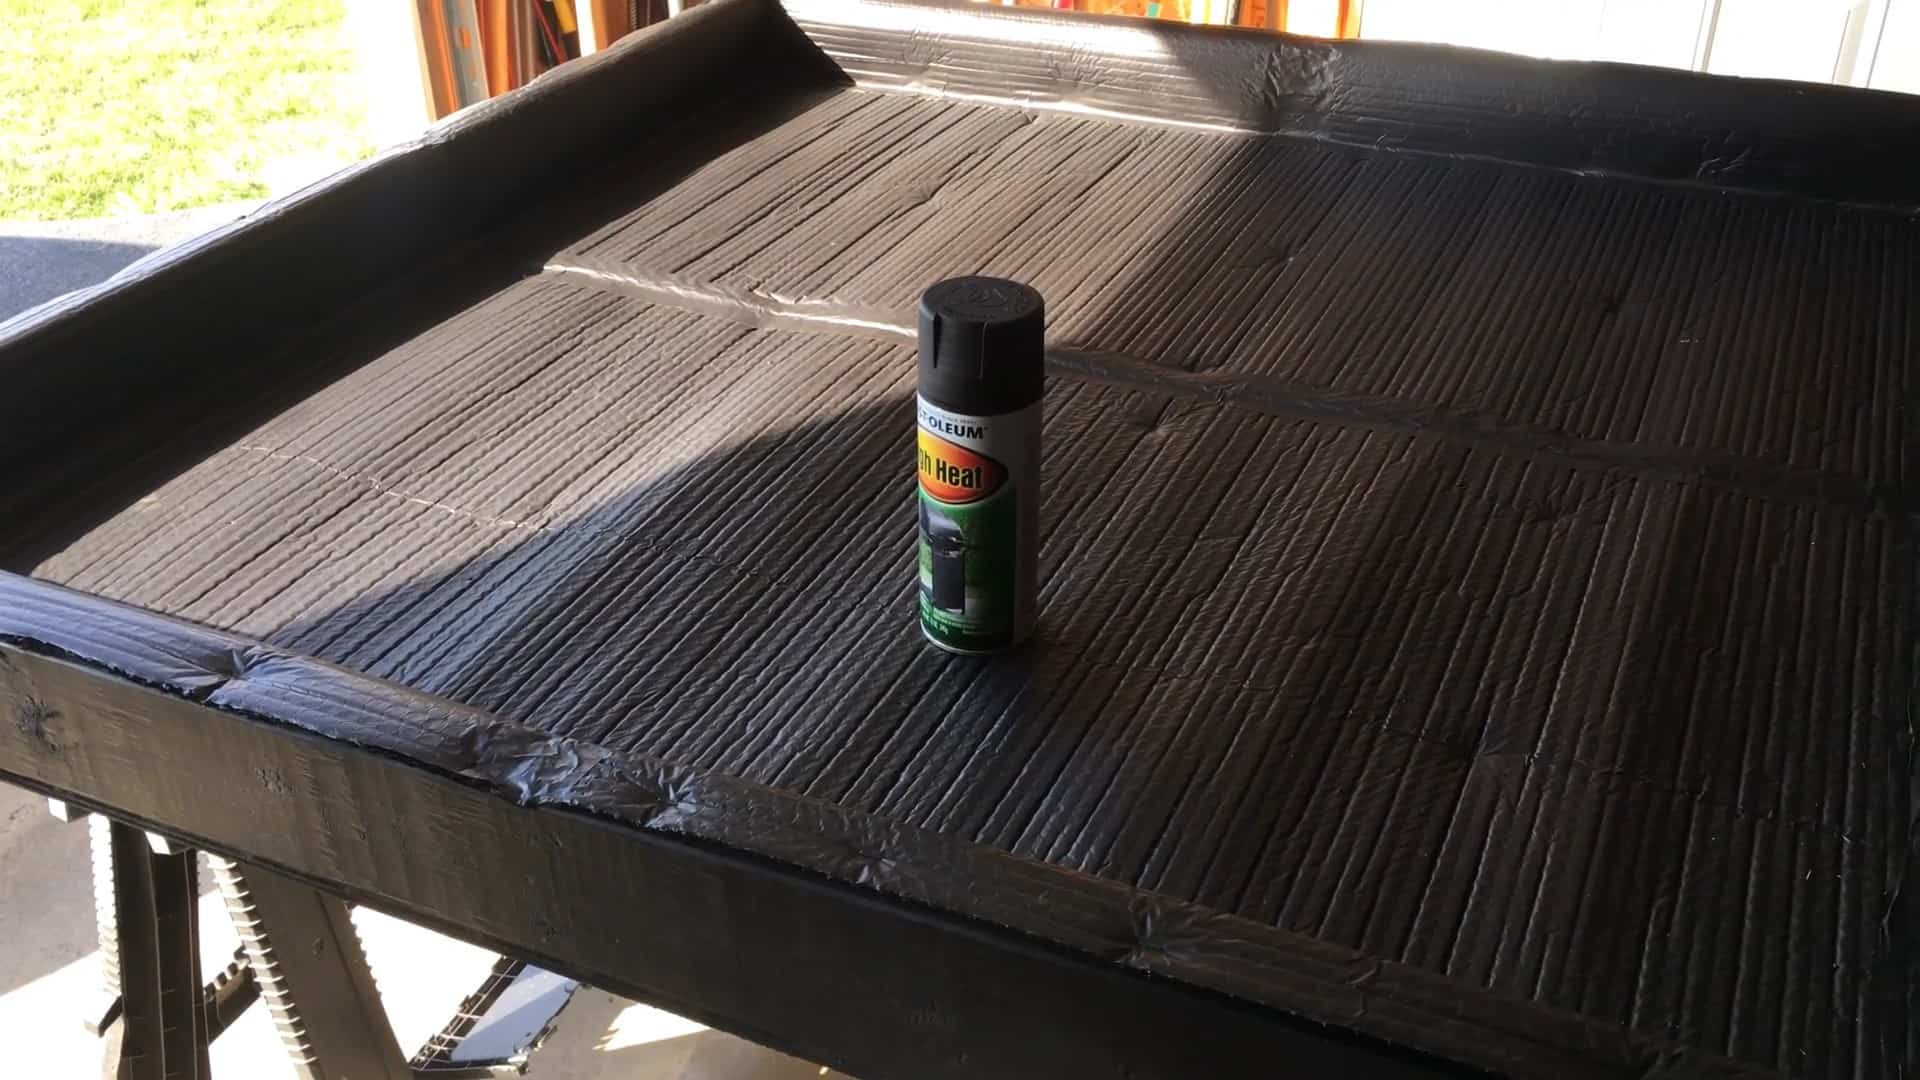
STEP 2 : INSTALLING THE INLET AND OUTLET PIPES AND COATING WITH BLACK PAINT
To ensure proper functioning of the solar thermal water heater, two holes are drilled into the sides of the sturdy 4 x 4 plywood frame. These holes serve as the inlet and outlet ends of the pex pipes.
Cold water enters through the inlet and travels through the pex pipes, where it gets heated by the sun’s rays, and exits through the outlet as hot water.
To optimize the heating process, the interior and exterior surfaces of the plywood box are painted with flat black Rust-Oleum high heat paint.
This paint is specifically designed to absorb and retain heat, which helps to maximize the effectiveness of the solar thermal water heater.
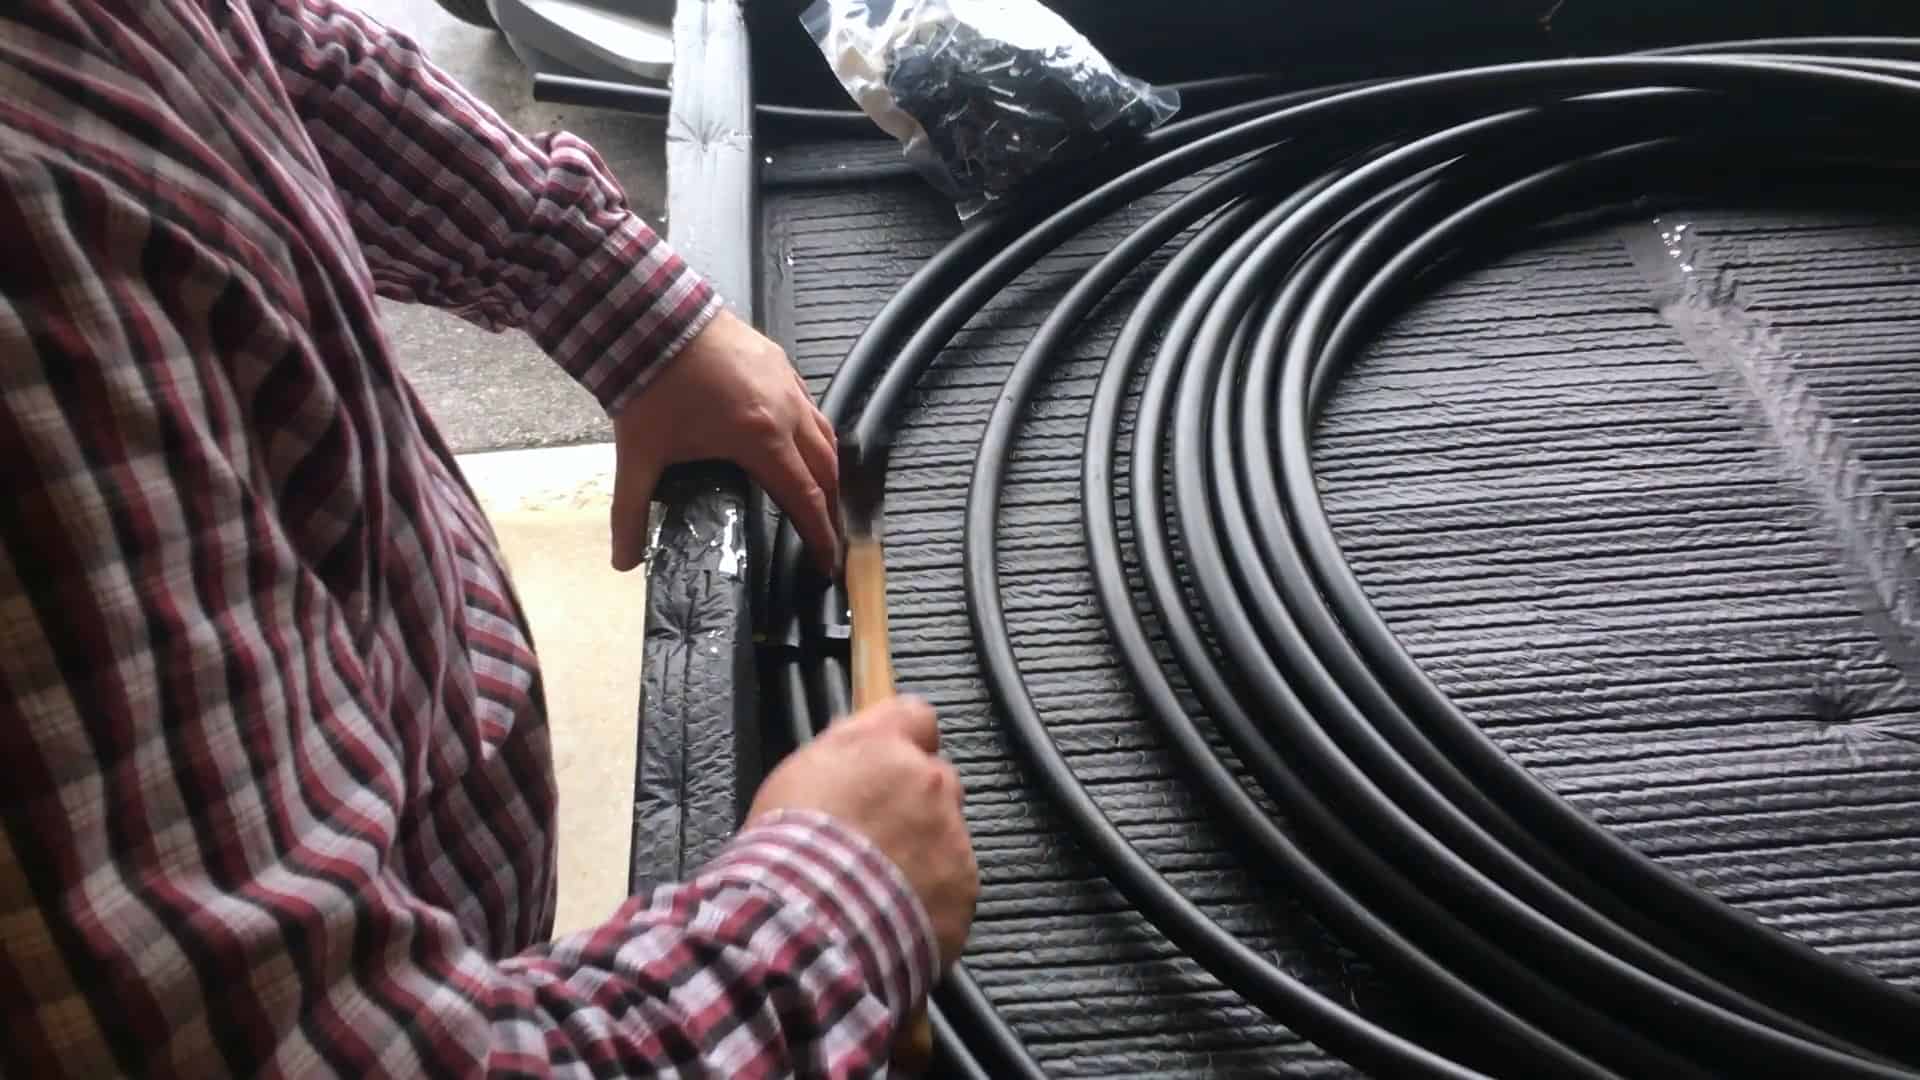
STEP 3 : INSTALLING THE PEX TUBES
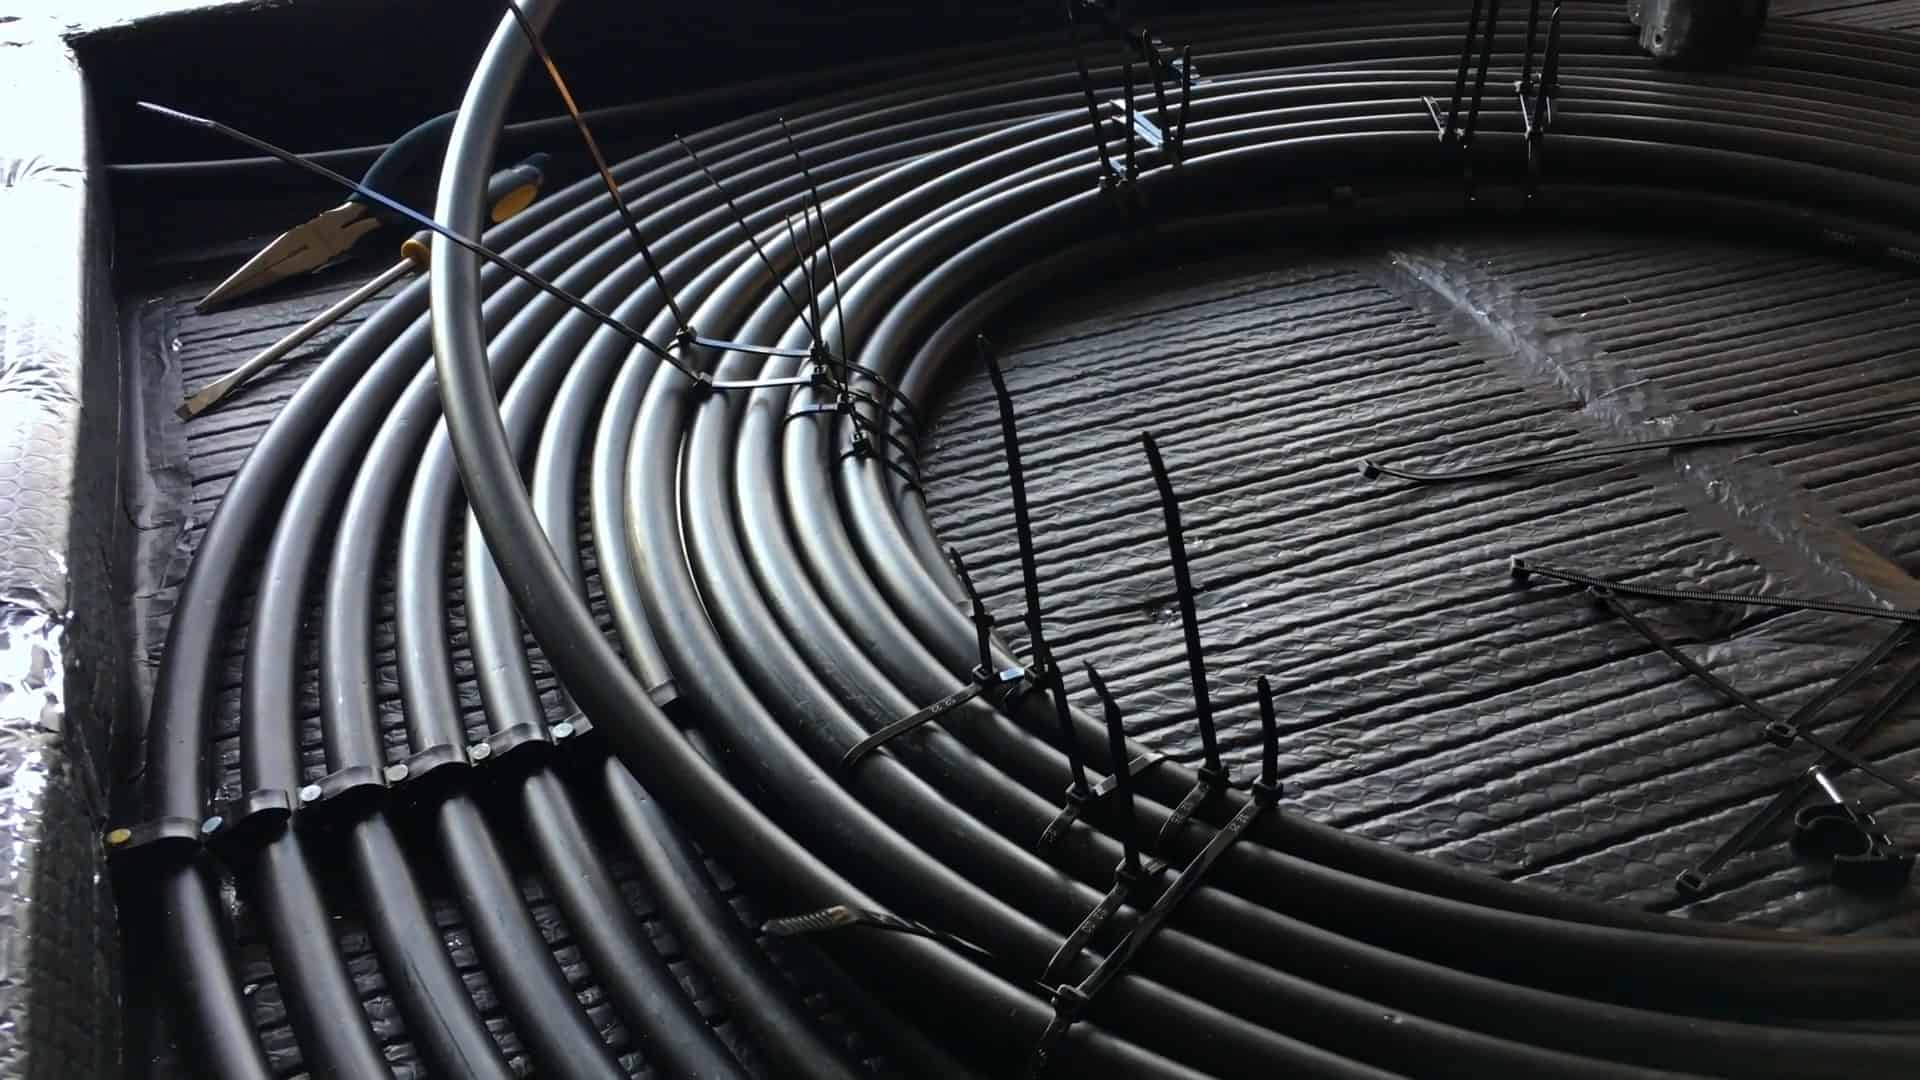
To start building the passive solar thermal water heater, the first step is to secure the pipes inside the heater box. You can use either half inch pex tubes or irrigation pipes for this project.
Whichever type of pipe you choose, ensure that they are strong and durable enough to withstand the pressure and heat.
To secure the pipes, start by installing the first layer of pipes using half inch pex talon clamps. These clamps are designed to hold the pipes securely in place and prevent them from shifting or moving around.
Install the clamps on all four sides of the box, securing each loop of the pipe to the box.
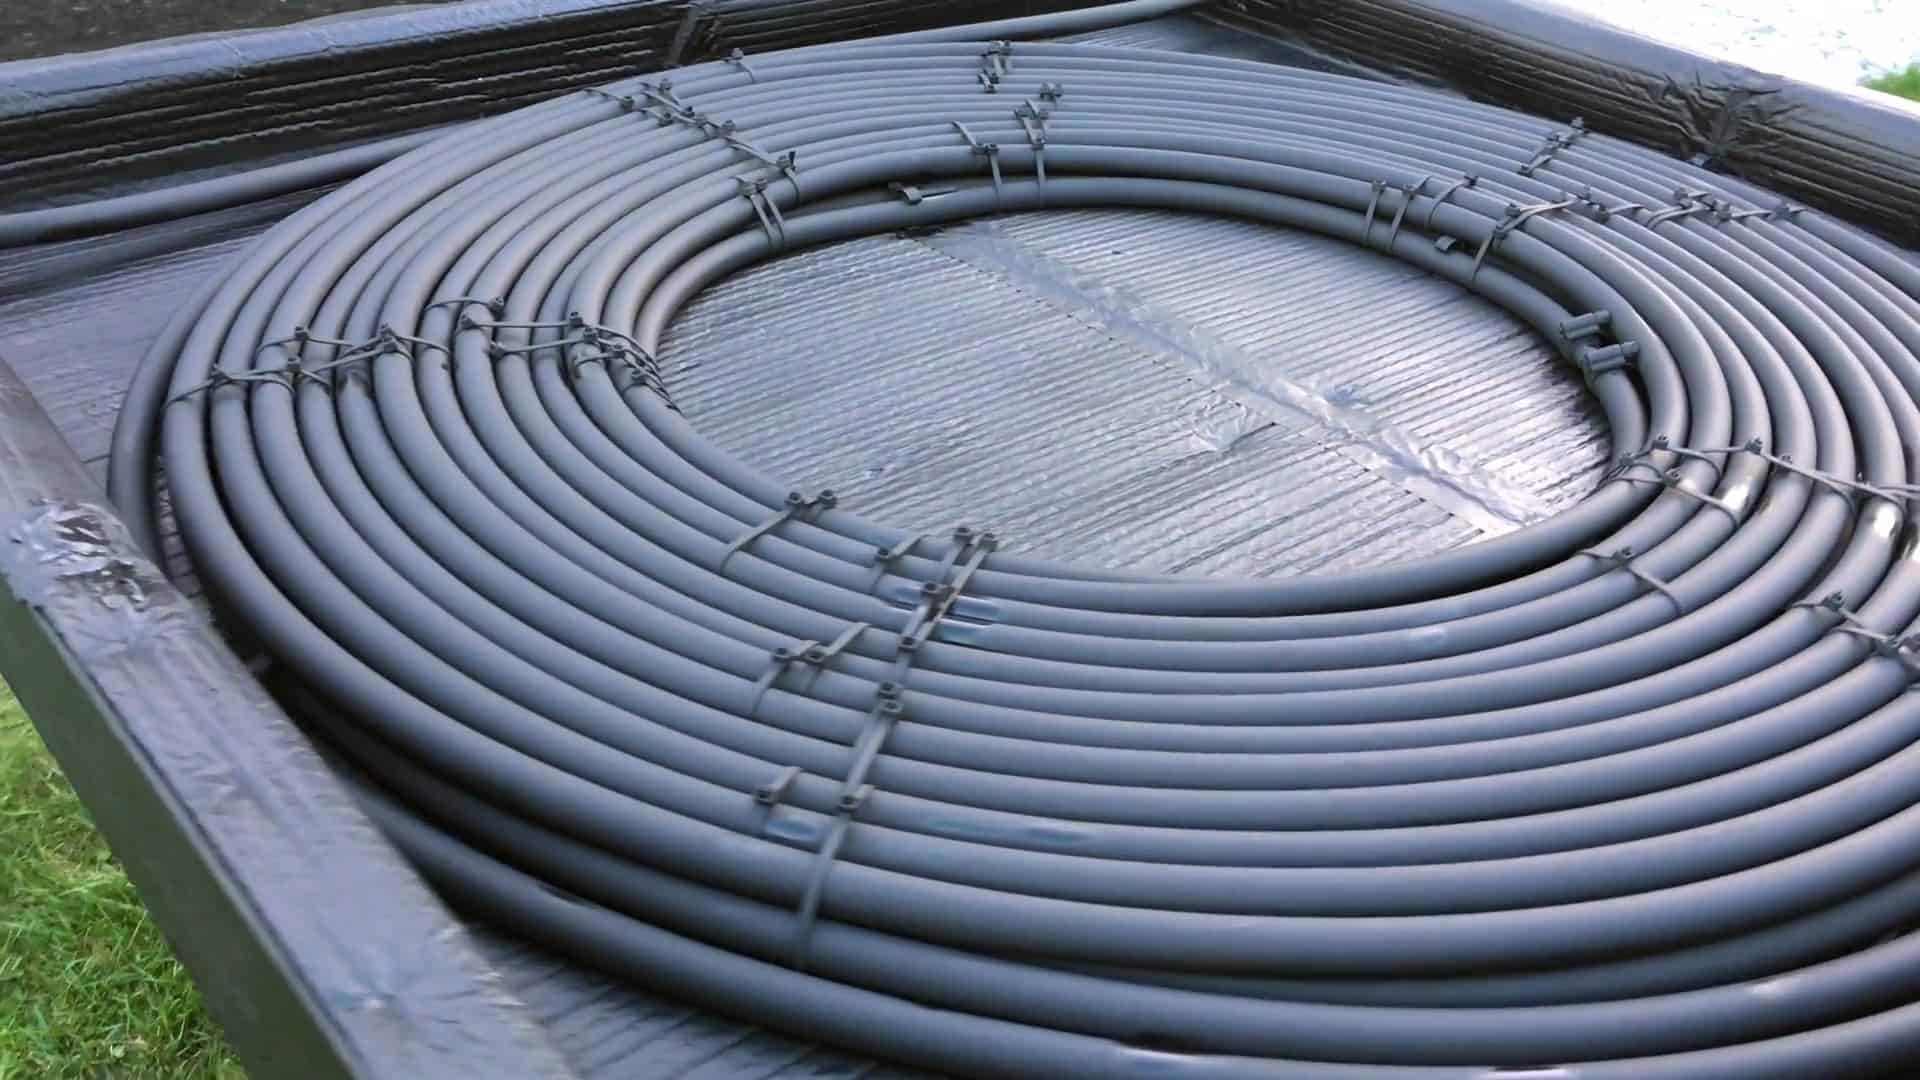
After installing the first layer of pipes, it’s time to add the second or upper layer. For this layer, you can use zip ties to secure the pipes to the box.
Make sure that the pipes are evenly spaced and arranged in a way that allows for maximum exposure to sunlight.
The total length of the pipe used in this project is 200ft, which is sufficient to absorb a significant amount of solar heat and transfer it to the water passing through the pipes.
Once inside, the pipe goes through the top layer and runs all the way to the outside before exiting through the outlet hole.
It is important to note that the bottom layer of pipes will not be exposed to the sun as much as the top layer, but they will still be warmed up because the entire box is covered with Lexan polycarbonate sheet.
The top layer of the pipe, which goes outside through the outlet hole, will have the highest thermal BTU. This means that the water running through this pipe will be heated the most and will be the hottest.
The two layers of pipes work together to ensure maximum heat transfer to the water, resulting in a highly efficient solar water heater.
STEP 4 : COVERING THE BOX WITH POLYCARBONATE SHEET
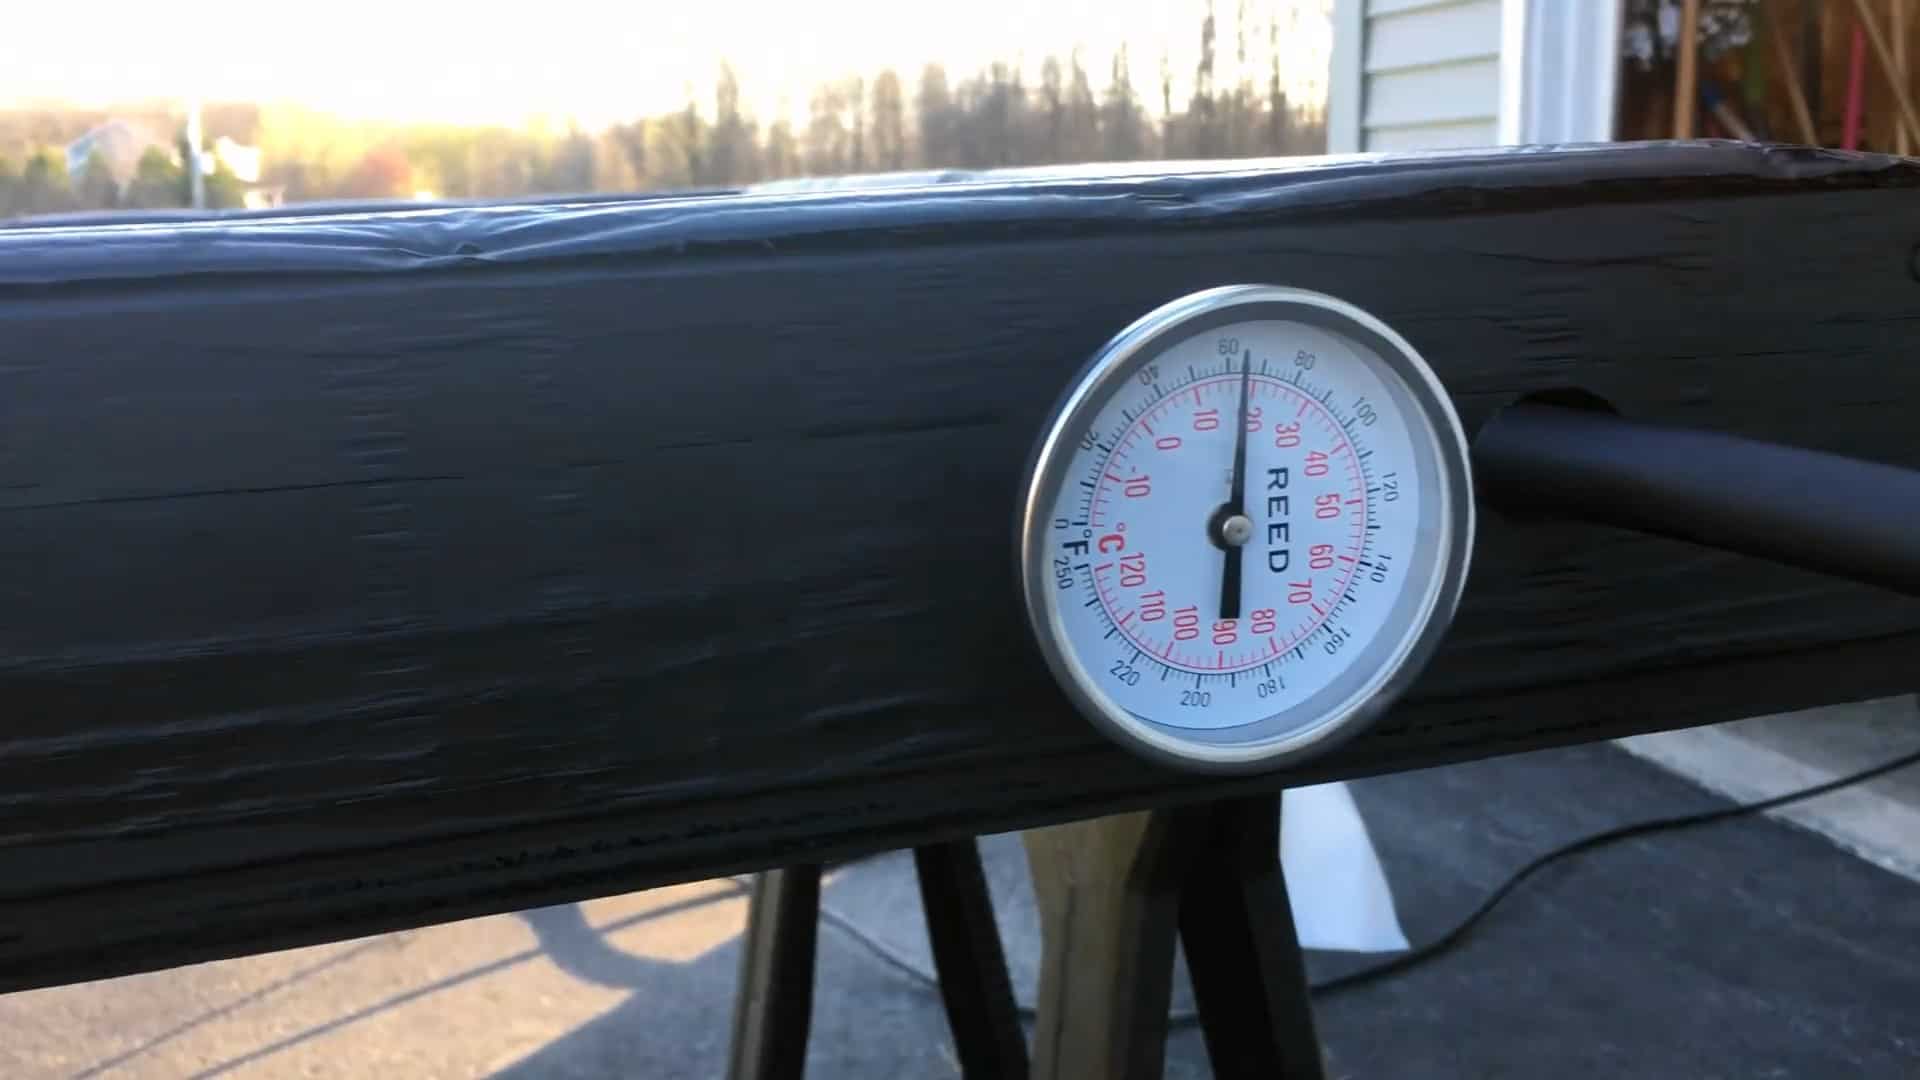
To ensure that the solar heater is functioning optimally, it is important to have a way of measuring the temperature inside the box.
This is achieved by installing a reed thermometer on the side of the heater. This thermometer has a 4-inch stem and is very affordable, making it a cost-effective way to monitor the temperature inside the heater.
To install the thermometer, a half-inch to three-eighths bushing reducer is used to attach it to the side of the box. The thermometer is carefully placed at a spot where it can accurately reflect the temperature inside the box.
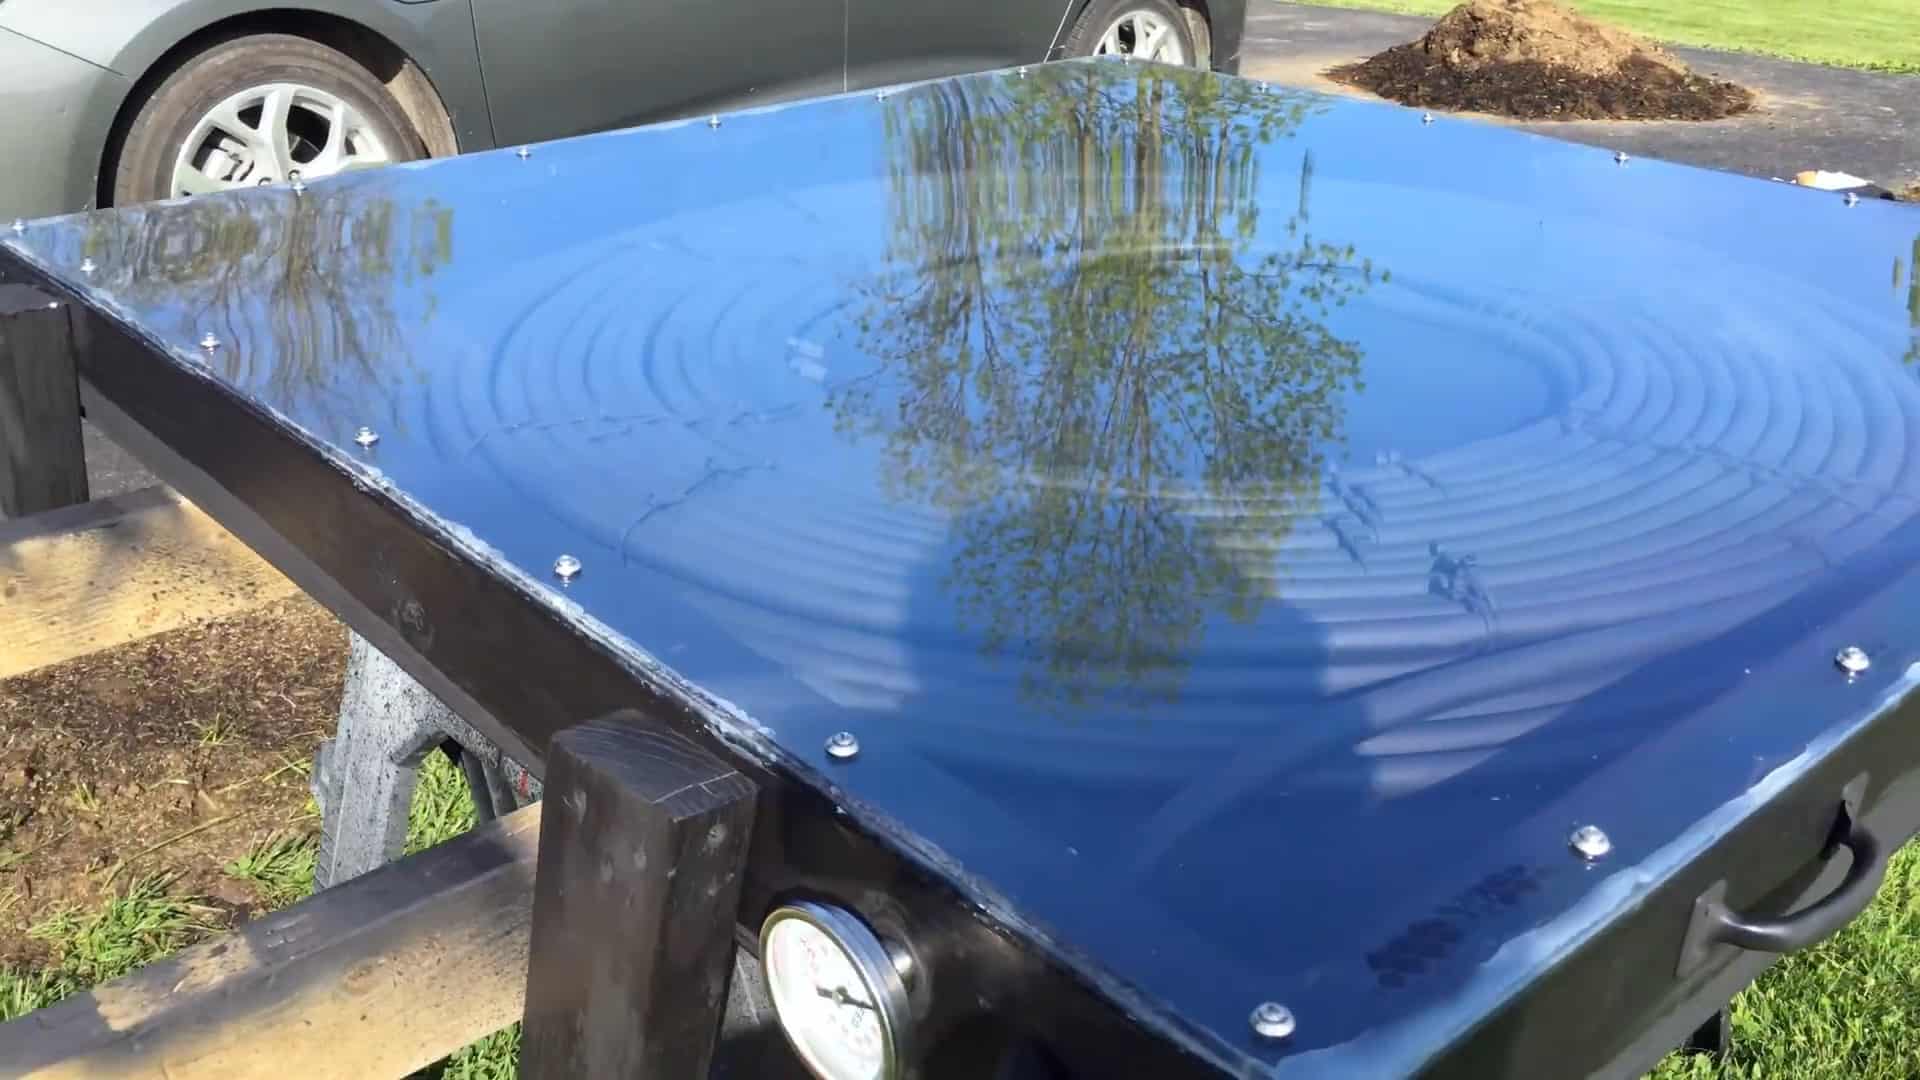
To protect the pipes and ensure that the solar heater is efficient in capturing the sun’s energy, a 4 X 8 Makrolon Polycarbonate Sheet is placed on top of the heater box.
This sheet is secured in place using No 8 One and one fourth sheet metal screws, finishing washers, and rubber grommets.
Silicone adhesive is then used to seal any gaps that may exist between the sheet and the box frame. This ensures that the heat generated inside the box
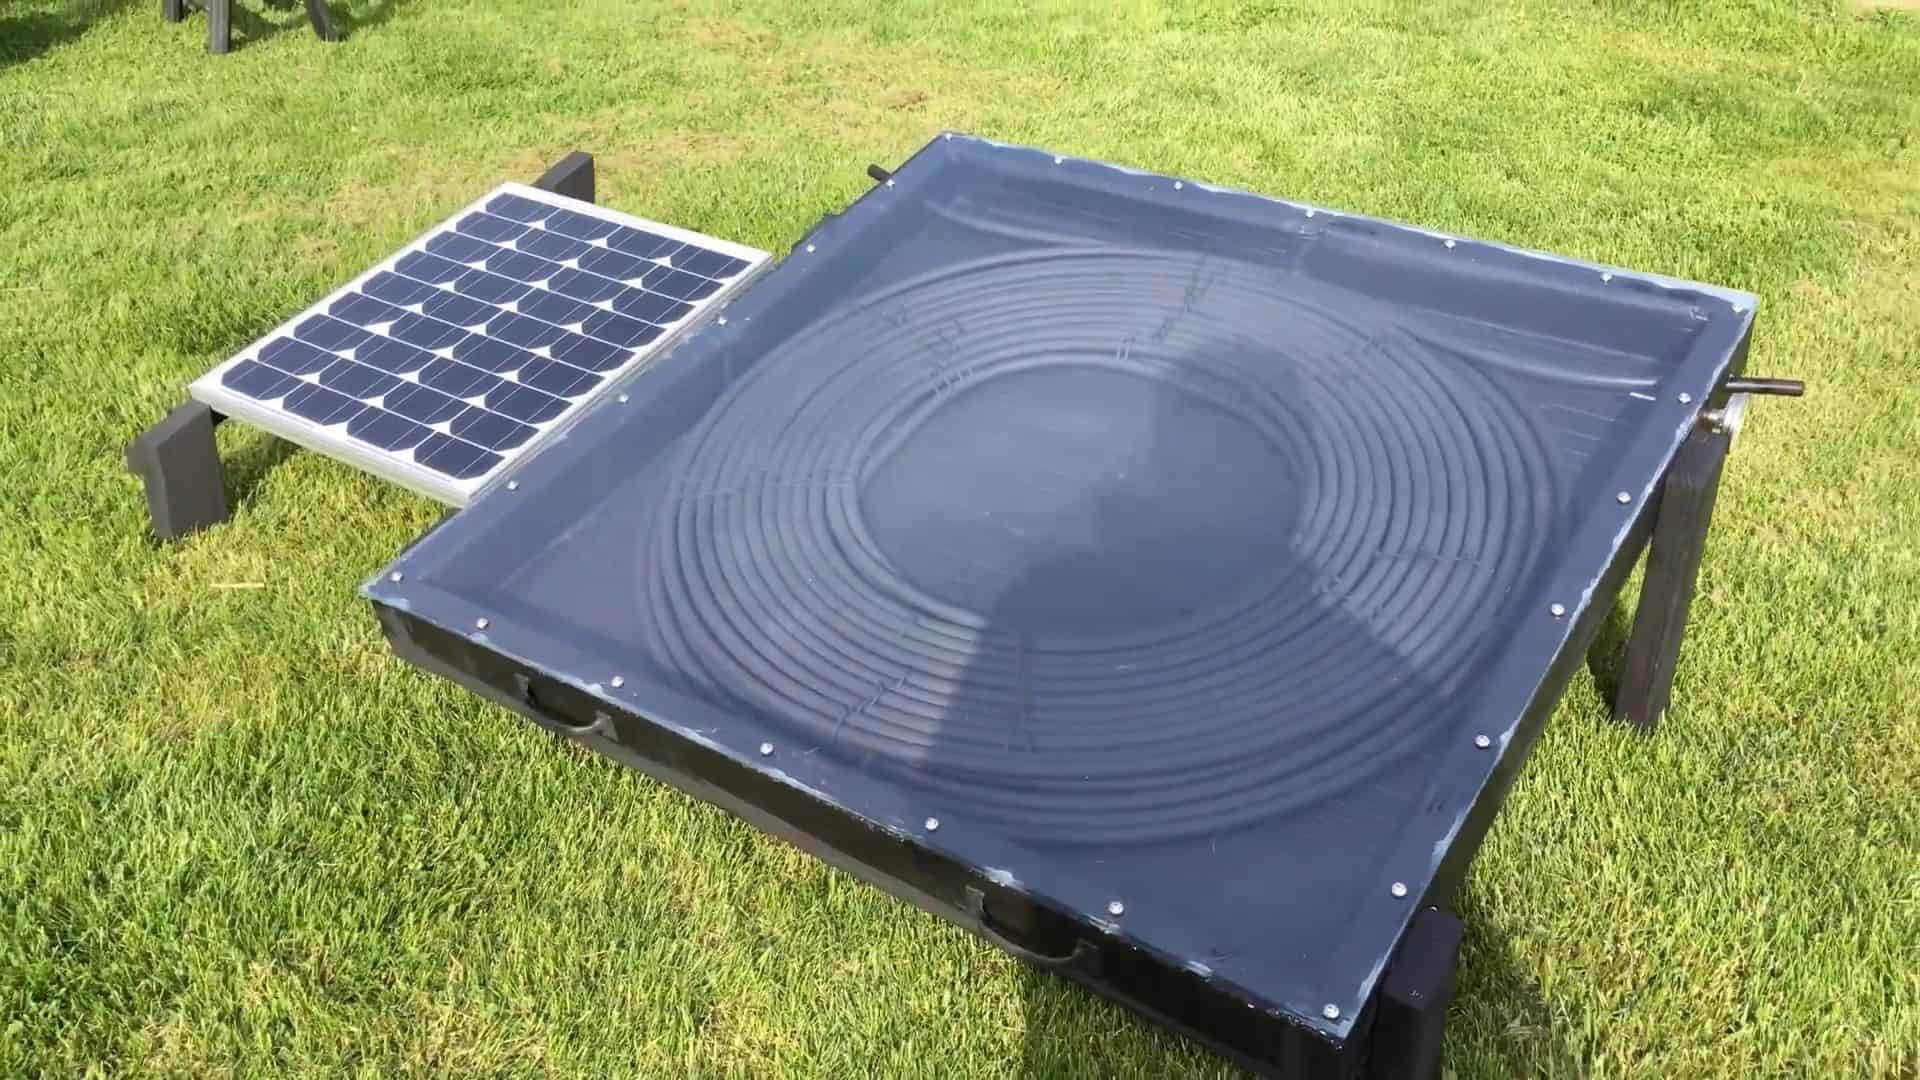
STEP 5 : ADDING SOLAR PANEL AND PUMP TO THE HEATER
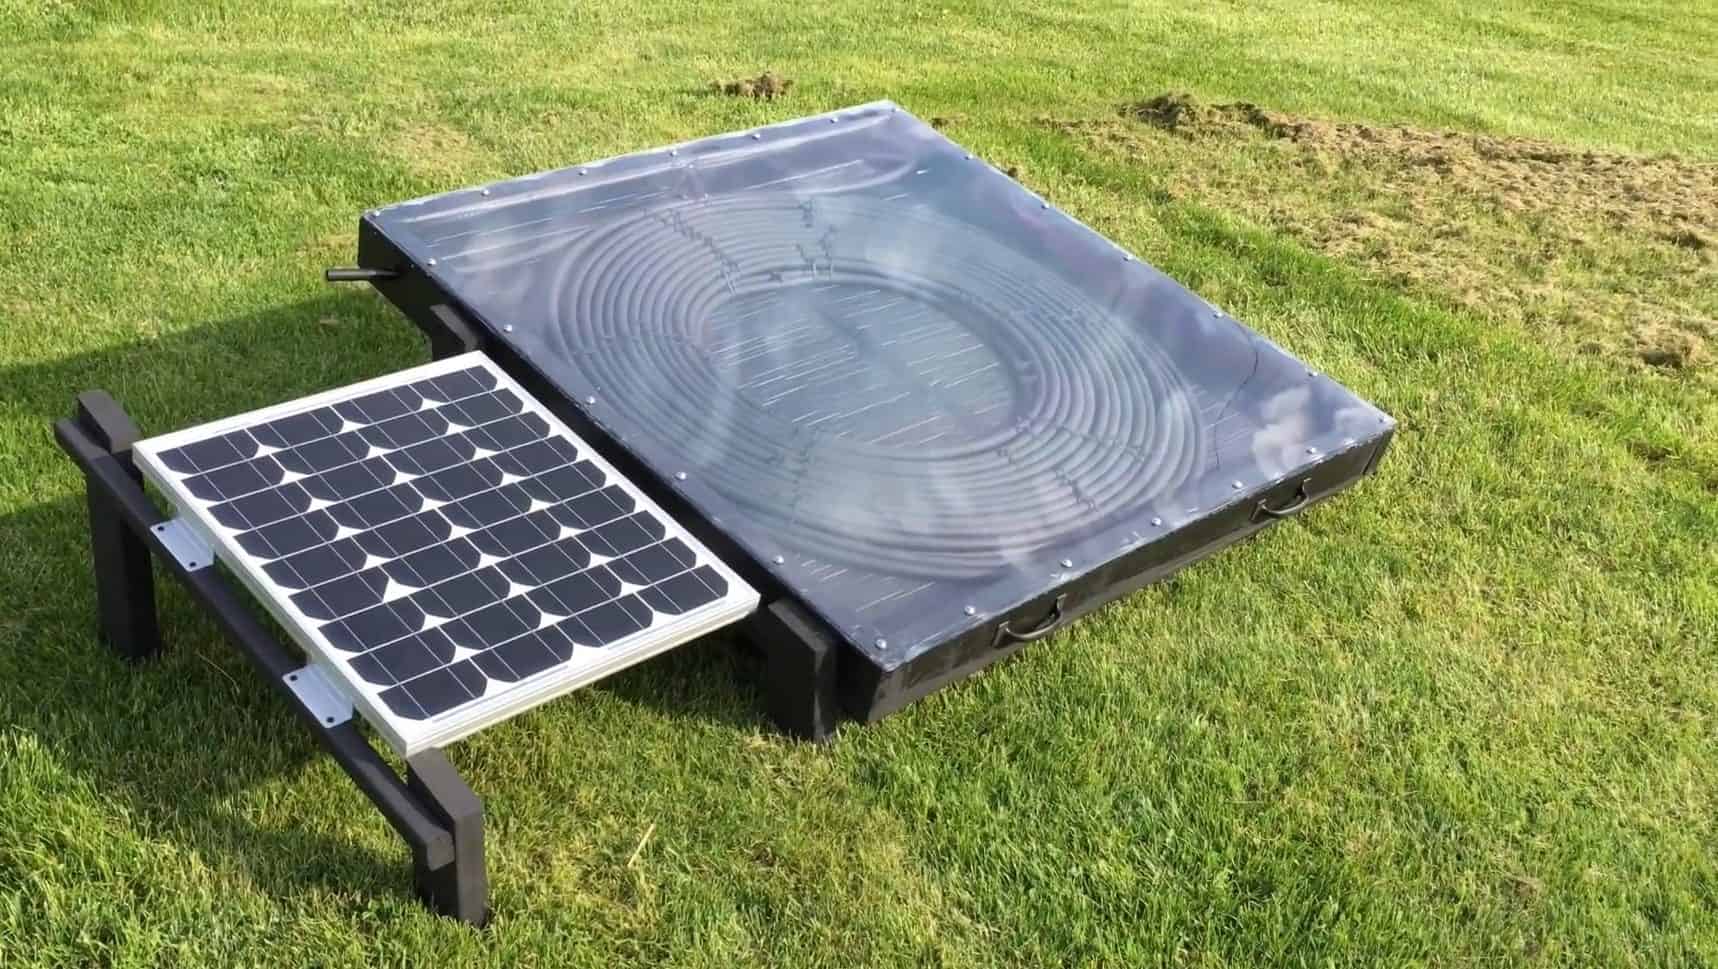
To optimize the solar thermal heater’s efficiency, it is installed at an angle of 20 degrees. This is achieved by creating leg supports using 16 and 8 inches 2 X 4 lumber pieces on both sides of the heater.
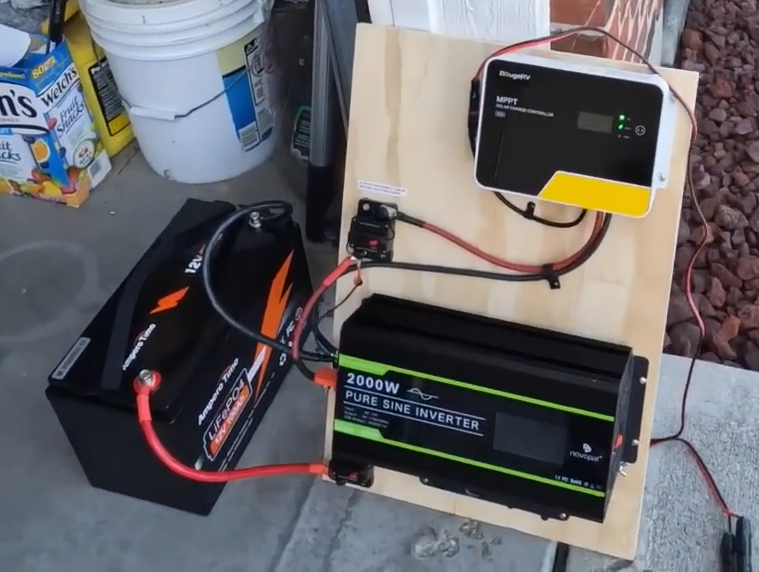
To power the bilge water pump, a 50-watt Renogy Solar Panel is installed next to the heater. This panel generates electricity to power the 500GPH 12V bilge pump, which pumps cold water through the pipes and into the heater.
To control the flow of water through the pump, a speed control electric circuit box is connected to the pump. The circuit box consists of a relay, a buck-boost converter, a motor pump speed controller, a potentiometer, and a switch.
The 50W Solar Panel powers the pump, with the negative connection from the panel connected to the relay and the positive to the switch.

The electrical system of the solar thermal heater is crucial for regulating the temperature of the water flowing through the pipes.
The relay plays a vital role in controlling the voltage of the system. It determines the voltage that the buck-boost converter needs to activate, which ensures that the system maintains a constant voltage output, regardless of the varying input from the solar panel.
The buck-boost converter is a crucial component of the system, as it regulates the voltage output from the solar panel.
It ensures that the voltage remains stable, even if the input from the panel fluctuates. This guarantees that the bilge pump is receiving a consistent supply of power, which is essential for maintaining a consistent flow of water through the pipes.
To control the speed of the bilge pump, a 15-amp motor pump speed controller is connected to the buck-boost converter.
The potentiometer is used to adjust the voltage output of the motor pump speed controller, which, in turn, regulates the speed of the bilge pump. This allows for precise control over the flow of water through the pipes, which is essential for maintaining the desired temperature.

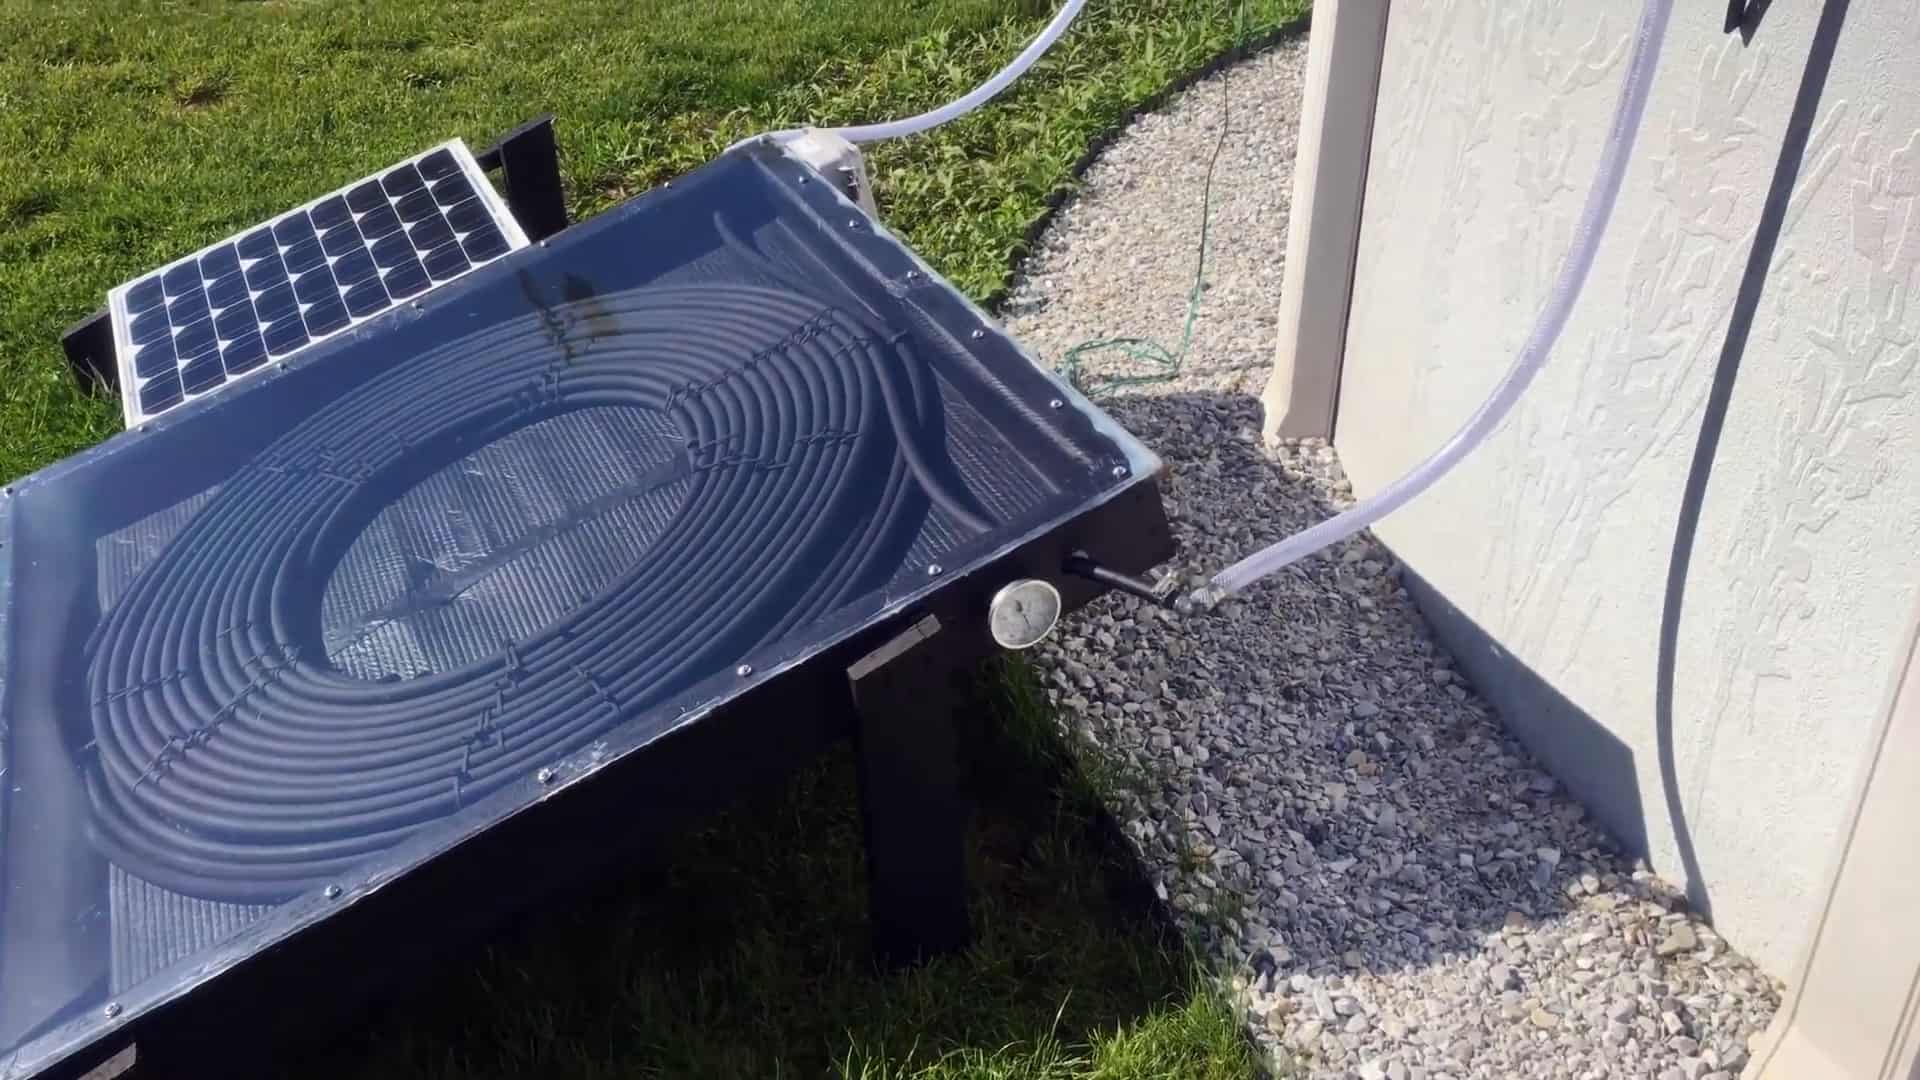
To test the efficiency of the solar thermal water heater, it was placed in close proximity to a swimming pool that needed heating.
The bilge pump was then submerged into the pool and connected to the heater using a PVC hose. The output PVC hose was then used to return the heated water back to the pool.
The solar panel was set up adjacent to the heater and was used to power the bilge pump. As the solar panel received sunlight, it powered the bilge pump which then pumped cold water through the pipes in the heater.
As the cold water flowed through the pipes, it was heated up by the sun and exited the heater at a much higher temperature. The heated water was then returned back to the pool via the output hose.
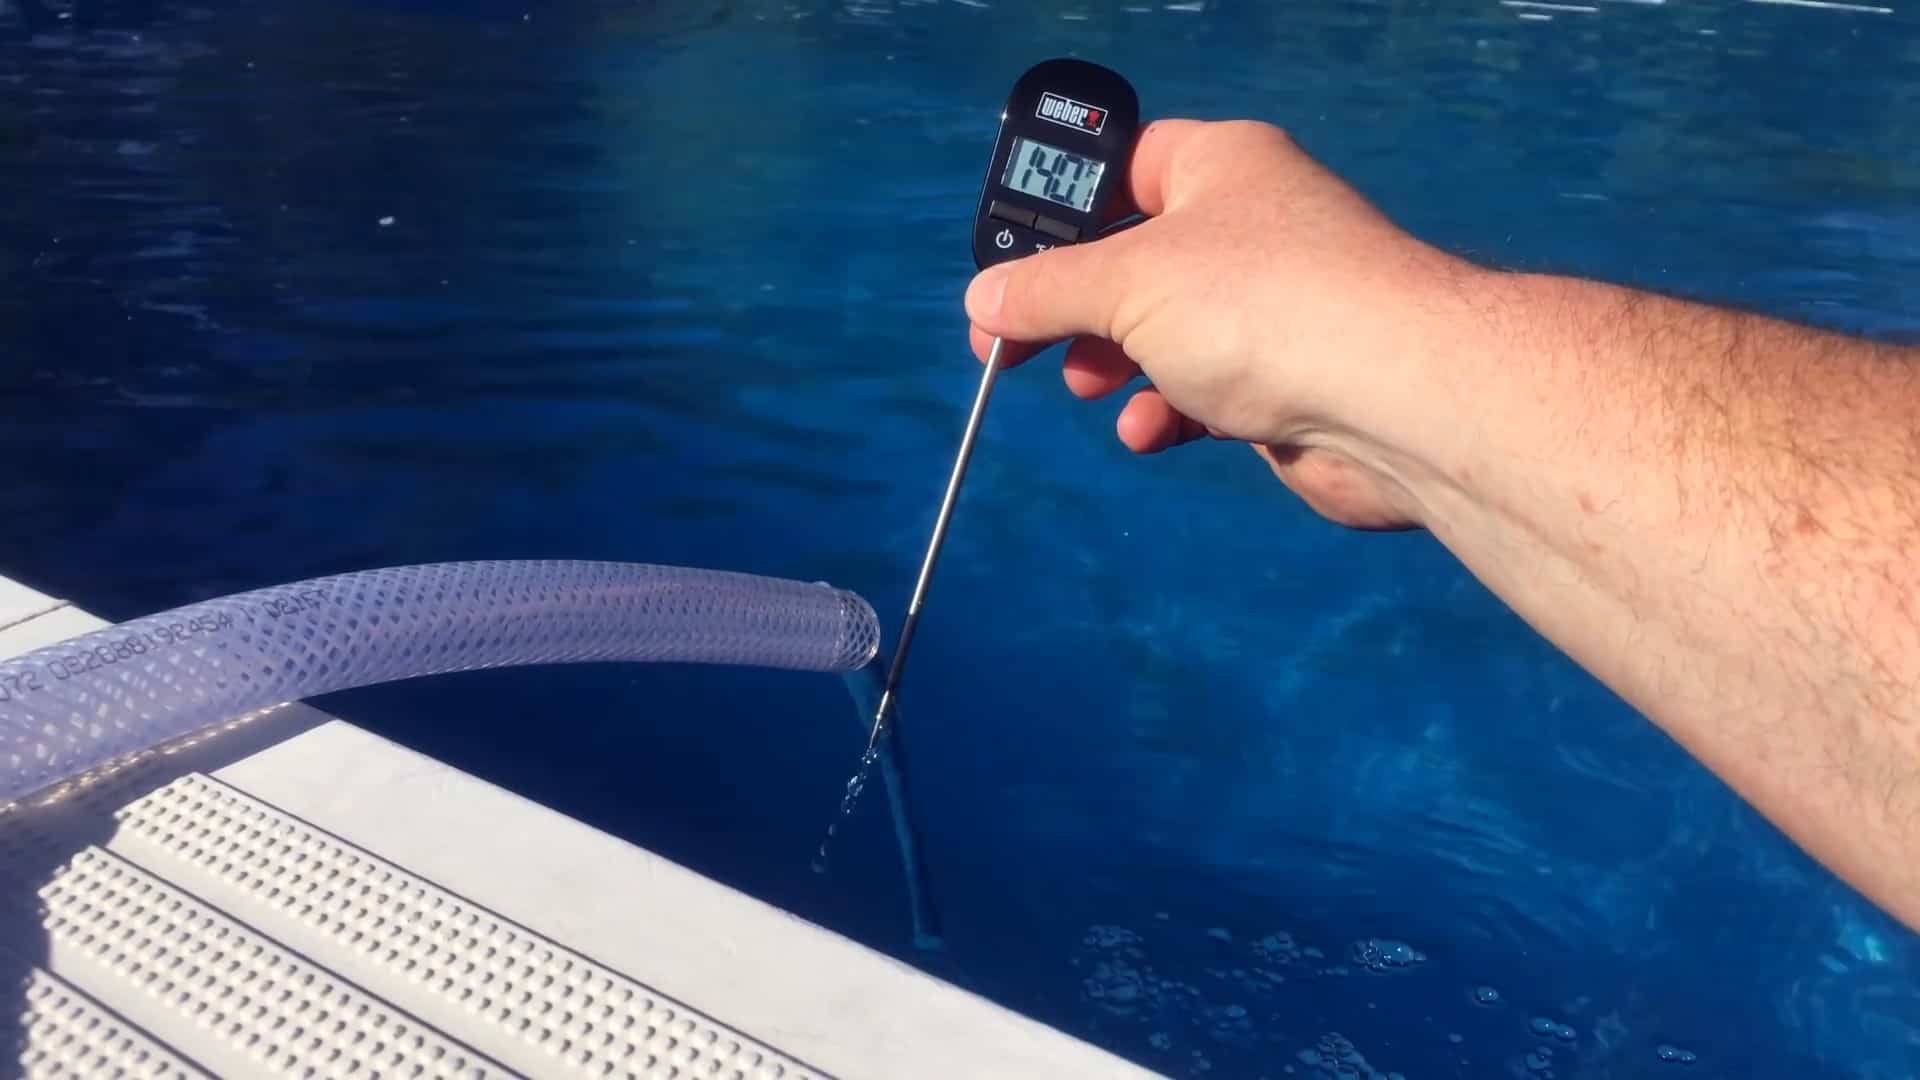
During the test, the water temperature inside the solar thermal water heater reached up to 120-150 F on a typical sunny day. This was achieved due to the use of durable and sturdy PEX pipes that are known for their excellent heat transfer properties.
The water that was pumped back into the pool was found to be at a comfortable 140 F temperature. This clearly demonstrated the effectiveness of the solar thermal water heater in efficiently heating up water.
In conclusion, building a DIY passive solar thermal water heater using pex pipes and a plywood box is a cost-effective and eco-friendly solution for meeting our heating needs.
With the ability to attain a temperature range of 120 – 150 F on a typical sunny day, this solar water heater can be used for domestic water, space or room heating, or even heating a swimming pool.
The flexibility in materials used for this project makes it accessible to anyone willing to minimize their carbon footprint and create a sustainable and efficient means of meeting their heating requirements.
Image Credits : Green Mountain DIY Guy