This project provides detailed instructions for constructing an affordable bio-sand water filtration system that is capable of removing pollutants from various sources such as streams, lakes, gutters, and well water.
Bio sand filters are highly effective in removing harmful microorganisms like parasites, bacteria, and protozoa viruses, as well as fine sediments from water sources.
FOUR STAGES OF PURIFICATION
The bio-sand water filtration system operates on four stages of purification that work in a sequential manner to remove harmful contaminants from the water.
The first stage, known as the biological zone, involves the growth of bacteria on the surface of the biozone. These bacteria feed on parasites, pathogens, and viruses, effectively eliminating them from the water.
The second stage, mechanical trapping, involves the attraction of sediment to porous rock. The sediment is then filtered out through absorption, which is the third stage.
The electrostatic charge of the sand in the filter attracts small particles and viruses down to the virus level. This effectively removes these harmful particles from the water.
The fourth and final stage is natural death from nutrient depletion. As the bacteria and viruses go through the sand, they eventually run out of nutrients to feed on, and as a result, they die off naturally.
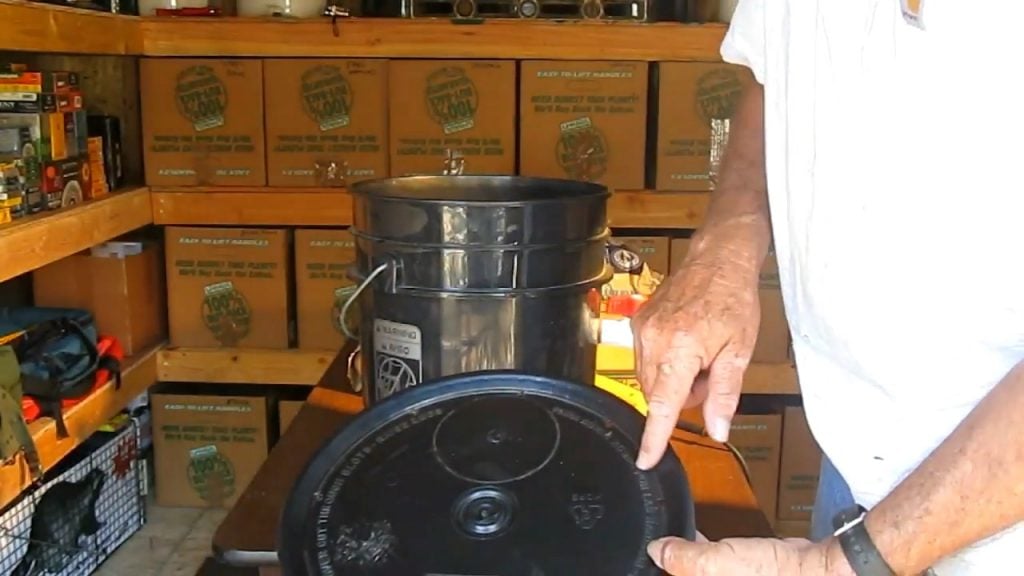
STEP 1 : STACKING THE BUCKETS
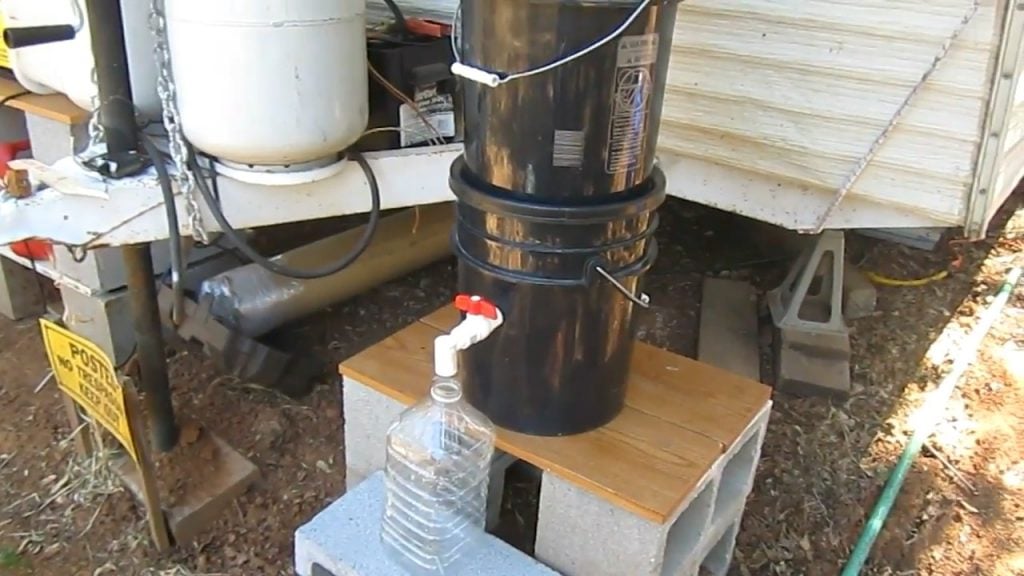
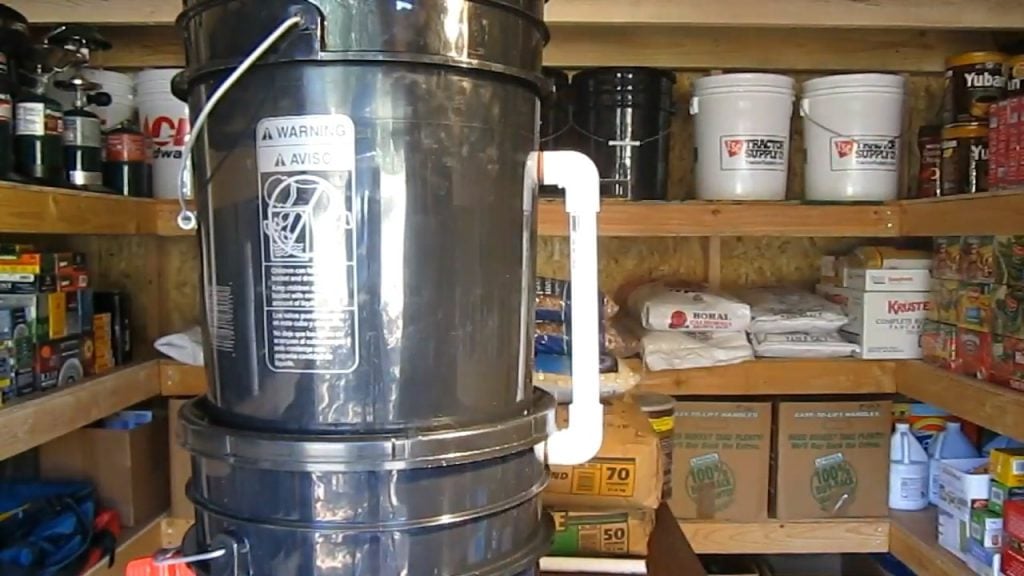
To construct the bio-sand water filtration system, you will need two five-gallon buckets. These buckets are typically used for storing food and are available in black color.
These buckets are preferred over opaque ones as they do not promote the growth of algae. The buckets are stacked one on top of the other, with the top bucket serving as the water storage container and the bottom one serving as the filter.
The top bucket is where the polluted water is initially stored, and from where it is eventually filtered through the bio-sand layer present in the bottom bucket.
STEP 2 : MAKING HOLES ON THE LID AND AT THE BOTTOM
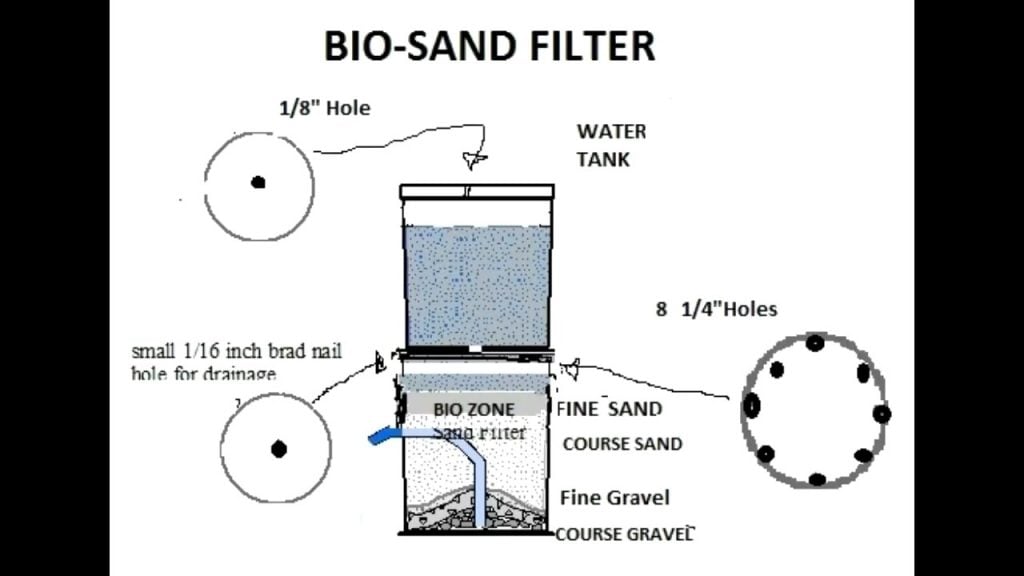
The top bucket of the bio-sand water filtration system features an eighth-inch hole on its lid. This hole serves an essential function of allowing water to flow freely without creating a vacuum.
Without this hole, the pressure inside the bucket would increase, hindering the flow of water to the lower bucket. The hole enables a smooth and continuous flow of water through the system.
On the other hand, the bottom bucket has a 16th of an inch hole at its bottom. This hole is strategically placed to allow the water to slowly drip out onto the top of the bottom bucket, where it comes into contact with the bio-sand layer.
STEP 3 : PROTECTING THE BIOZONE
The bottom bucket of the bio-sand water filtration system has eight one-quarter inch holes along the sides.
These holes serve to disperse the water over the top of the sand layer, allowing it to drip down onto the biozone without disturbing it.
This careful drip pattern ensures that the biozone is not disturbed or destroyed during the filtration process, resulting in effective removal of harmful contaminants.
It takes approximately three weeks to establish the biozone, during which period you need to feed some polluted water containing bacteria to help the biozone develop and grow.
This feeding process allows the bacteria to establish and multiply, ultimately leading to the effective removal of parasites, bacteria, protozoa viruses, and fine sediments from the water.
To ensure proper distribution of bacteria in the bio-sand water filtration system, a large circular ring can be placed in the center of the biofilter.
This ring serves to distribute the bacteria off to the side, ensuring even distribution of bacteria throughout the sand layer.
This even distribution is essential to the functioning of the filtration system, as it relies on bacteria that form on the top of the sand to eat other bacteria such as Giardia and Cryptosporidium.
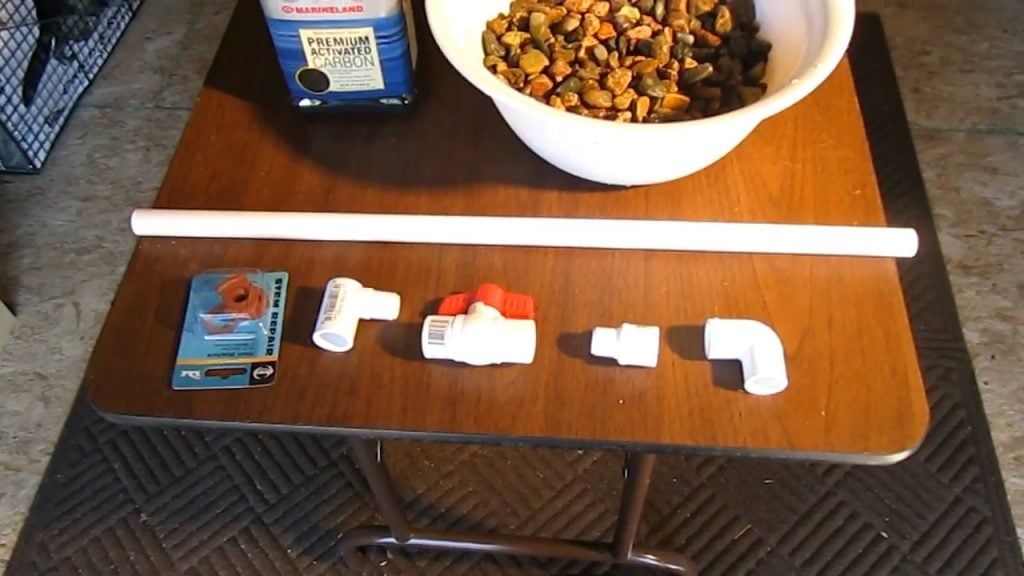
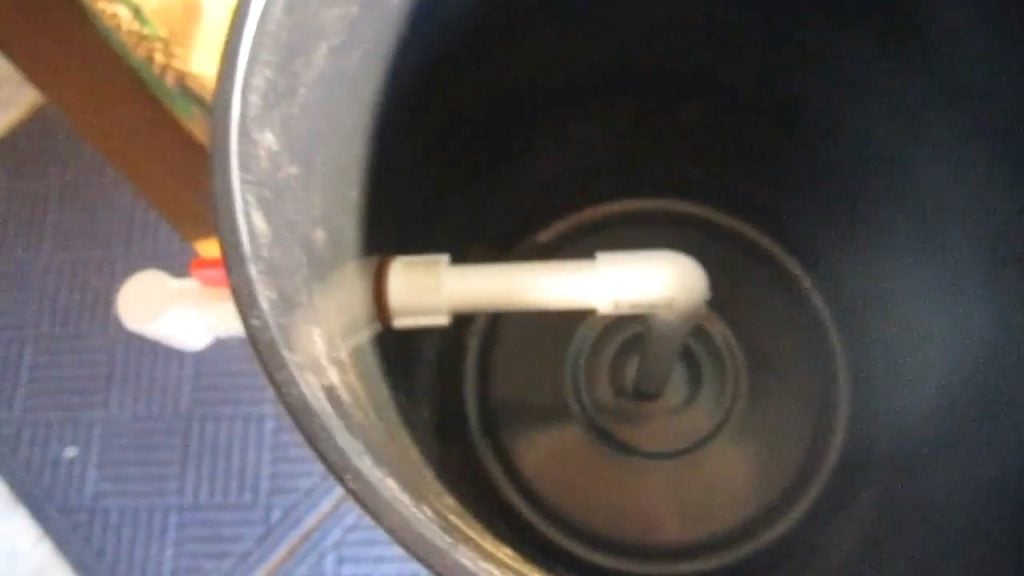
STEP 4 : ADDING THE CENTER PIPE
In the bio-sand water filtration system, a pipe is placed at the center of the system to prevent sand from entering the faucet and ultimately contaminating the drinking water.
This pipe is an essential component of the filtration system, as it serves to keep the sand layer separate from the purified water.
Without this pipe, there is a risk that the sand layer could be disturbed, allowing it to enter the faucet and ultimately the drinking water.
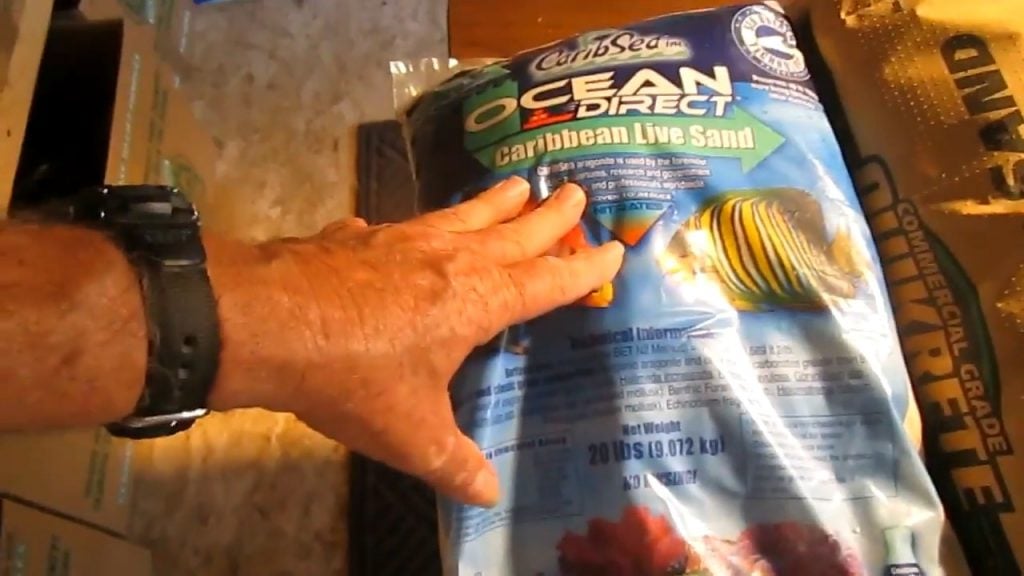
STEP 5 : TWO LAYERS OF SAND
The bio-sand water filtration system comprises two distinct layers of sand. The first layer, which is the biozone, is designed to promote the growth of bacteria, which are responsible for removing harmful contaminants from the water.
This layer comprises a couple of inches of fine sand, which provides an ideal environment for the bacteria to grow and thrive.
Underneath the biozone is a second layer of sand, which serves as a mechanical filter to remove sediment and other bacteria from the water.
This layer comprises a coarser sand, which is selected for its ability to trap and filter out harmful particles from the water.
At the very bottom of the filtration system is a layer of fine pea gravel, which serves as a final layer of filtration before the purified water is collected in the bottom bucket.
This layer is designed to filter out any remaining particles or contaminants that may have passed through the sand layers.
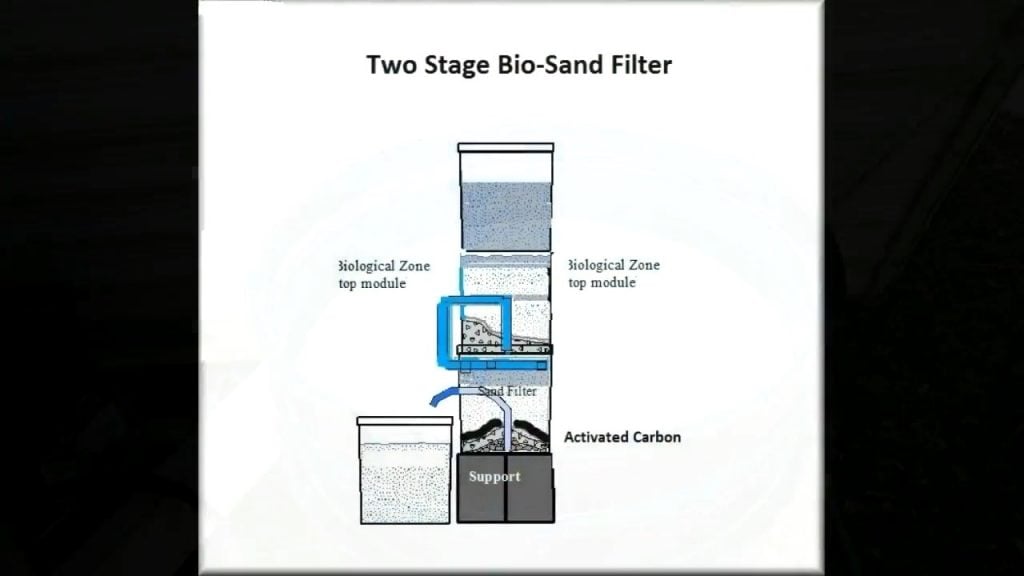
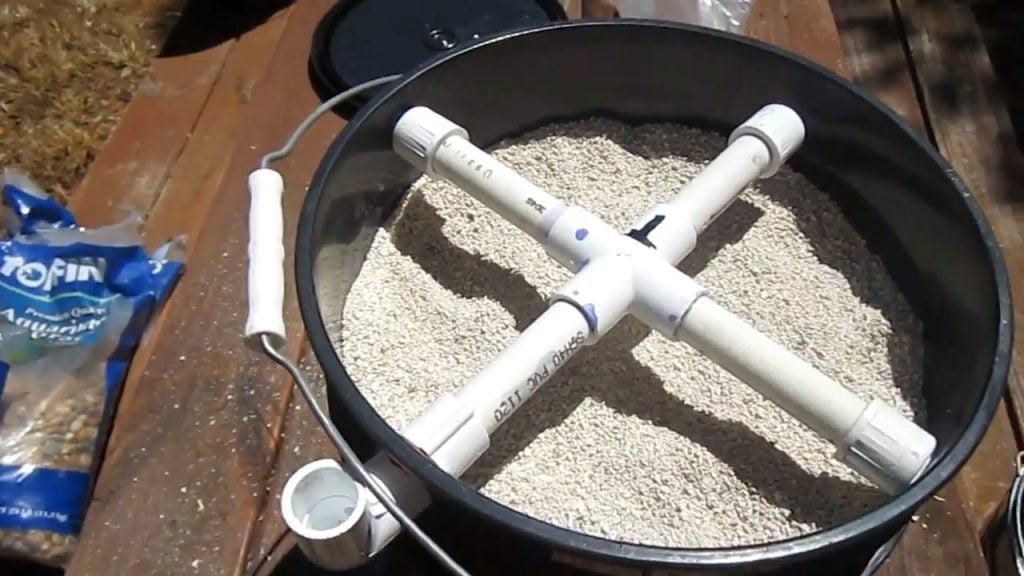
STEP 6 : ADDING A FOUR WAY DISTRIBUTION PIPE
The second stage of the bio-sand water filtration system involves the construction of a 4-way distribution pipe using PVC pipes and a four-way coupler.
This pipe serves to distribute the water evenly over the top of the sand layer, ensuring that the water is not concentrated in one spot and trickling down one side or the center.
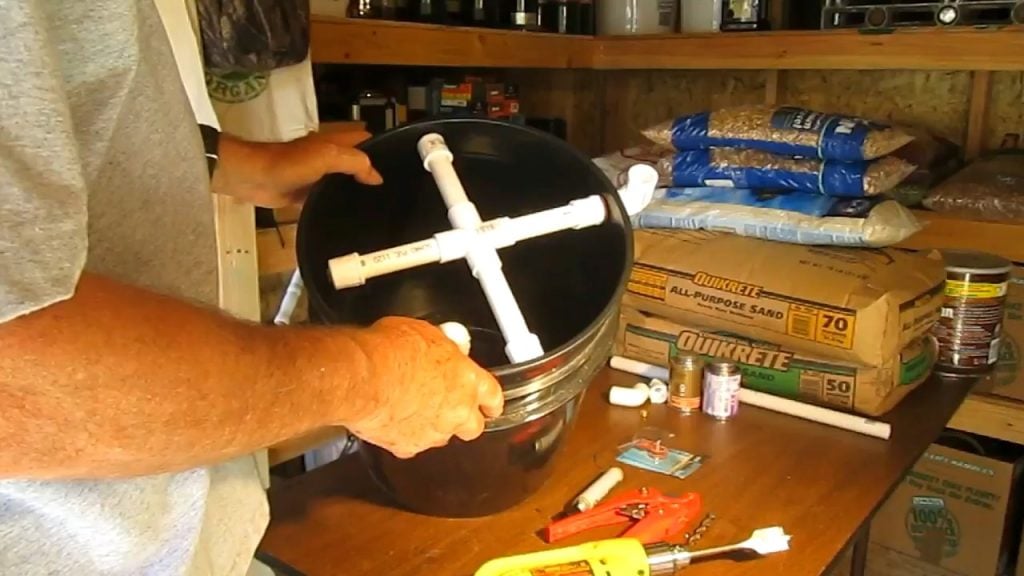
To achieve this even distribution of water, holes are cut in the distribution pipe, one towards the end and the other towards the center.
This allows water to flow out of the pipe in multiple directions, resulting in a more uniform distribution of water over the top of the sand layer.
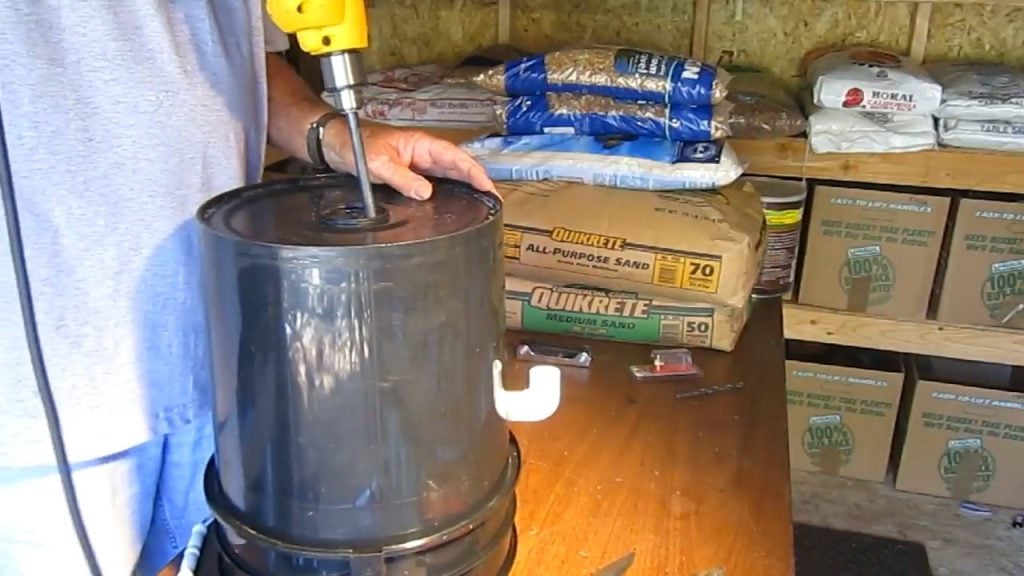
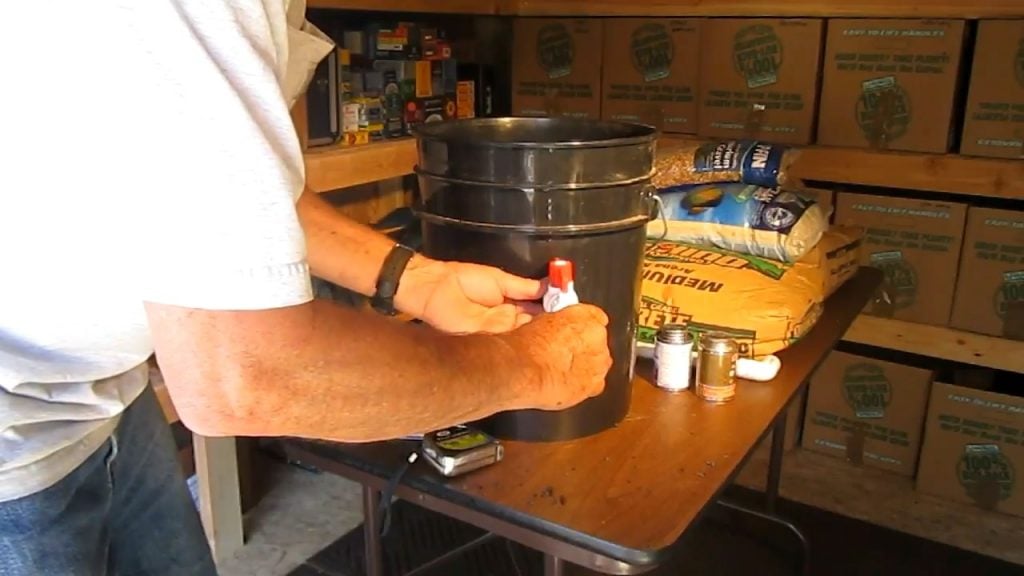
To ensure the bio-sand water filtration system is easy to maintain, a hole is drilled at the bottom of the second bucket, and a quarter-inch brass drain plug is inserted.
This drain plug serves as a convenient method to drain water out of the buckets for storage or flushing purposes.
STEP 7 : STARTING THE SECOND STAGE
The second stage involves the addition of three levels of gravel and three levels of sand. Each layer of gravel is two to three inches thick, and each layer of sand is also two to three inches thick.
On top of the last layer of fine gravel, one inch of activated carbon is added. This carbon layer serves to remove any remaining impurities from the water, resulting in high-quality purified water that is safe for consumption.
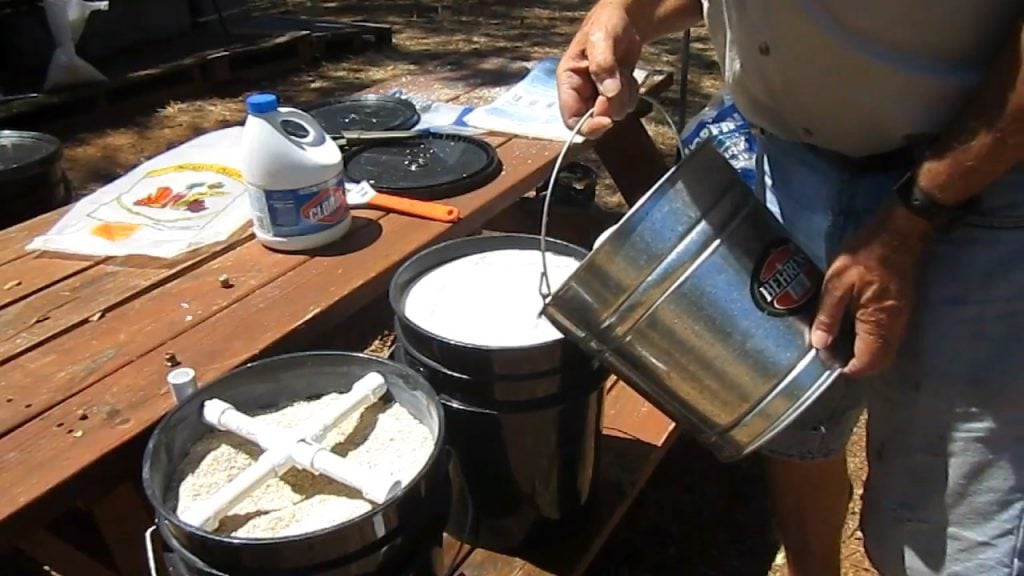
Before adding the activated carbon layer, both filters are treated with chlorinated water and fresh water, and allowed to sit for a few minutes.
This treatment serves to sterilize the filters and ensure that any harmful bacteria or viruses are effectively removed from the system.
Once the second stage filter is complete, it is stacked on top of the first stage filter, ensuring that the entire setup is tightly sealed.
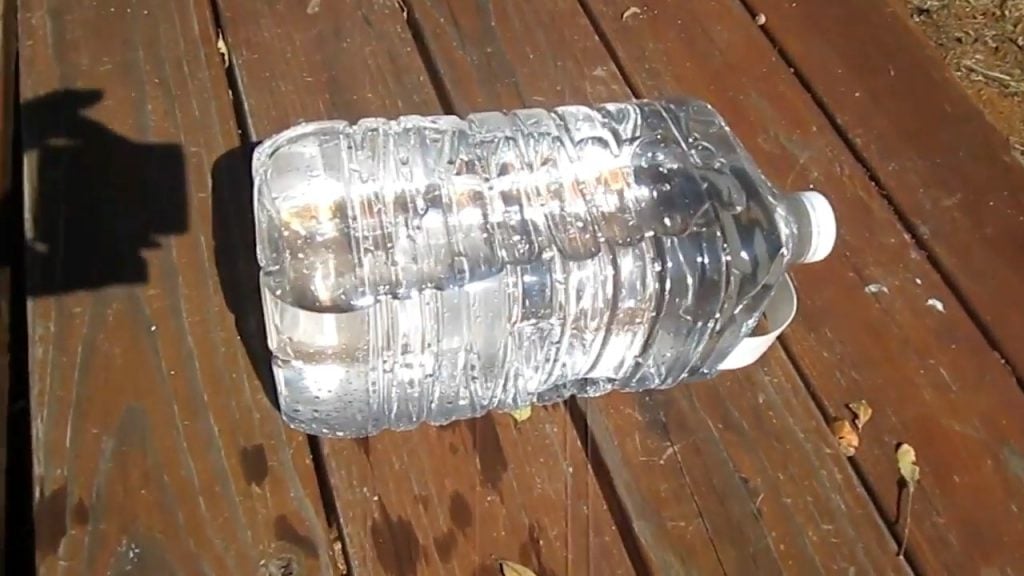
In addition to the filtration system, the bio-sand water filtration system can also use the natural power of the sun to further purify the water.
By letting the purified water sit under the sun, the ultraviolet rays present in sunlight can further purify the water by eliminating any remaining bacteria that might be present.