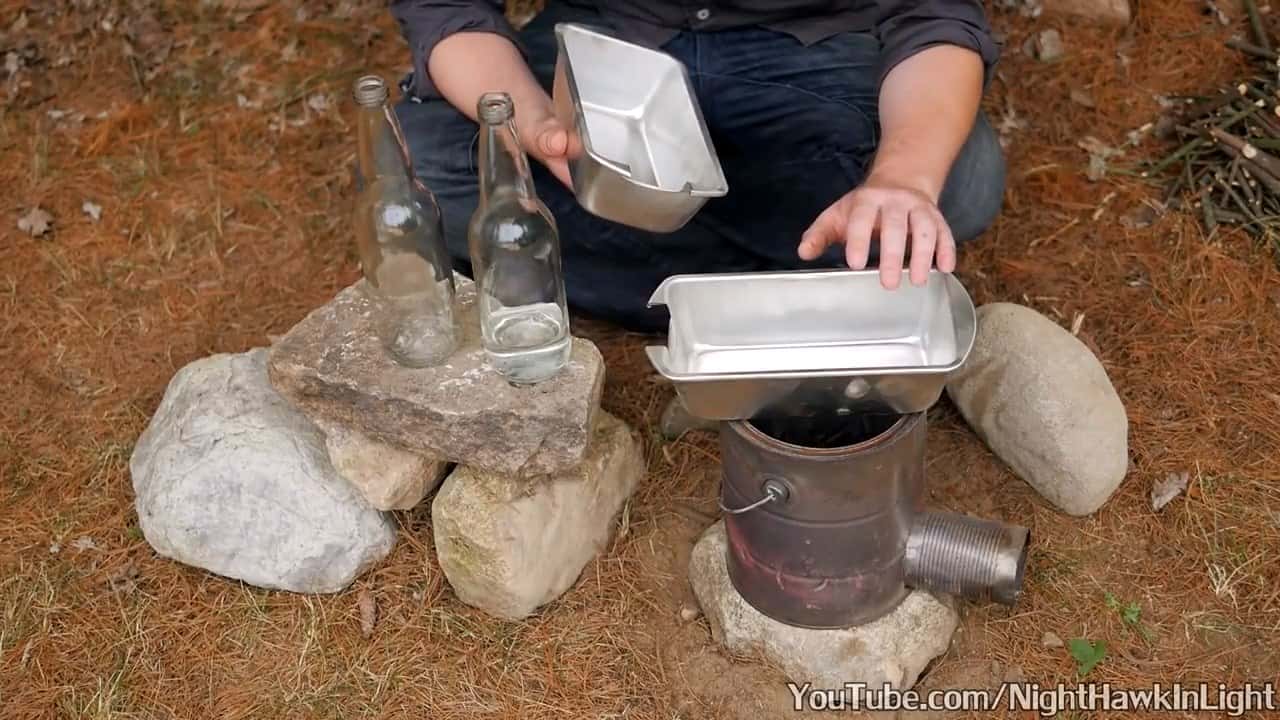
STEP 1 : MATERIALS REQUIRED
In situations where fresh water is not readily available, having access to a survival water distillation system can be a life-saving solution.
This article provides detailed instructions on how to build a simple and effective water distillation system using basic materials such as glass bottles, metal trays, and sand, all of which can be obtained inexpensively.
The metal trays act as heat sinks and help to maintain an even temperature during the distillation process.
With this system, it is possible to turn saltwater into drinkable freshwater, making it an ideal solution for those who live near coastal areas or find themselves stranded in a survival situation near saltwater sources.
STEP 2 : PREPARATION
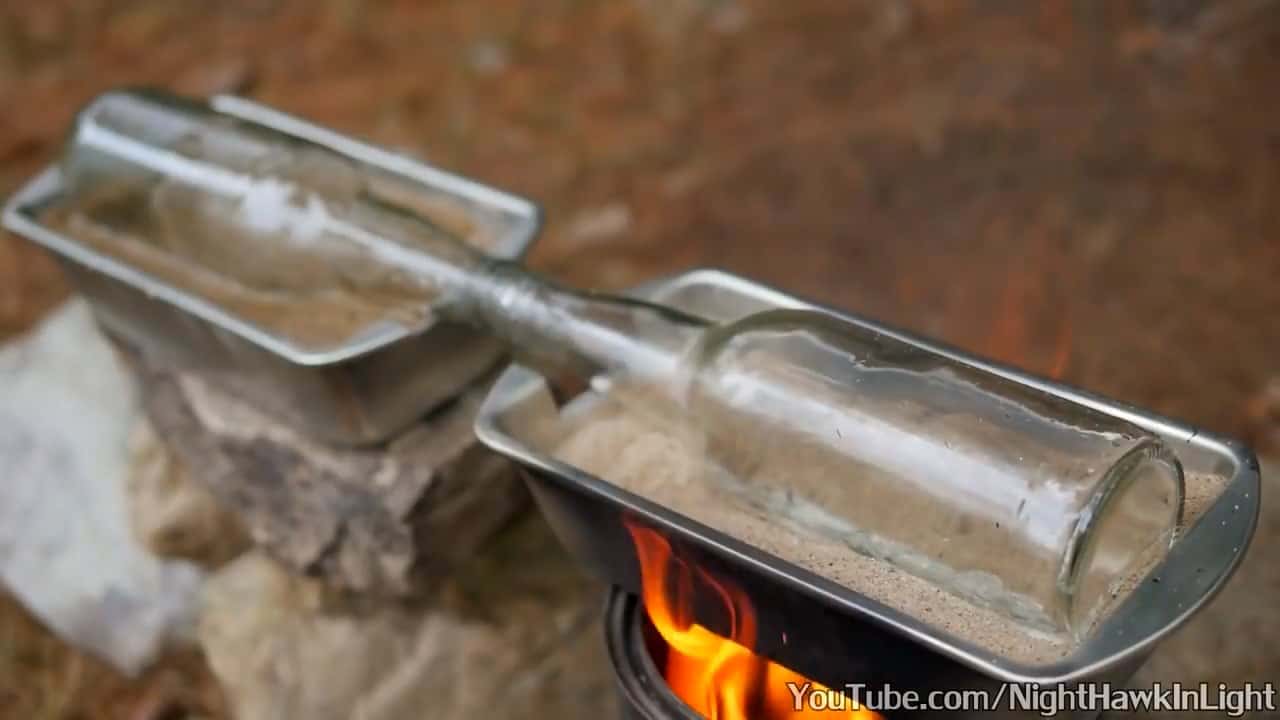
The two glass bottles must be carefully positioned in a mouth-to-mouth configuration, with one bottle suspended above a heat source.
The selection of a safe and appropriate heat source, such as an open campfire, is imperative for successful distillation.
Proper support using rocks or logs must be provided to securely suspend the bottle over the heat source, and safety precautions such as wearing heat-resistant gloves should be taken to ensure safety while handling the glass bottles.
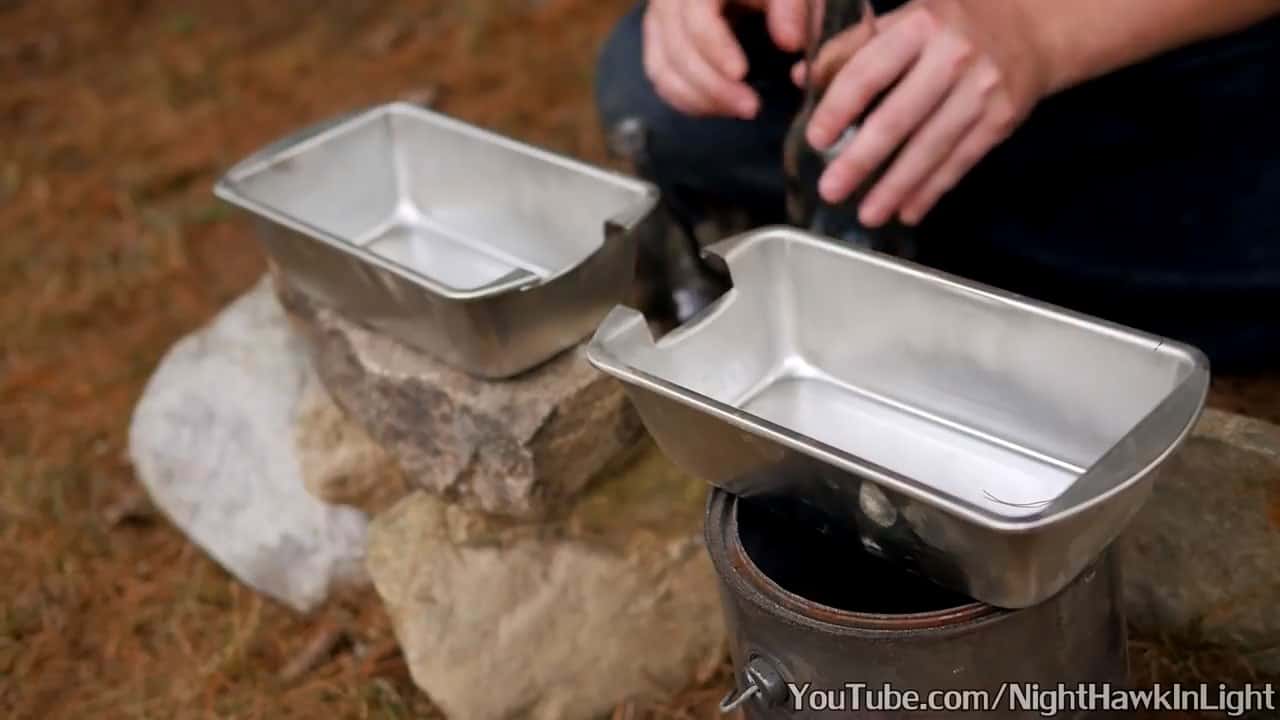
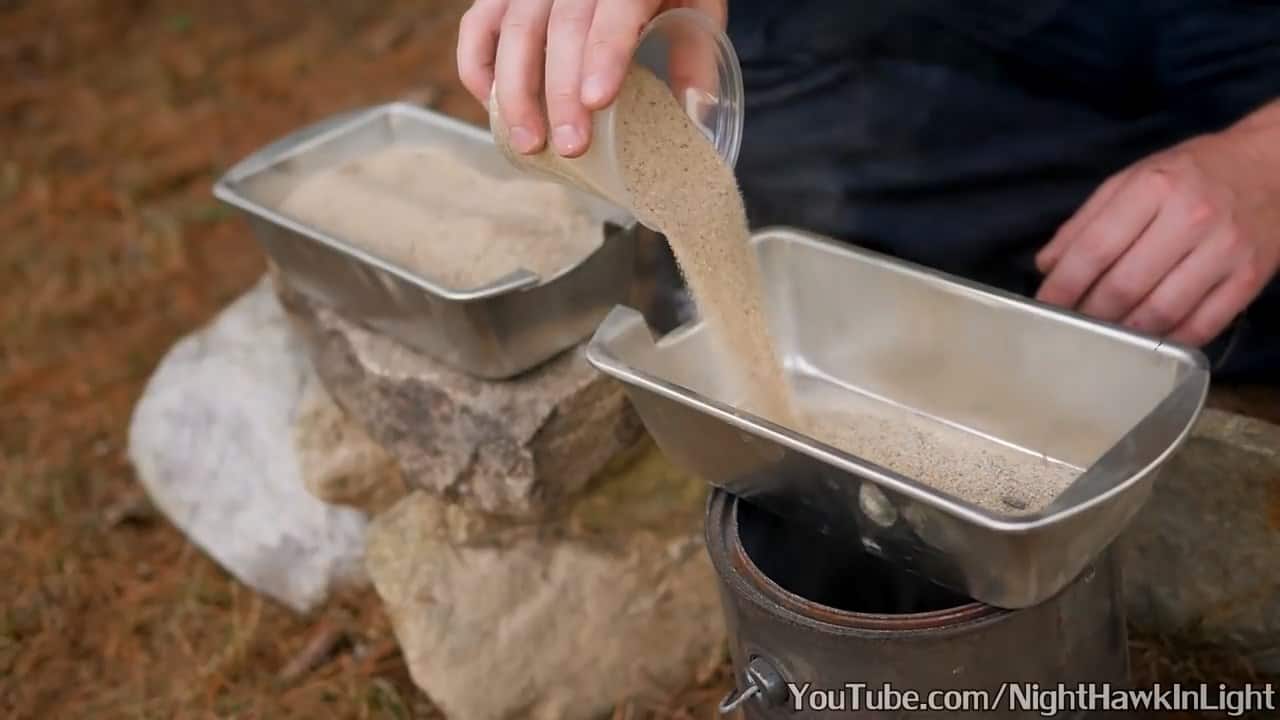
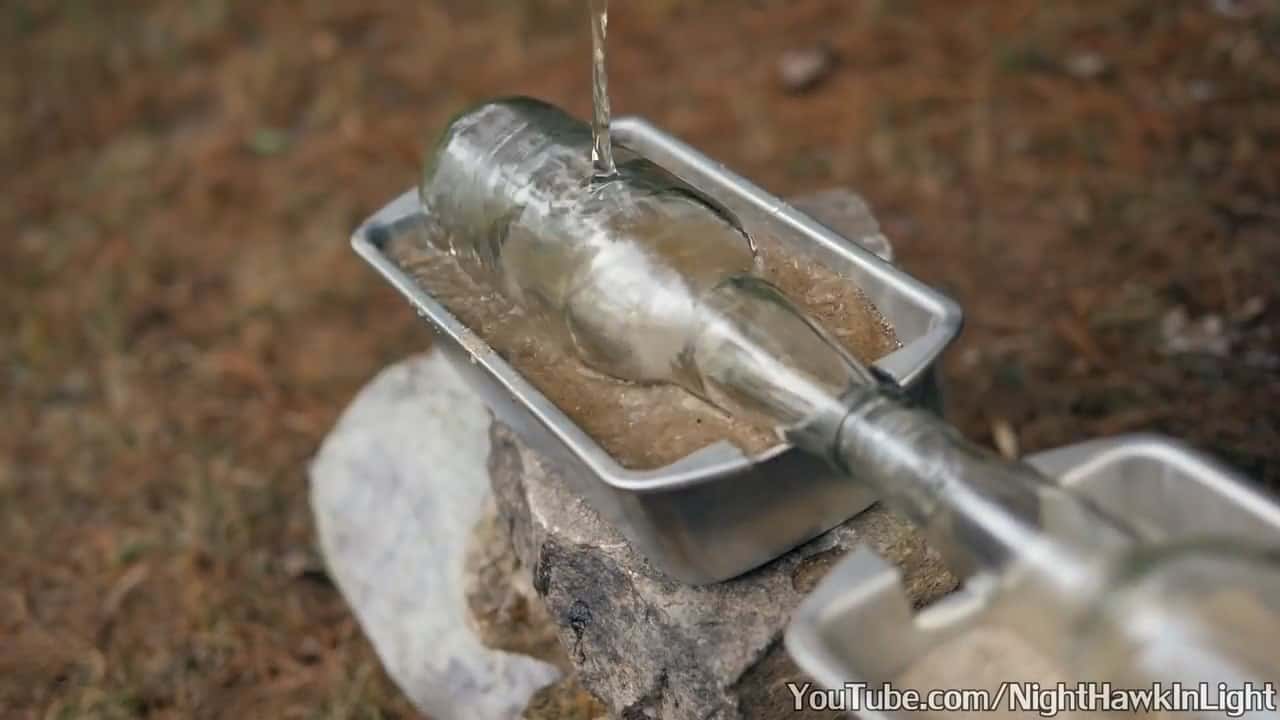
STEP 3 : FILLING SAND
To ensure that the bottles are stable during the distillation process, cut a small notch on one side of the pan so that the neck of the bottles can sit a little lower in the pan.
This will make the setup more secure and prevent the bottles from tipping over.
Once the trays are securely in place, fill both of them with sand. The sand acts as a heat sink and helps to distribute the heat evenly.
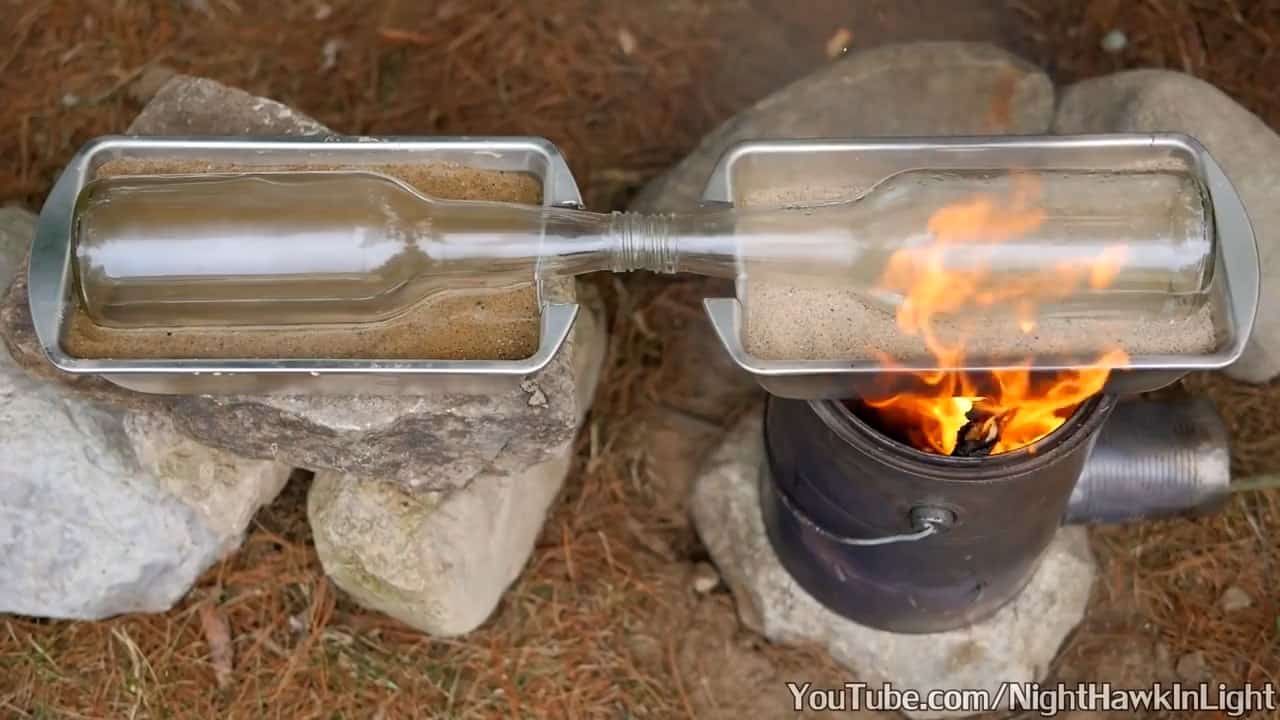
One tray should be used to cool one of the bottles, while the other tray is used to heat the other bottle. This will prevent the bottle from shattering due to uneven heating.
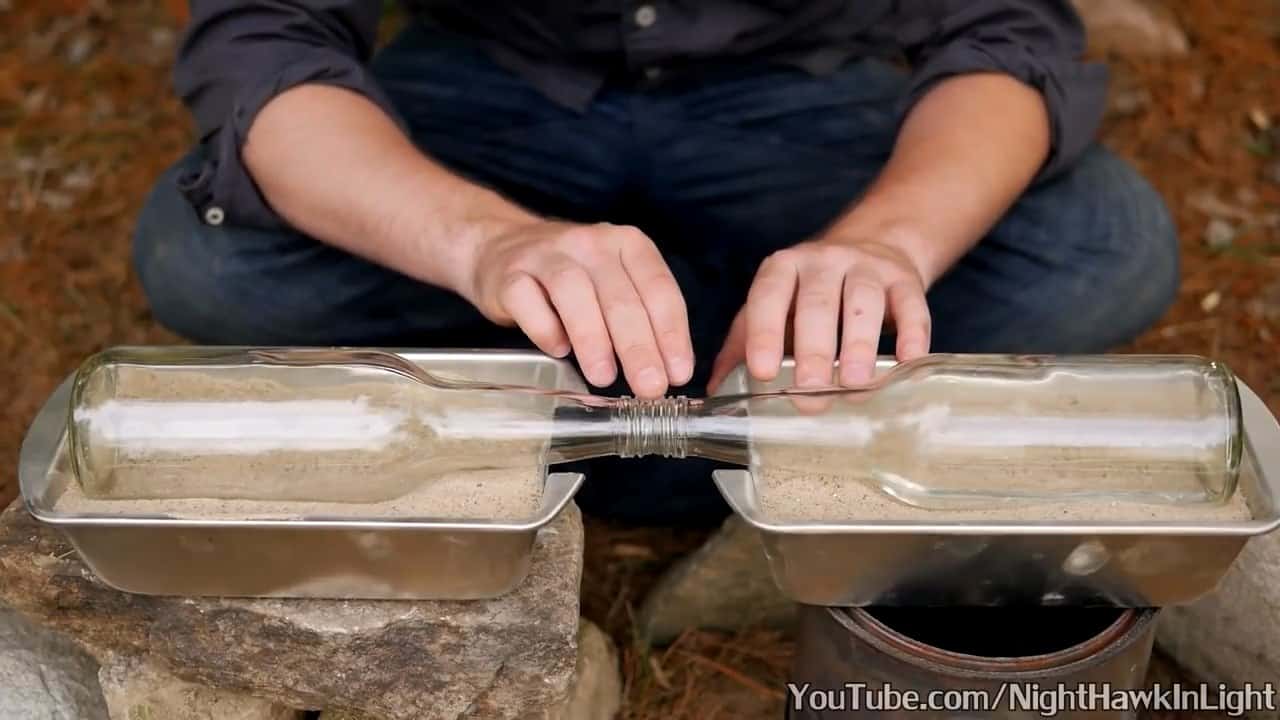
STEP 4 : ADJUSTING THE BOTTLES
Now it’s time to prepare the bottles for the distillation process. Press the first bottle firmly into the sand so that it has good thermal contact and will be heated evenly.
Then, adjust the second bottle so that its mouth meets up with the first bottle and press it into the sand to obtain good thermal contact as well.
Sand is used in this process because it makes it easy to adjust the angles of the bottles, which is important for them to meet up as evenly as possible.
This helps to ensure that there is not much room for water vapor to escape and that the distillation process is more efficient.
STEP 5 : WETTING THE SAND
Now that the first bottle is heating up and producing steam, it’s time to start condensing the steam into fresh water.
To do this, we want all the steam to make it into the second bottle, where it can cool down and condense into fresh water. However, we also want to make sure that the cold half of the system stays cold, so we need to take some extra measures.
One option is to wet the sand on the cold bottle with water or cover it with a wet cloth. This will help to cool down the sand and the bottle, allowing for better condensation of the steam.
The water in the cloth or sand will evaporate and create a cooling effect, helping to keep the bottle cool.
Make sure to monitor the water levels in both bottles and refill the first bottle with saltwater as needed. Keep rotating the bottles to maintain an even temperature and maximize the production of fresh water.
STEP 6 : STARTING THE DISTILLATION PROCESS
After setting up the bottles and sand trays, you may need to wait a bit for the sand to heat up and reach the boiling point.
This may take some time due to the large quantity of sand in the trays, but once it gets going, the sand will stay hot for a long time.
As the water boils dry in the first bottle, you can simply refill it and continue with the distillation process as long as you need to. Keep an eye on the sand and bottles to ensure that they don’t get too hot or break.
It’s a good idea to have extra water on hand in case you need to add more to the system during the distillation process
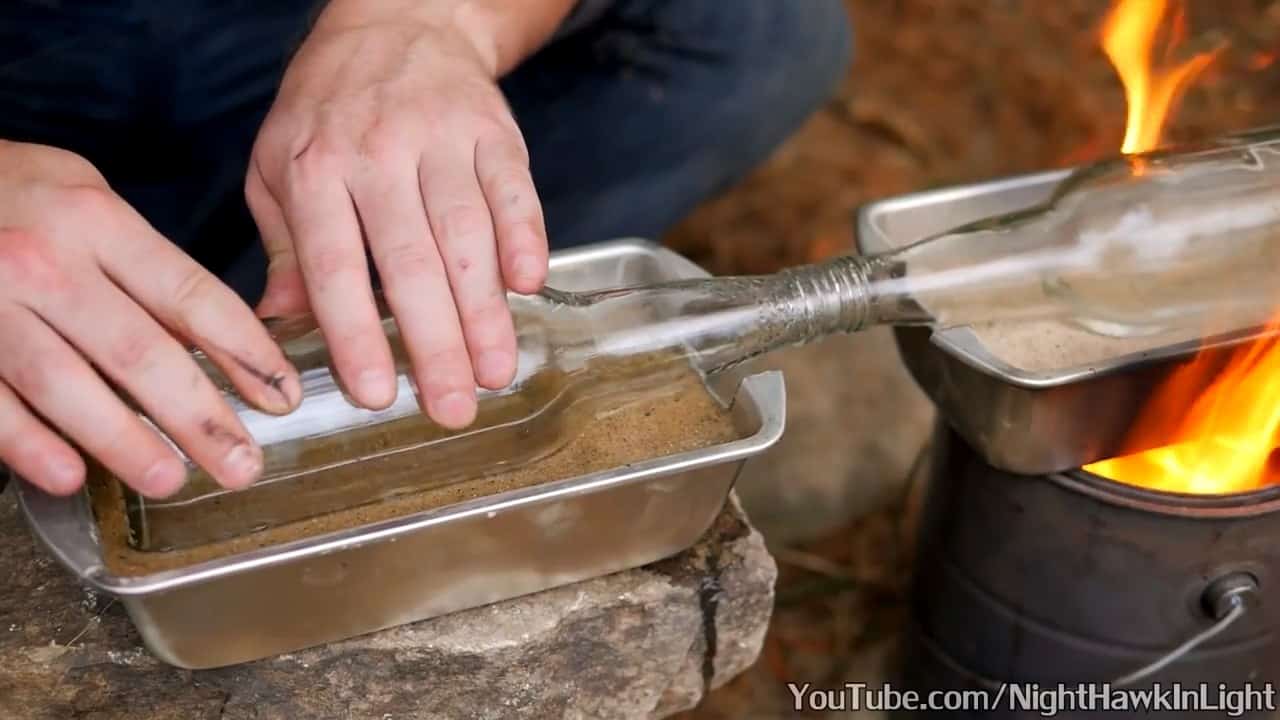
To speed up the distillation process, you can rotate the bottle so that the top portion is exposed to the steam, while the bottom is submerged in the cold sand.
This helps to maintain a cold temperature in the bottle, which causes the steam to condense more quickly, resulting in a faster production of fresh water.Keep rotating the bottle regularly to ensure that the entire bottle is exposed to the steam and cooled by the sand.
Remember to be patient and let the distillation process run its course. Depending on the heat source and environmental conditions, it may take some time to produce a sufficient amount of fresh water.
Once you have distilled enough water, carefully remove the bottles from the sand and collect the condensed water from the second bottle. Be sure to test the water before consuming it to ensure that it is safe for drinking.
With this simple and affordable setup, you can turn saltwater into fresh, drinkable water in a survival situation.
Image Credits : NightHawkInLight