If you find yourself in a survival situation where clean drinking water is scarce, building a simple water distillation system can be a lifesaver.
In this project, we will show you how to build a portable and inexpensive water purifier that uses the process of desalination to turn saltwater or dirty water into fresh, drinkable water.
The system is easy to make, and you only need a few materials like a stainless steel bottle, copper tubing, a stove or heating source, and a container to collect the condensed water.
STEP 1 : MATERIALS REQUIRED
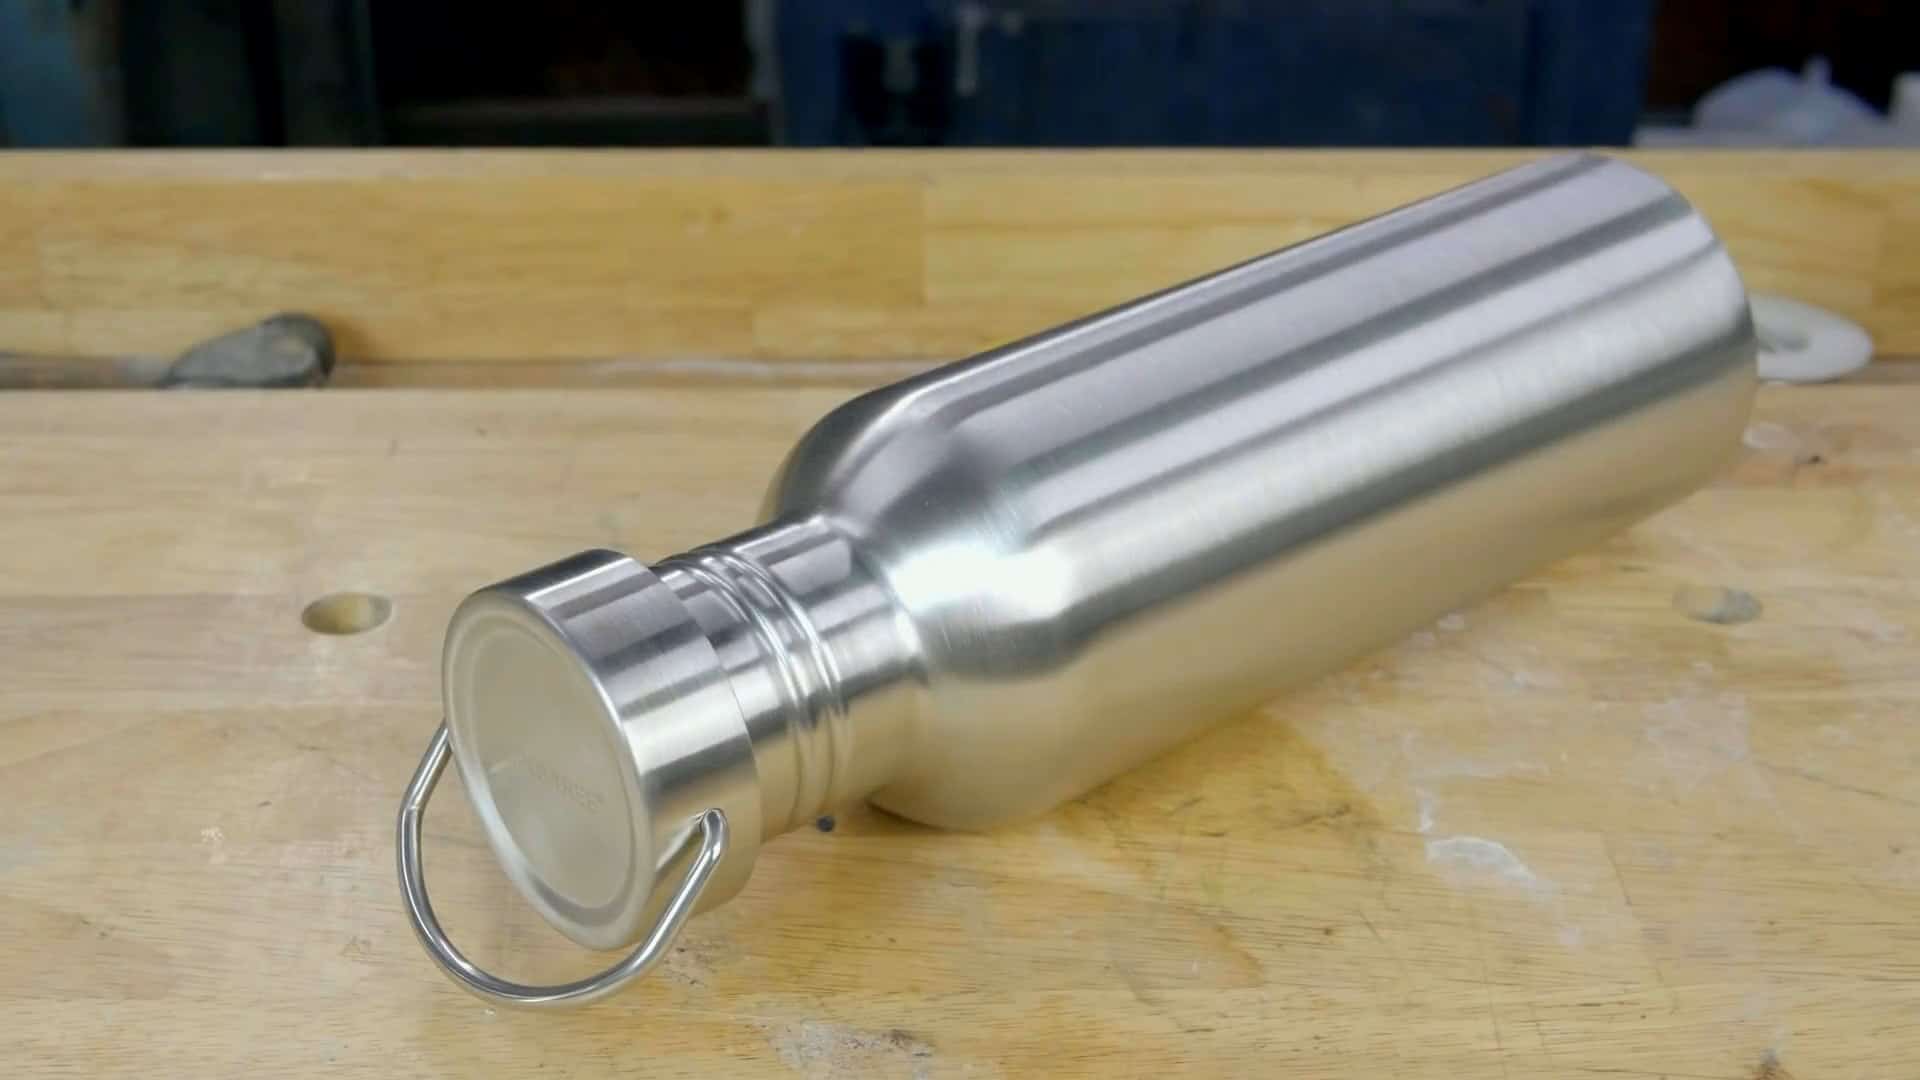
To build a desalination unit, you will require some basic materials that are easy to find. These materials include a simple non-insulated stainless steel bottle with a steel lid, copper tubing, a stove or heating source, a bottle for collecting the condensed water, a soldering unit, and a right-angle compression fitting.
The condenser of this desalination unit is made from one-quarter-inch copper tubing, which is a highly efficient material for conducting heat.
When heated, seawater or other saltwater sources will produce steam, which can be captured and condensed into clean, drinkable water using this setup.
The condensation process separates the salt and other impurities from the water, making it safe for consumption.
STEP 2 : INSTALLING THE COPPER TUBING
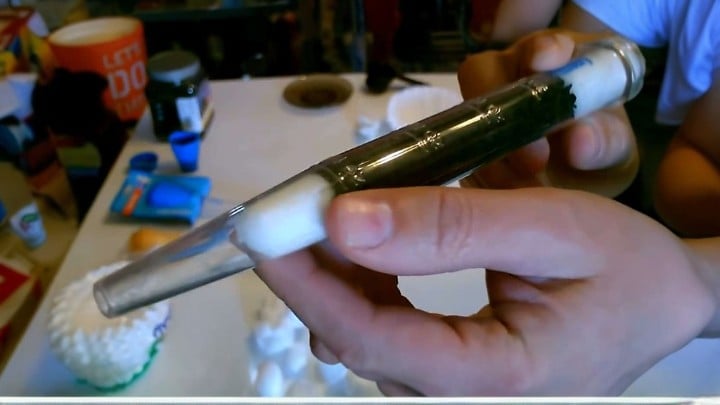
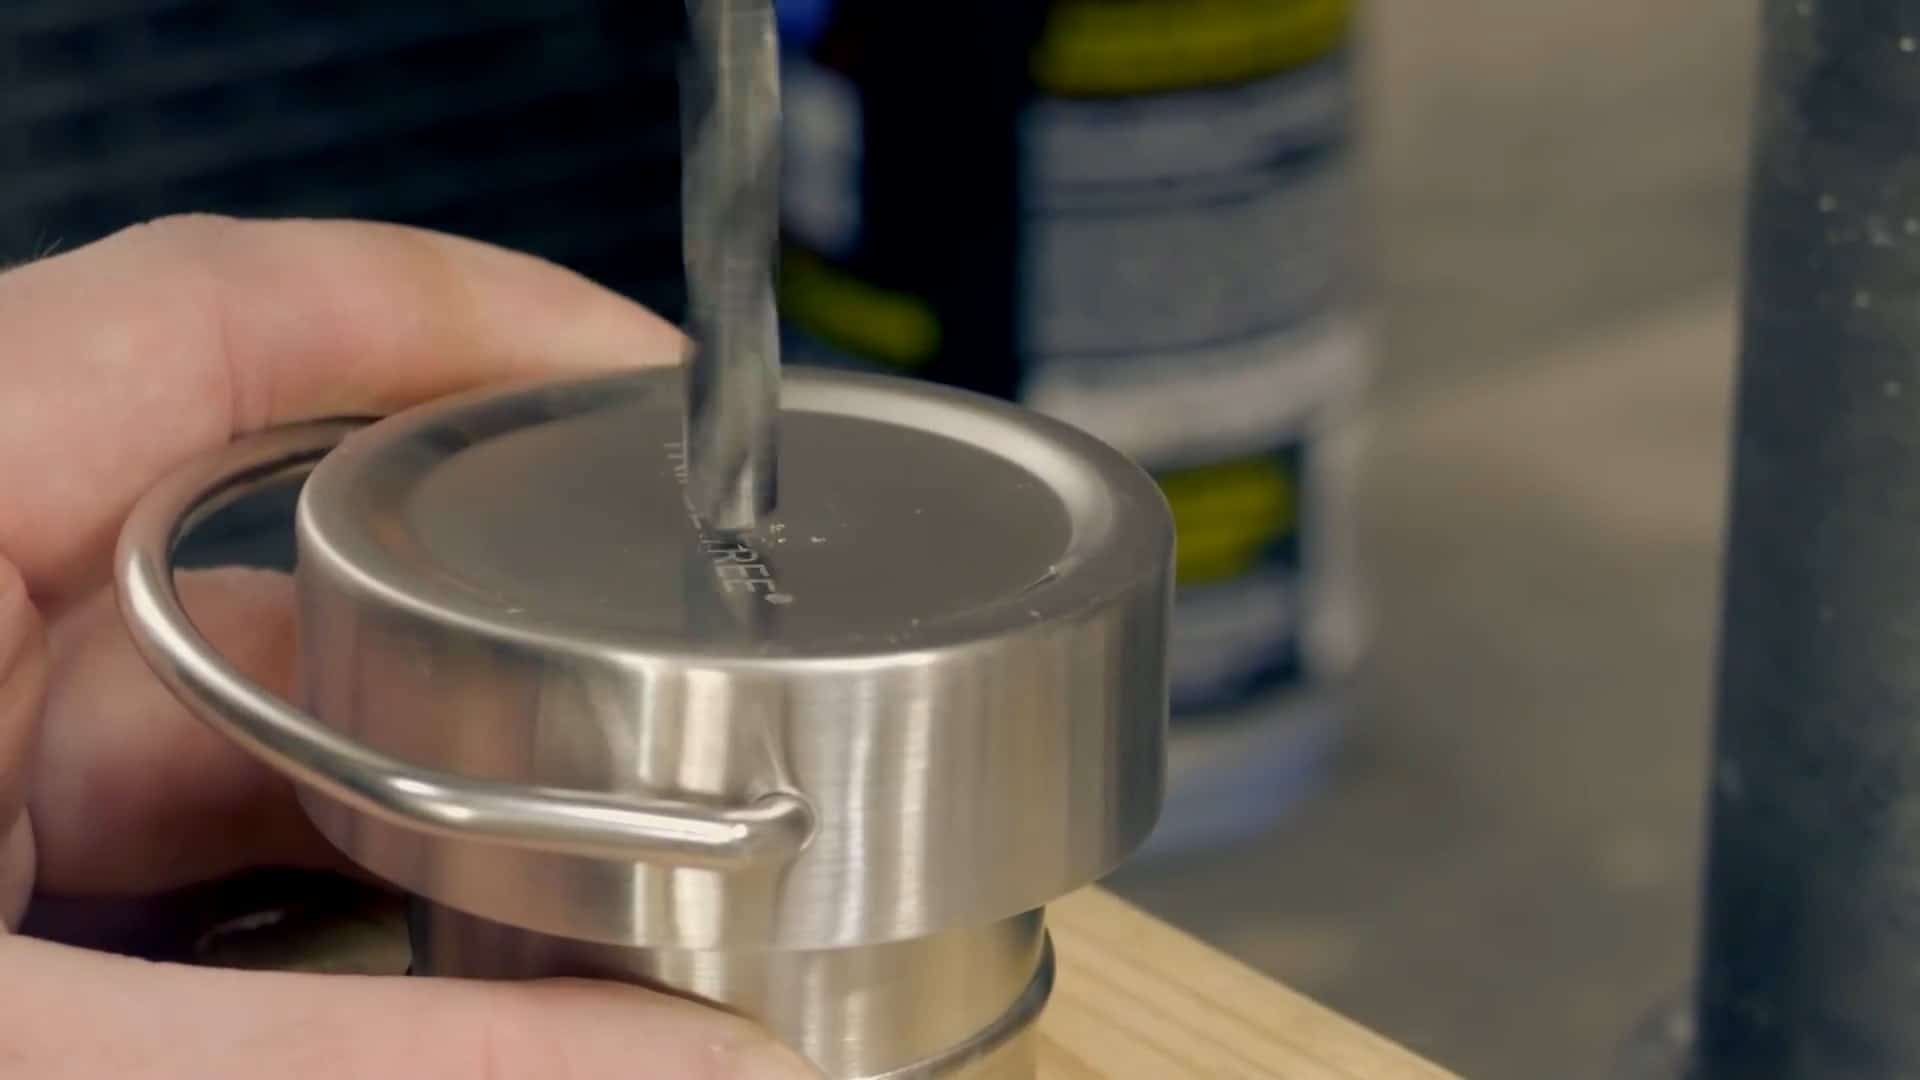
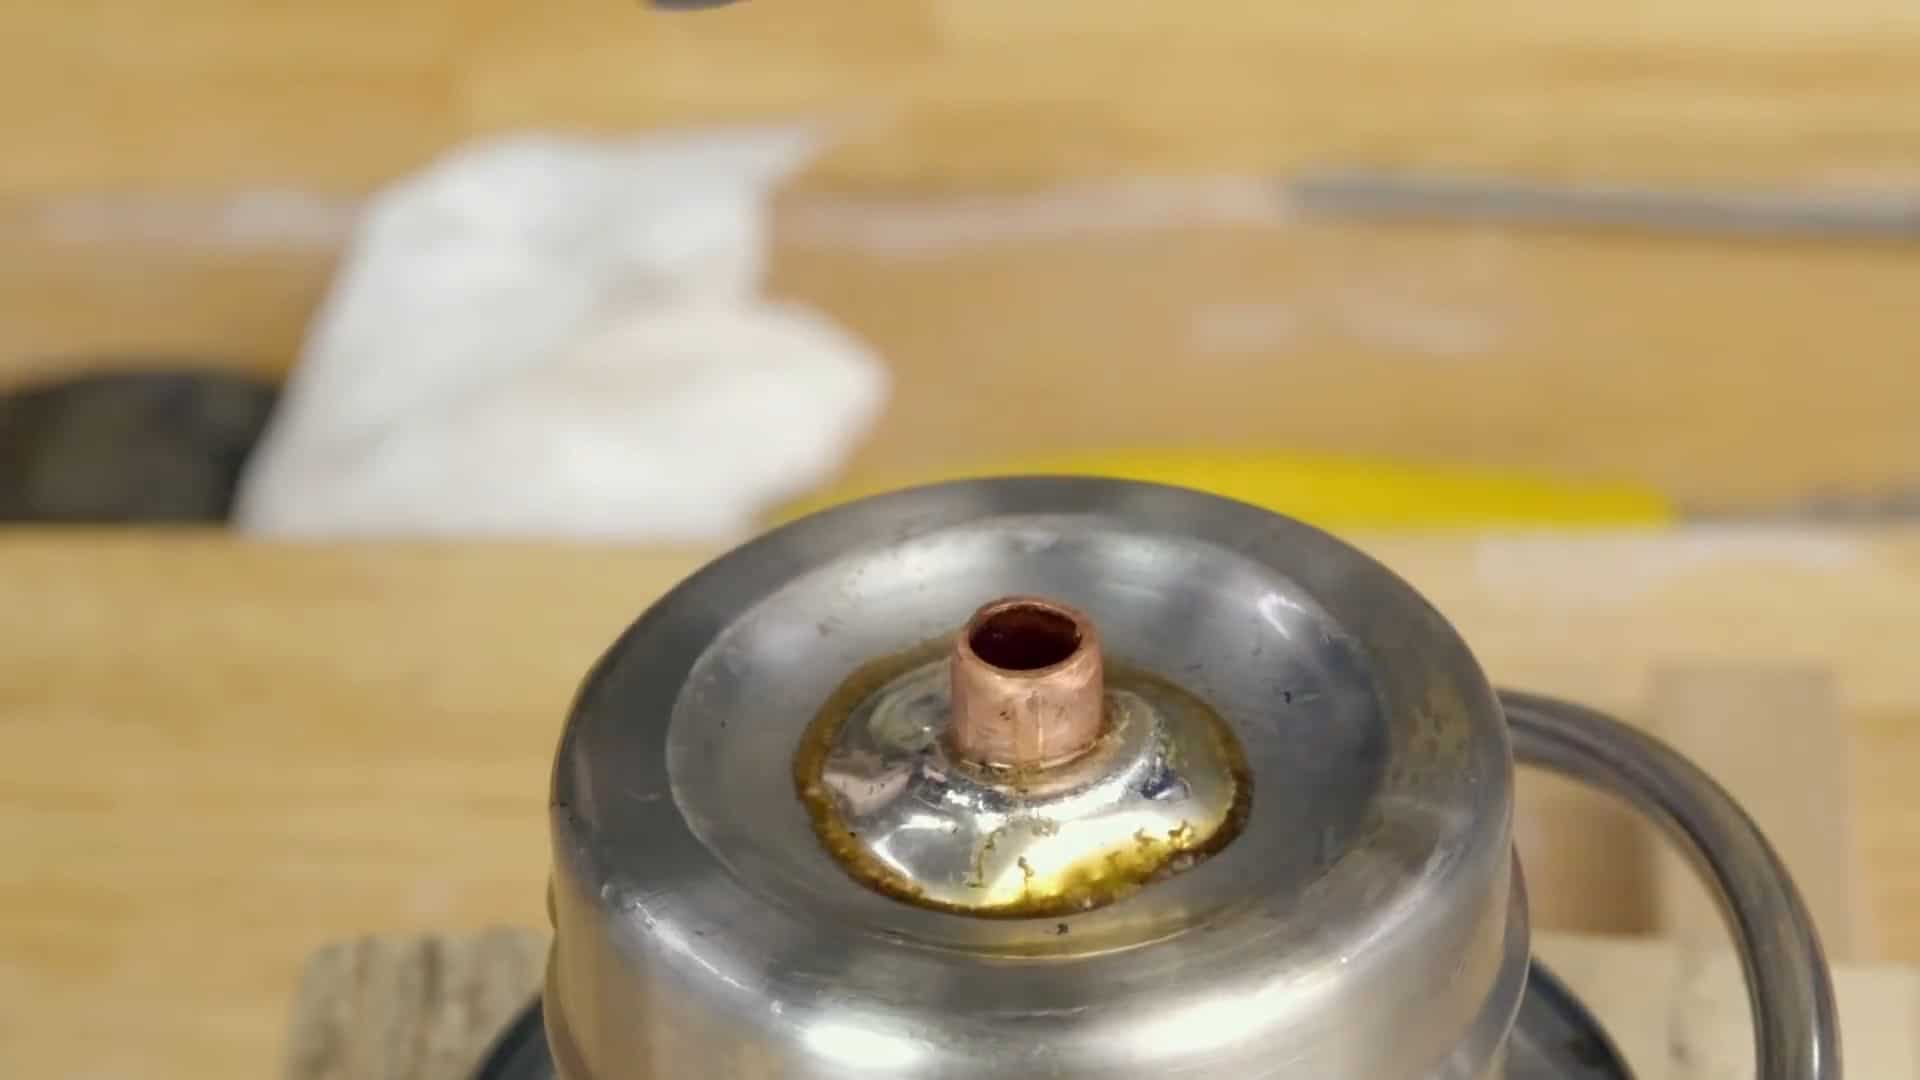
To start building the desalination unit, the first step is to remove the lid and gasket from the stainless steel bottle.
This will allow access to the top of the lid where a hole needs to be drilled to accommodate the quarter-inch copper tubing. To ensure accuracy, it is recommended to use a drill press for this task.
After the hole is drilled, both the surface of the copper tubing and the stainless steel lid need to be cleaned thoroughly using sandpaper. This ensures that the soldering process can take place without any interference or impurities.
Once cleaned, the copper tubing should be pushed through the hole just enough to stick half an inch from both sides.
The next step is to secure the copper tubing in place by soldering it securely onto the stainless steel lid. It is important to ensure that the soldering is done properly and that there are no leaks in the joint.
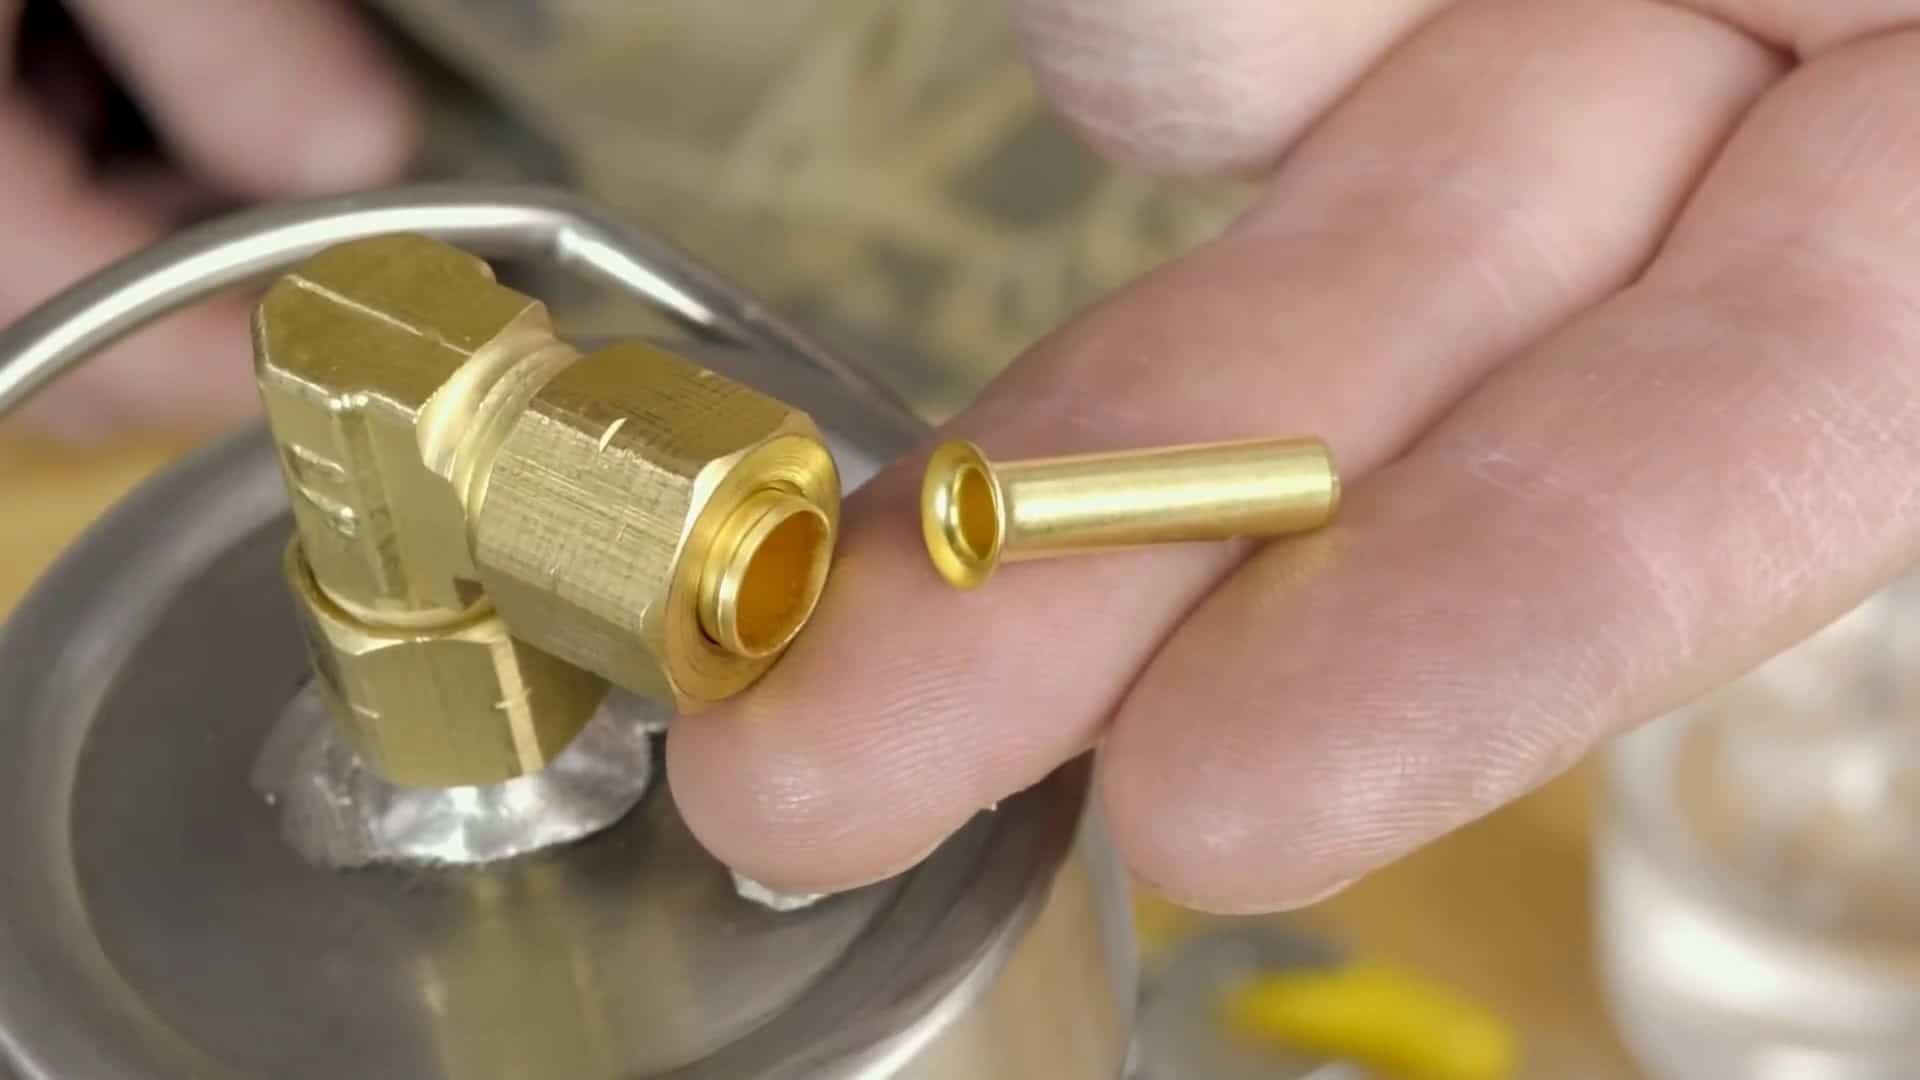
Once the soldering is completed, the silicon gasket can be re-installed into the lid, and the lid can be screwed back onto the bottle.

To ensure a tight seal between the copper tubing and the lid, a right angle compression fitting is used. The compression fitting is carefully pressed into the opening of the lid where the copper tubing was inserted.
The extension tube on the other end of the fitting is then removed, and a rubber gasket is put in its place.
This replacement is done to provide a better seal and ensure that the lock nut tightly secures the compression fitting onto the lid.
The lock nut is then tightened to secure the compression fitting in place and ensure that there are no leaks.
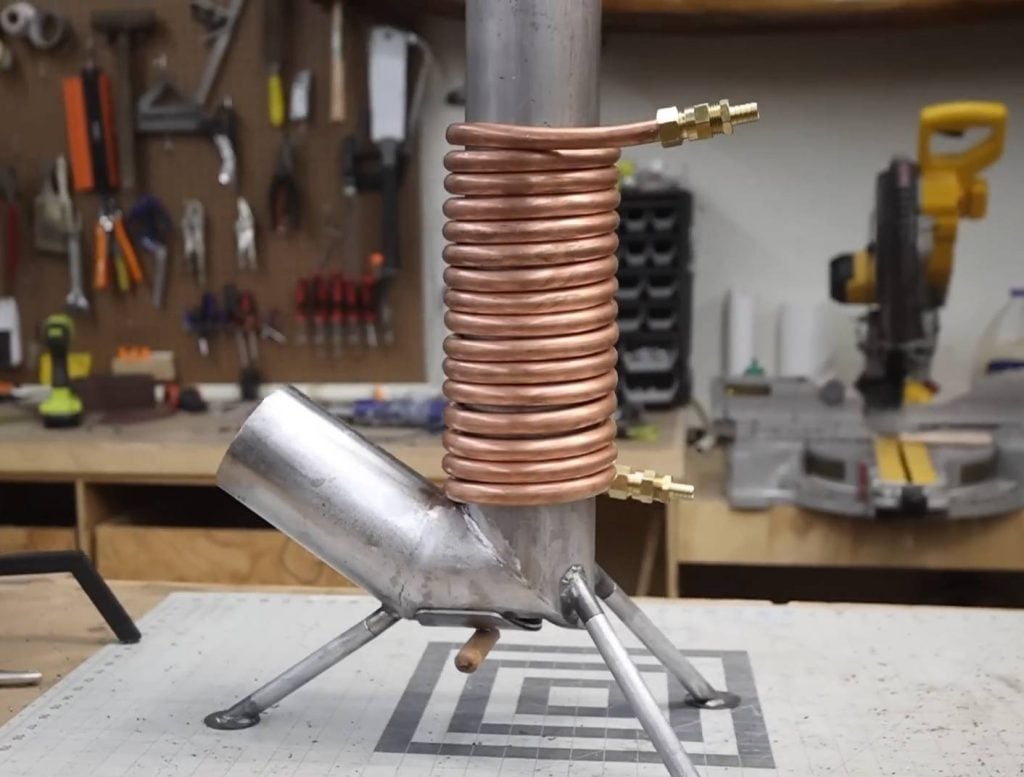
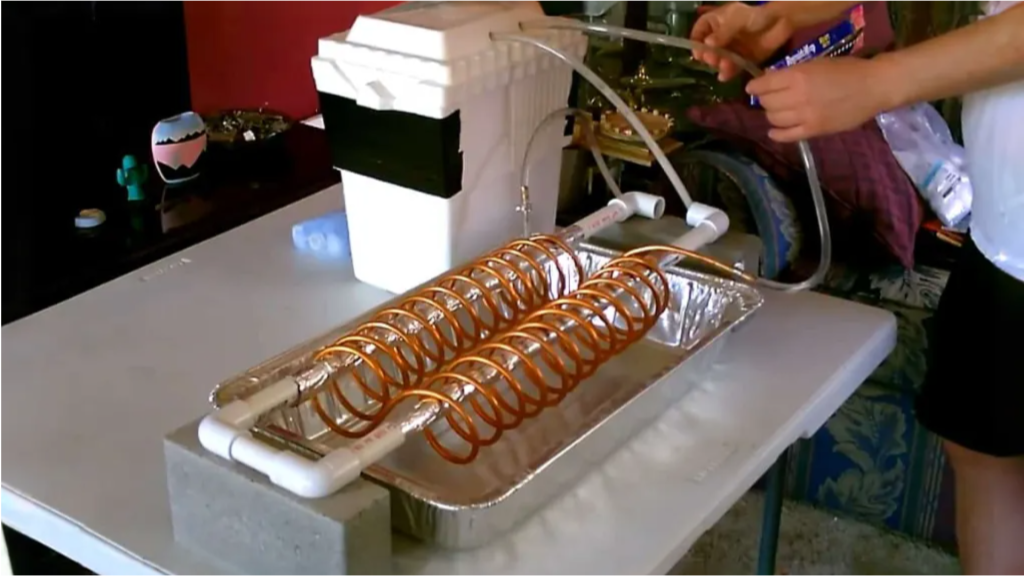
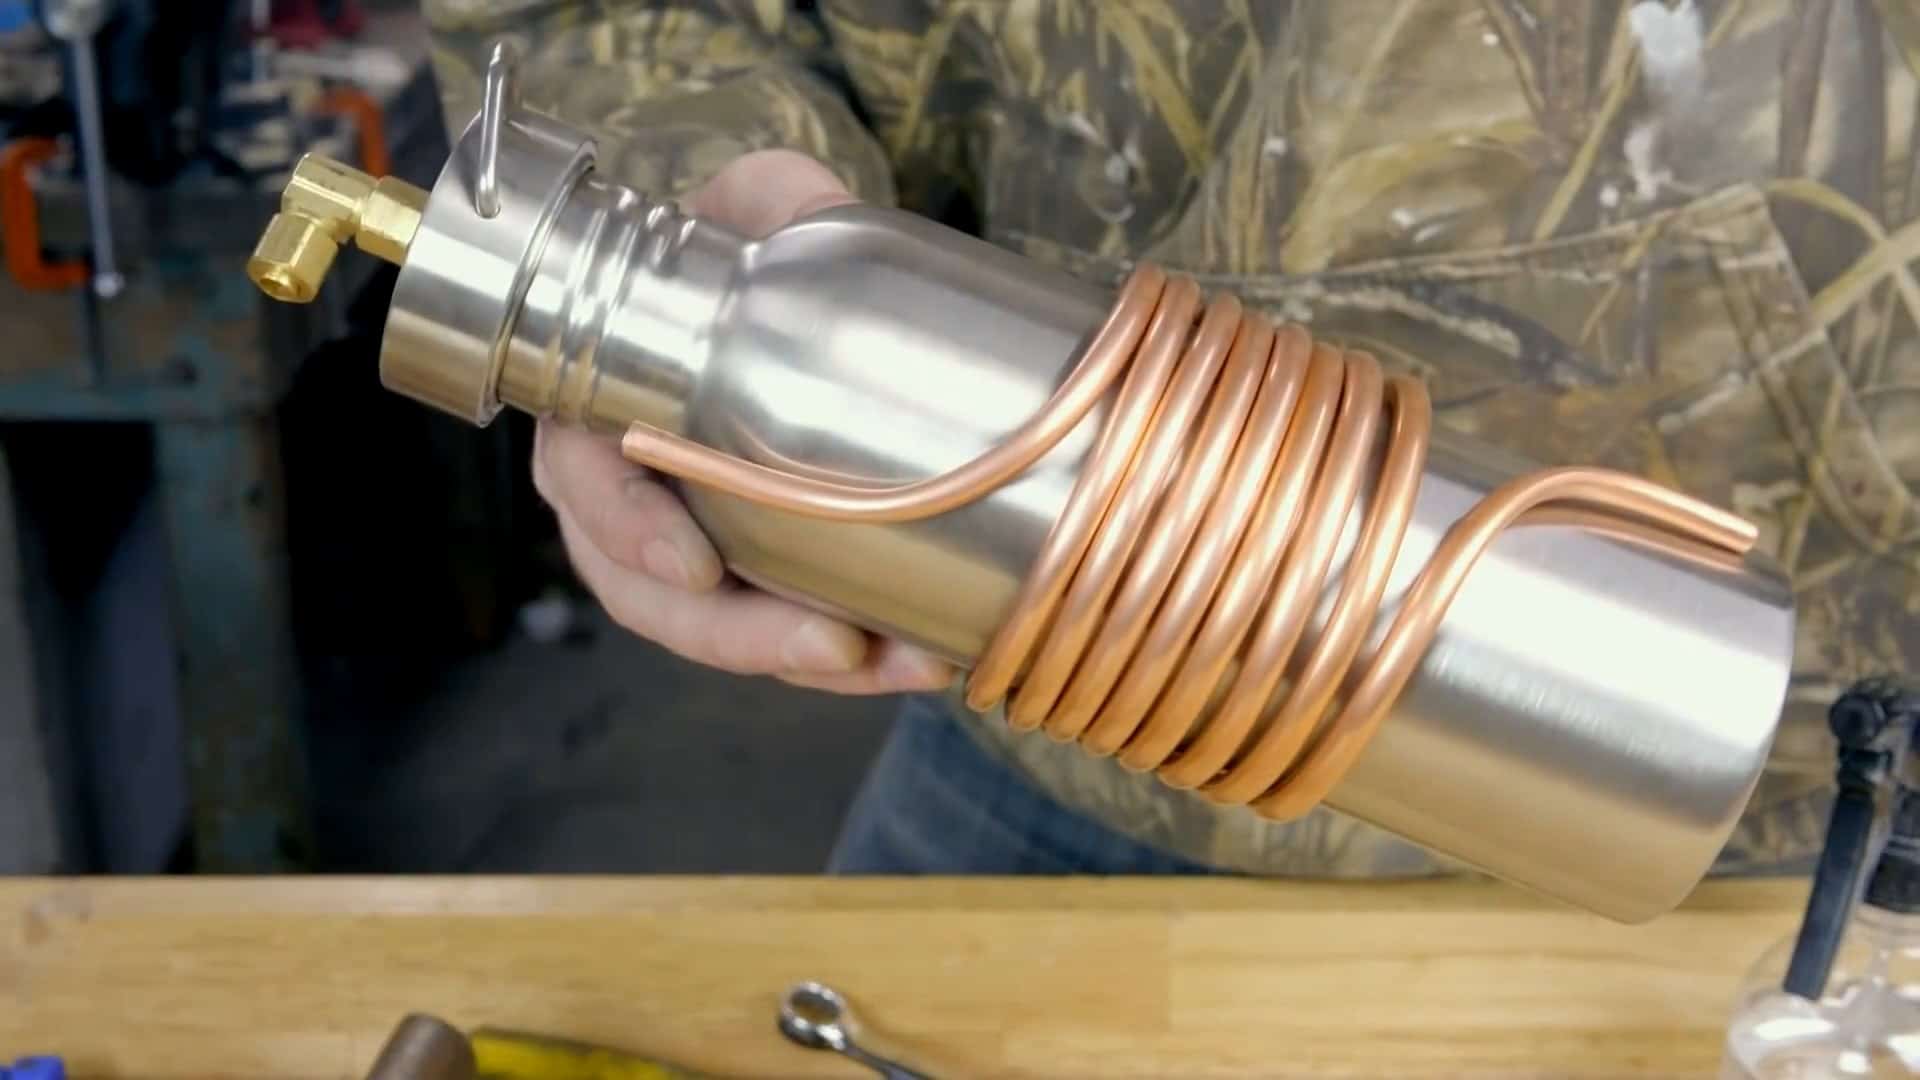
STEP 3 : WRAPPING THE COPPER COIL
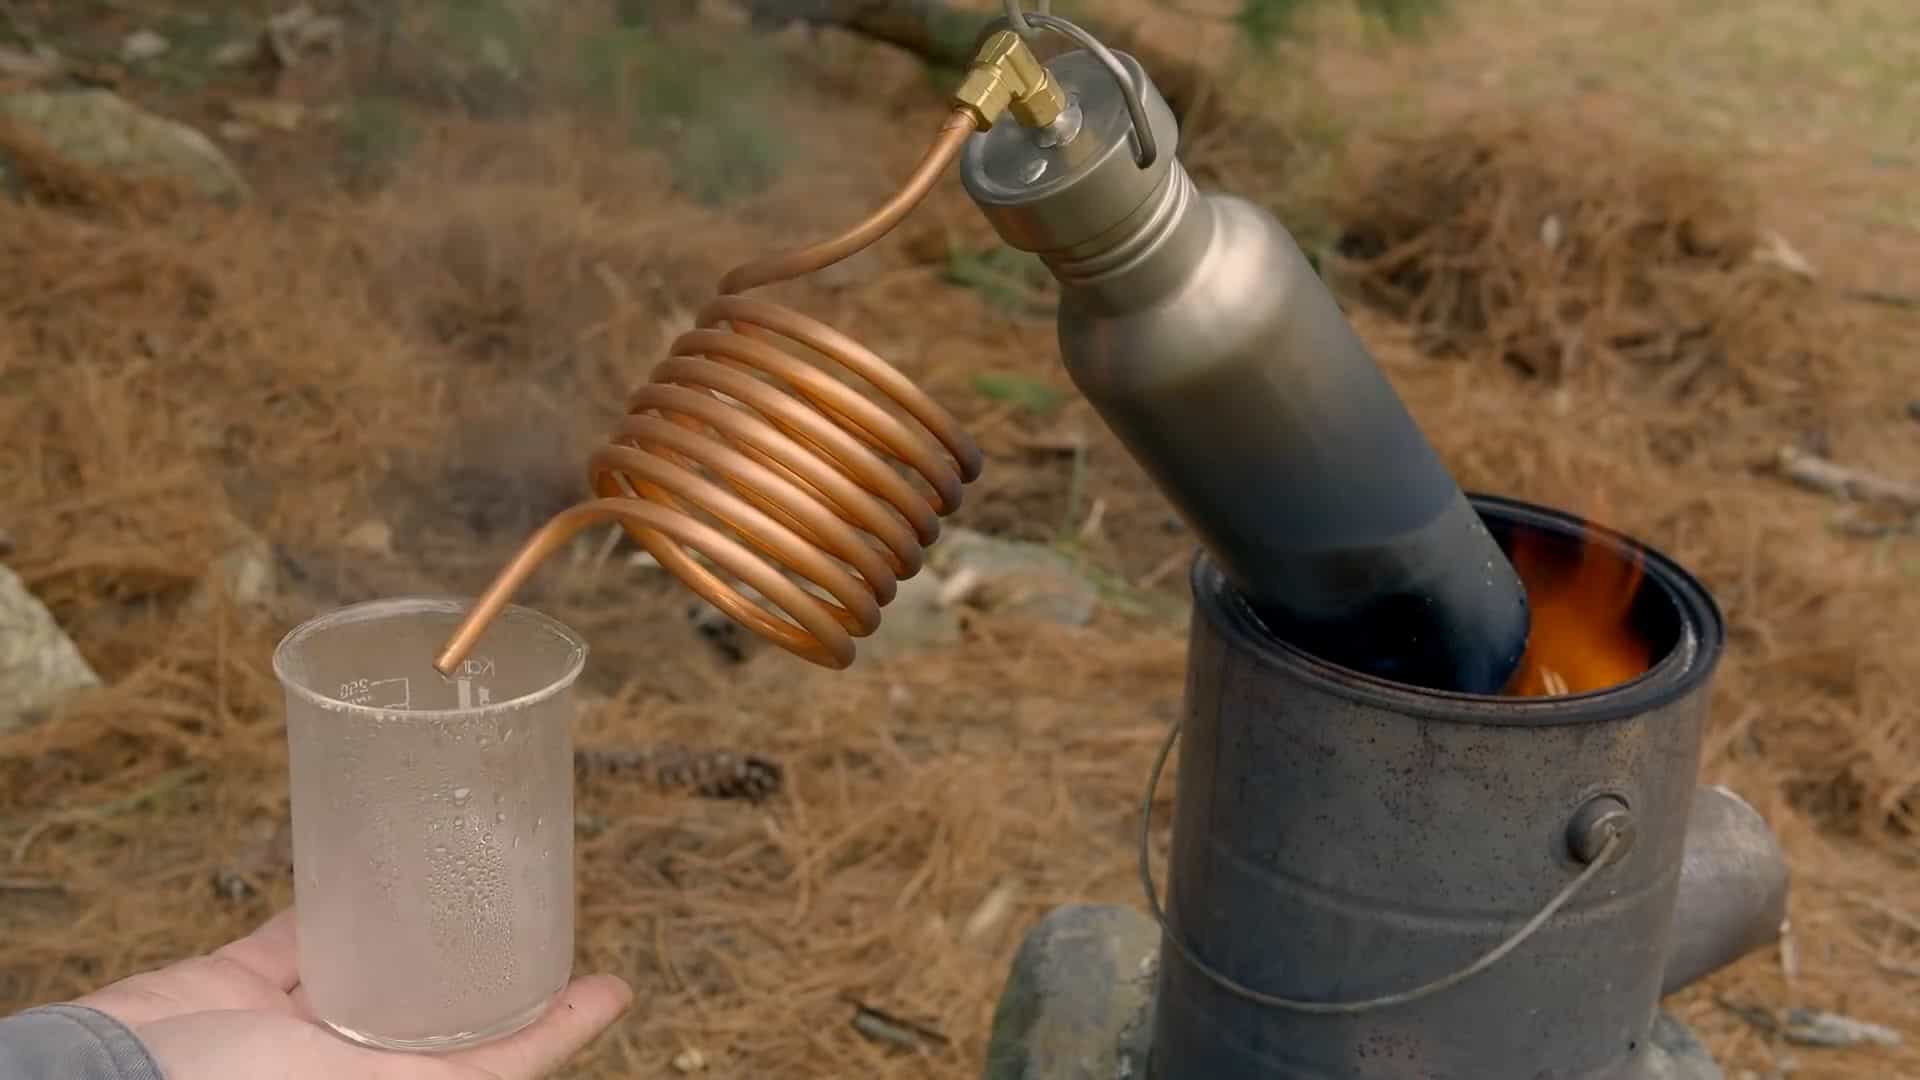
To re-condense the steam generated during the boiling process, a copper coil is necessary. To make the coil, the copper tubing is wrapped tightly around the stainless steel bottle. Ideally, the coil should have eight or nine turns.
The ends of the coil are then bent outwards, so that one end can be pressed into the fitting on the bottle while the other end sticks straight out.
It’s important to ensure that the copper coil is wrapped tightly around the bottle and that the ends of the coil are not touching each other.
This will help to maximize the surface area available for the steam to condense back into liquid form.
STEP 4: ADDING HEAT SOURCE
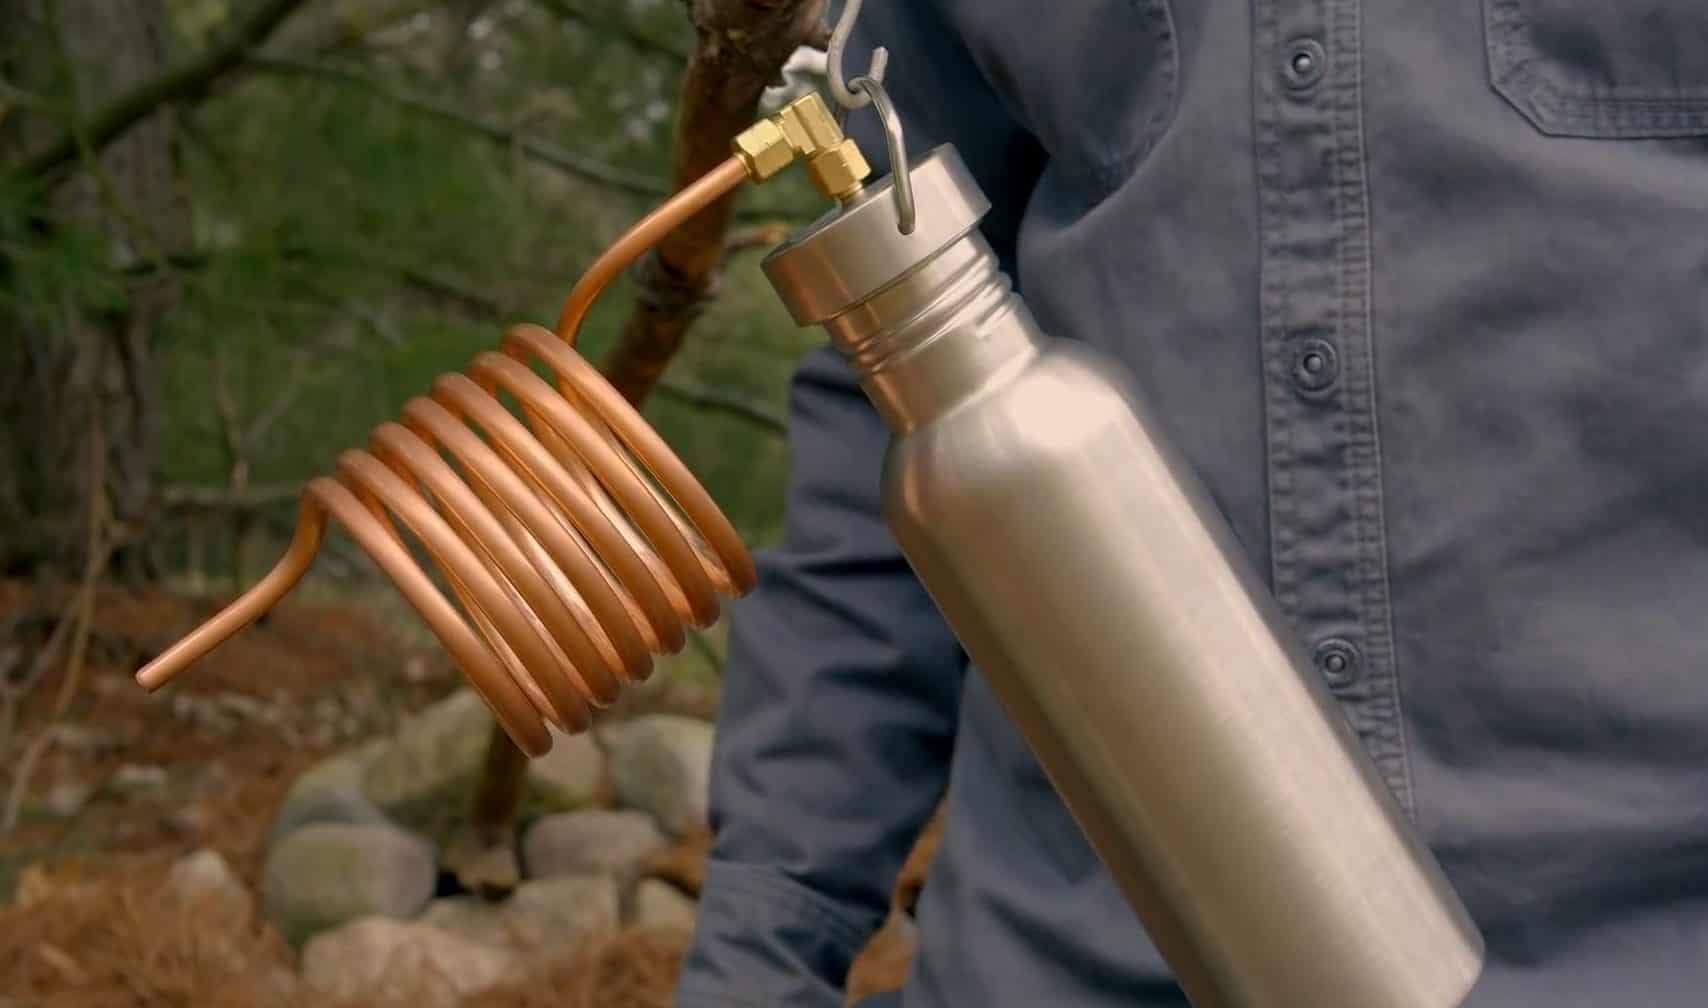
After completing the assembly of the desalination unit, the next step is to use it to desalinate water. The first step is to fill the stainless steel bottle with salt or seawater, ensuring that the lid with the copper tubing is tightly secured to the bottle.
The unit is then placed over a heat source such as a wood stove or campfire. As the water inside the bottle heats up, steam rises through the copper tubing and into the coiled condenser.
The condenser, which is wrapped tightly around the stainless steel bottle, cools the steam and condenses it back into liquid water.
This distilled water then drips down the condenser and into a collection container placed below it. The distilled water collected in the container is pure and safe for drinking or other uses.
It is important to monitor the heat source during the desalination process to ensure that the water inside the bottle does not boil too vigorously or too slowly.
The ideal temperature for desalination is between 150-200 degrees Fahrenheit, which allows for optimal steam production while preventing the water from boiling over.
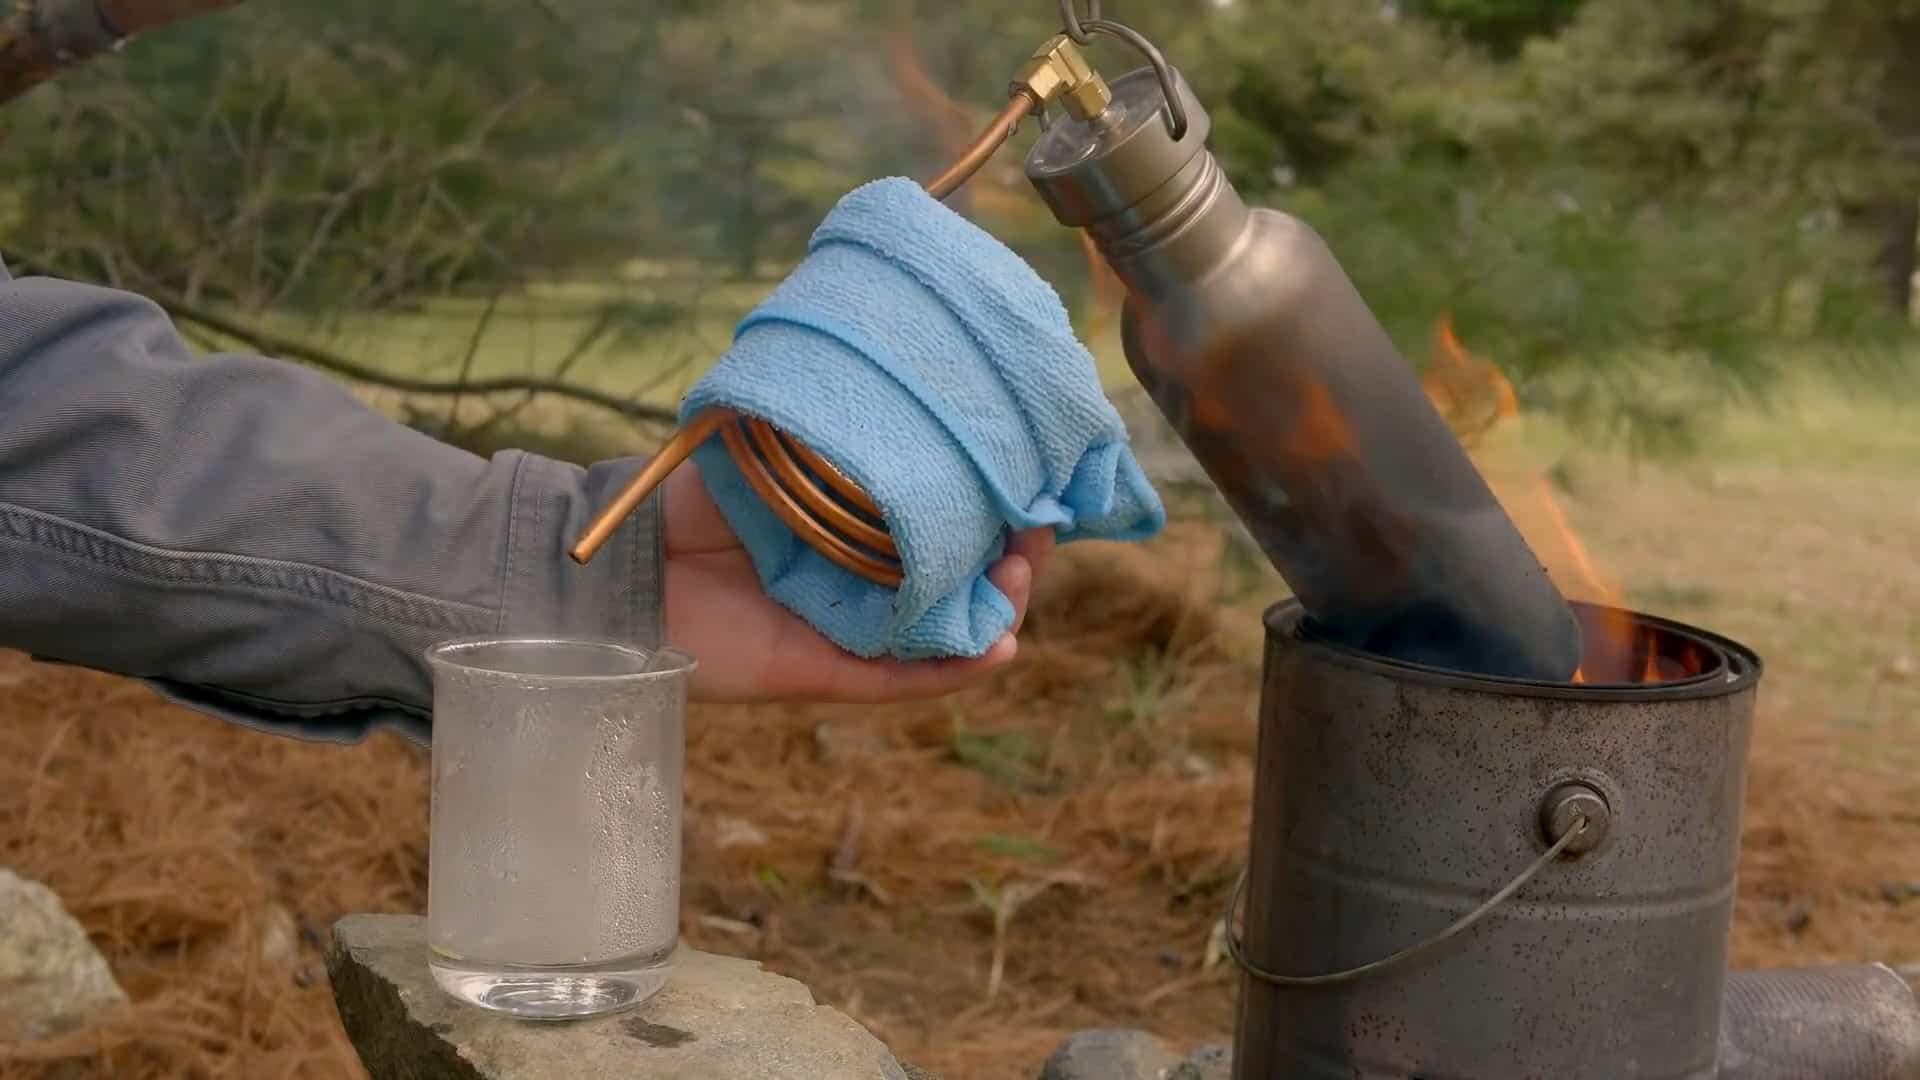
STEP 5 : COOLING THE COPPER TUBING
To optimize the production of condensed water, it is necessary to cool down the copper tubing. Otherwise, the production of steam may exceed the production of condensed water.
One way to cool down the copper tubing is to wrap a wet cloth soaked in cold water around the coil.
This will cause the water vapor to condense on the copper tubing and flow down to the collection container. Alternatively, you can dip the bottom half of the copper coil into a container filled with cold water to cool it down.
This will help to produce more condensed water and increase the overall efficiency of the desalination unit.
In conclusion, building a simple water distillation system can be a lifesaver in a survival situation where clean drinking water is scarce.
This project requires only a few materials that are easy to find, including a stainless steel bottle, copper tubing, a stove or heating source, and a container to collect the condensed water. By following the steps outlined in this article, you can easily turn saltwater or dirty water into fresh, drinkable water using the process of desalination.
Image Credits : NightHawkInLight