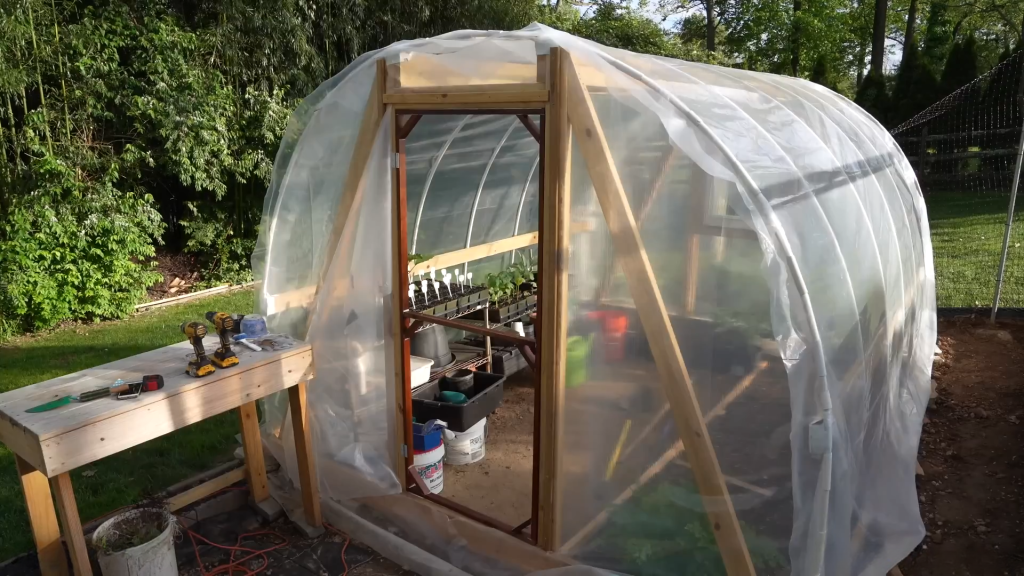
Are you looking to extend your gardening season and enhance your ability to grow your own food? Building a DIY hoop house greenhouse might just be the project you need! In this blog post, we’ll guide you through the steps of constructing a sturdy, energy-efficient hoop house that won’t break the bank. Ideal for small farms or personal gardens, this type of greenhouse helps protect plants from harsh weather and creates an optimal growing environment.
STEP 1 : Materials Required
The materials needed for building this greenhouse are:
PVC:
– 14 half-inch schedule 40 PVC pipes
– 2 PVC Ts
– 5 PVC crosses
– 2 one-inch PVC pipes
– 1 one-inch PVC coupling
– 3 packs of 25 one-half inch two-hole conduit straps
Fasteners:
– 2 one-pound boxes of number 9 three-inch wood to wood deck screws
– 1 one-pound box of number 8 one and five-eighths inch wood to wood deck screws
– 8 number 10 four-inch exterior wood screws
– 1 roll of one-half inch to 3/8 18 gauge heavy-duty staples
Lumber (pressure-treated):
– 2 2x6x10 boards
– 4 2x6x12 boards
– 1 2x6x8 board
– 10 2x4x8 boards
– 2 2x4x12 boards
– 9 1x2x8 foot radius edge boards
Door:
– 4 2x2x8 foot pressure-treated lumber (for a simple door)
– 2 2-inch outdoor rated hinges (zinc coated or other)
– 1 basic door handle
– 1 basic hook latch
– Optional: a pre-hung exterior frame door for an upgrade
Plastic Sheeting:
– 6 or 8 mil rated, 4 to 6 years UV resistant polyethylene greenhouse film for gardening and/or farm use.
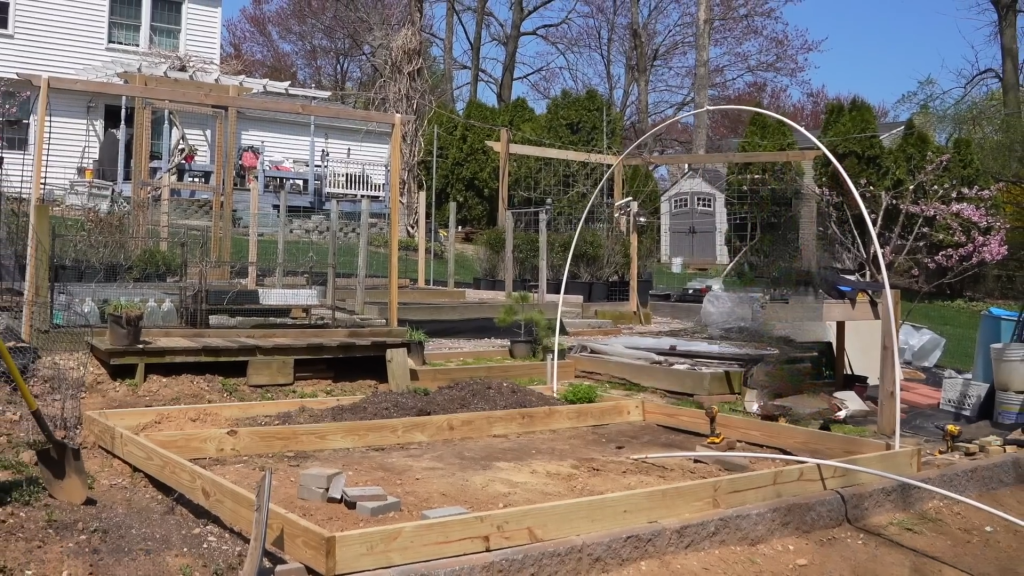
STEP 2 : Prepare the Site
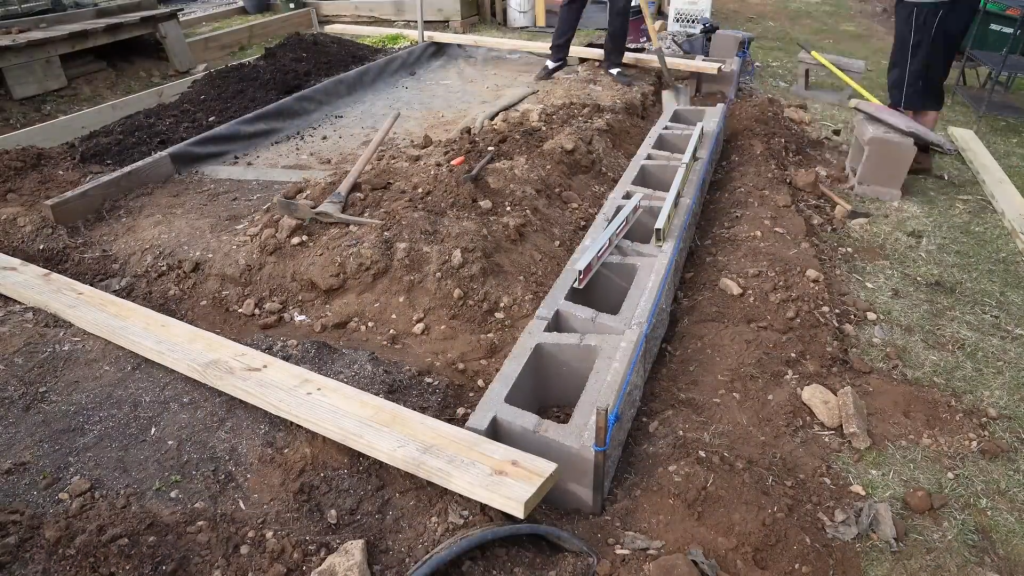
Level the ground where the greenhouse will stand. Use retaining wall blocks to create a level base, especially if your land has a slope. Pick one corner as your reference point and ensure it is level in all directions. Add or remove soil to level each block. Use a string tie to get them straight.
STEP 2 : Building the Base
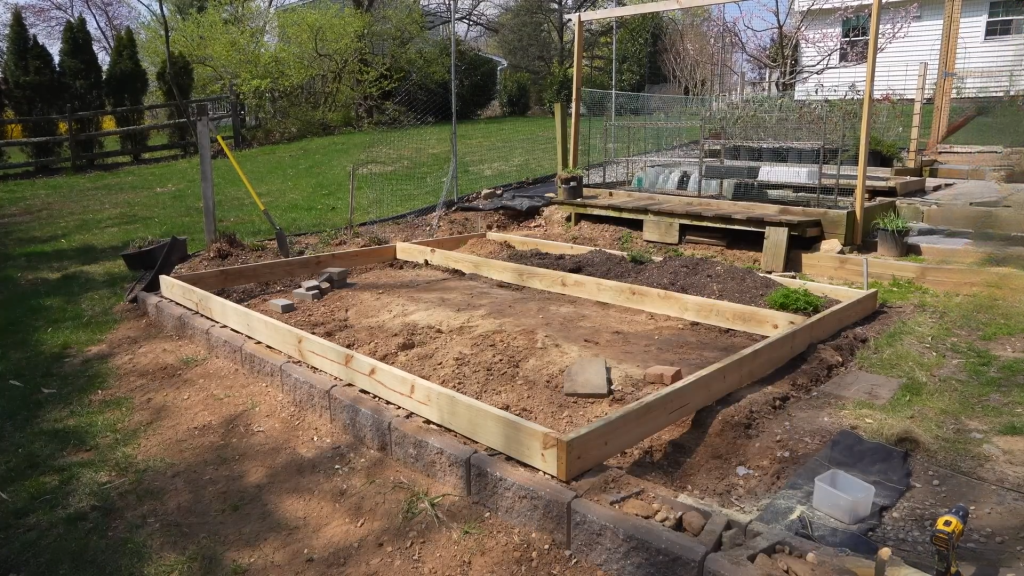
Cut the pressure-treated 2×6 lumber to create a rectangular base that measures 10 feet wide by 12 feet long. Secure the corners using 3-inch exterior screws. Ensure the corners are square.
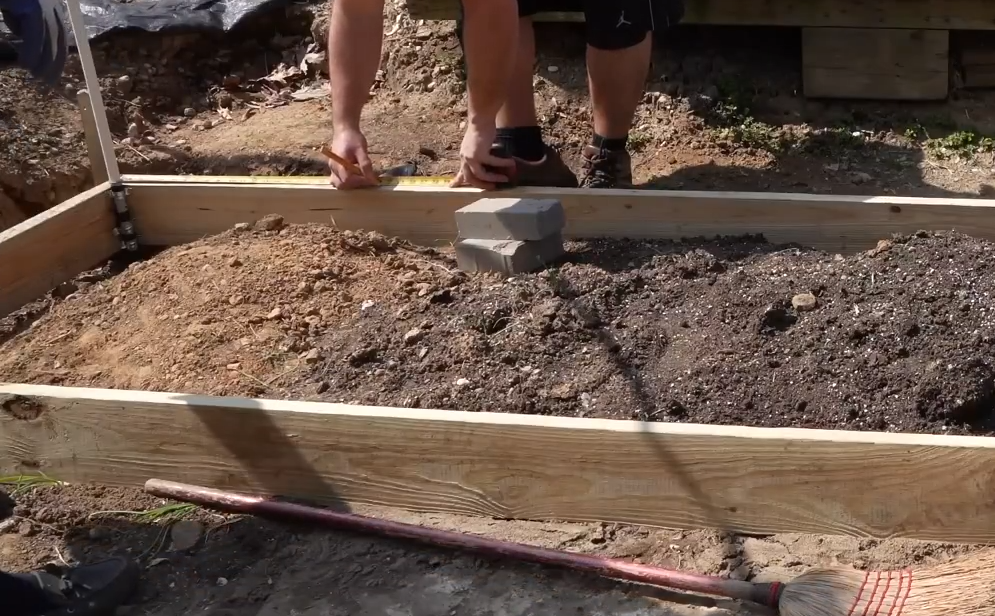
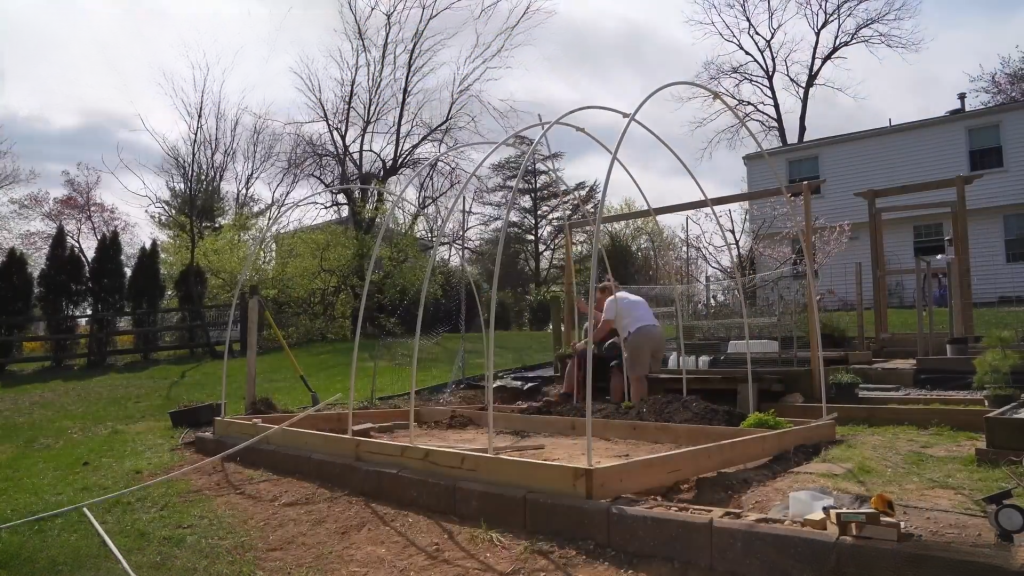
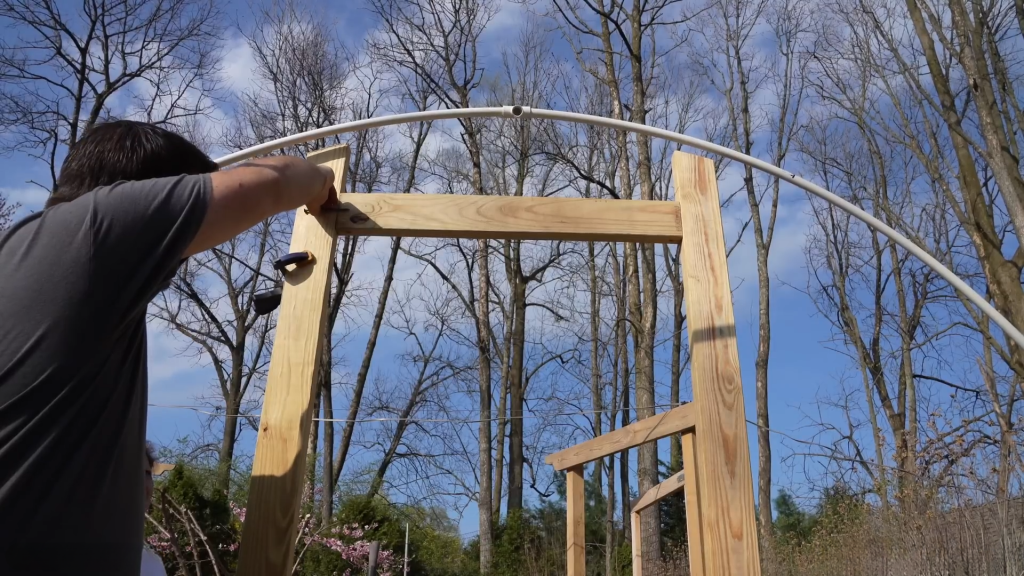
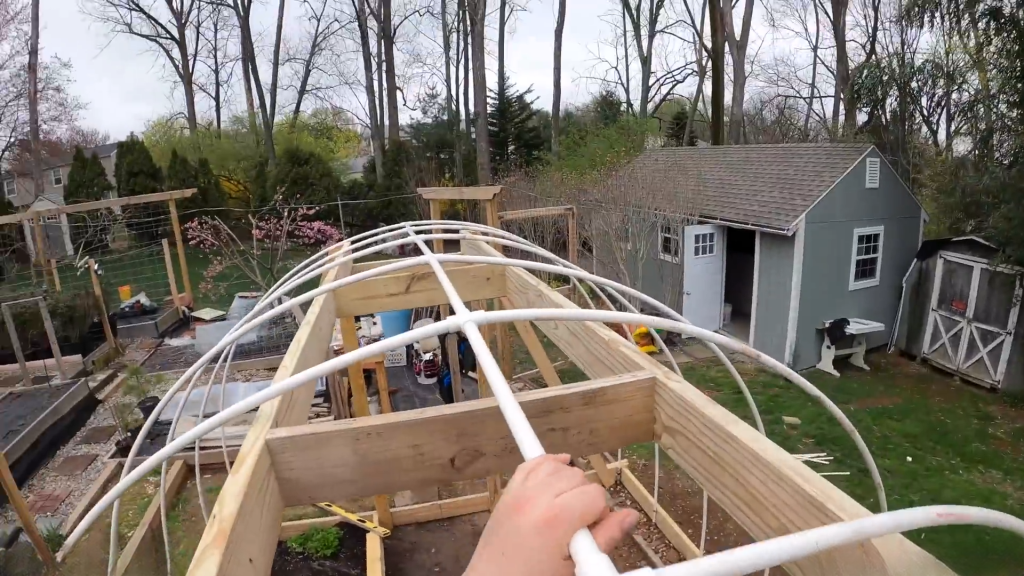
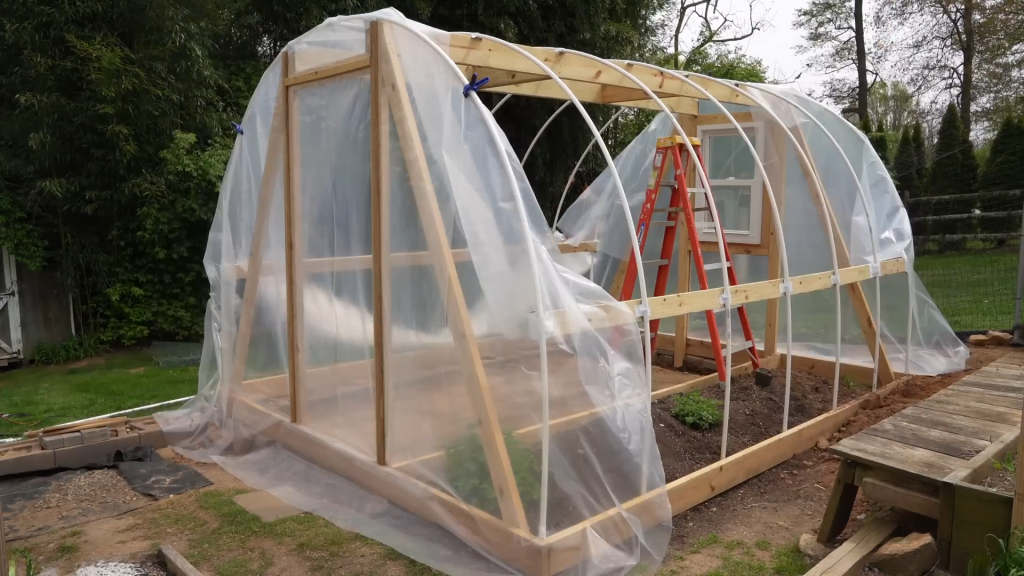
STEP 3 : Installing the PVC Pipes
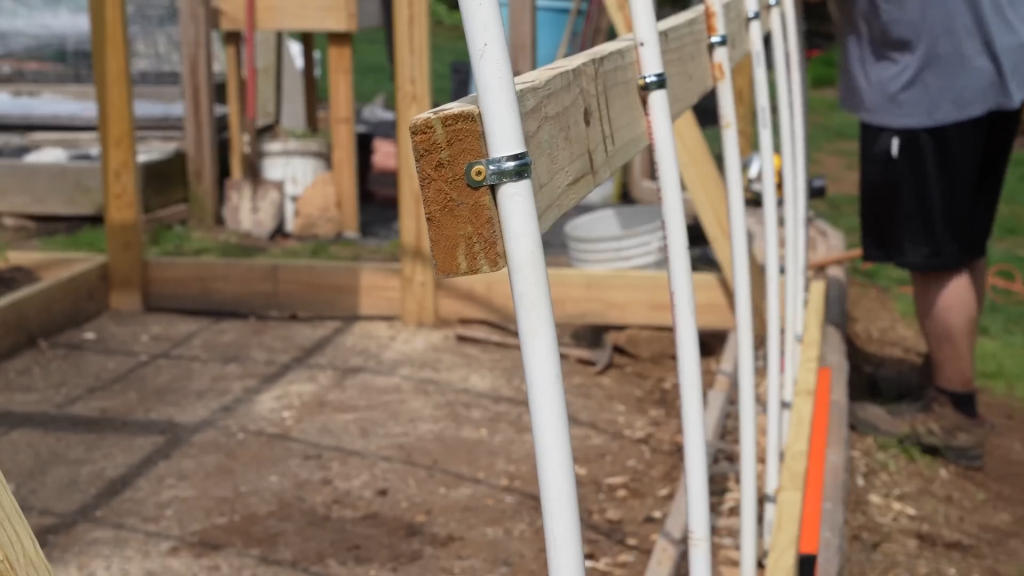
Measure and mark the placement of the PVC pipes along the length of the base frame.Insert 10-foot PVC pipes into the connectors to form arches. Place T-connectors on the ends and crosses in the middle. Secure the base of the pipe to the corner of the frame using 2-hole straps and screws, adding spacers for extra support. Repeat for all corners.
Cut small pieces of PVC pipe (about 6 inches) to use as wedges in the corners. Place these wedges in the gaps between the arches and the straps to provide extra stability.
![]()
Mark the center of the 12-foot sides of the base. In this case, the total length is 12 feet and 1.5 inches, so the center is at 6 feet and 0.75 inches (or 6 feet and 3/4 inches). Based on this, mark the remaining spots on the base and install the remaining PVC hoops. These PVC pipes can be mounted directly to the 2X6, no spacers needed.
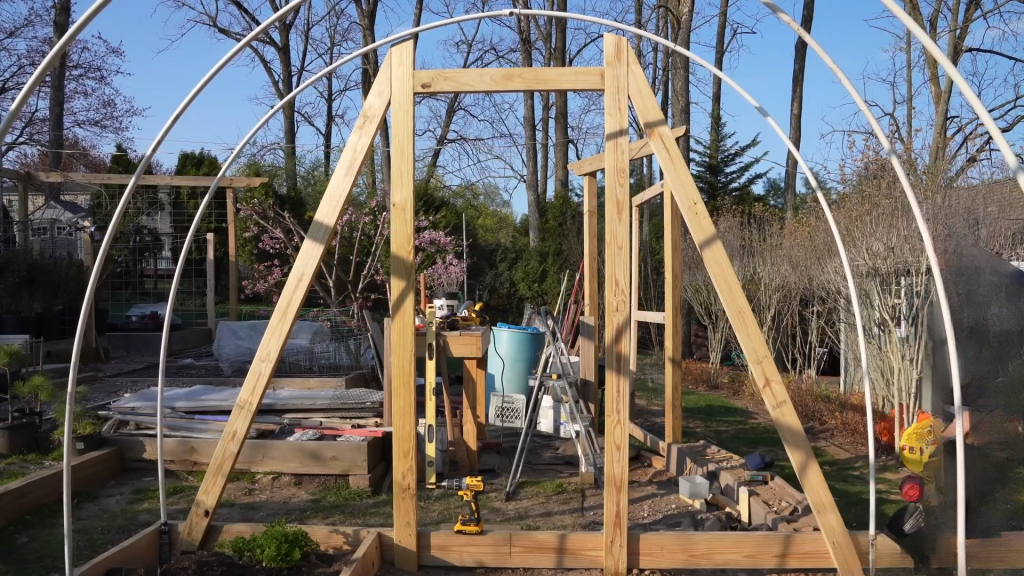
STEP 4 : Adding the Door Frame
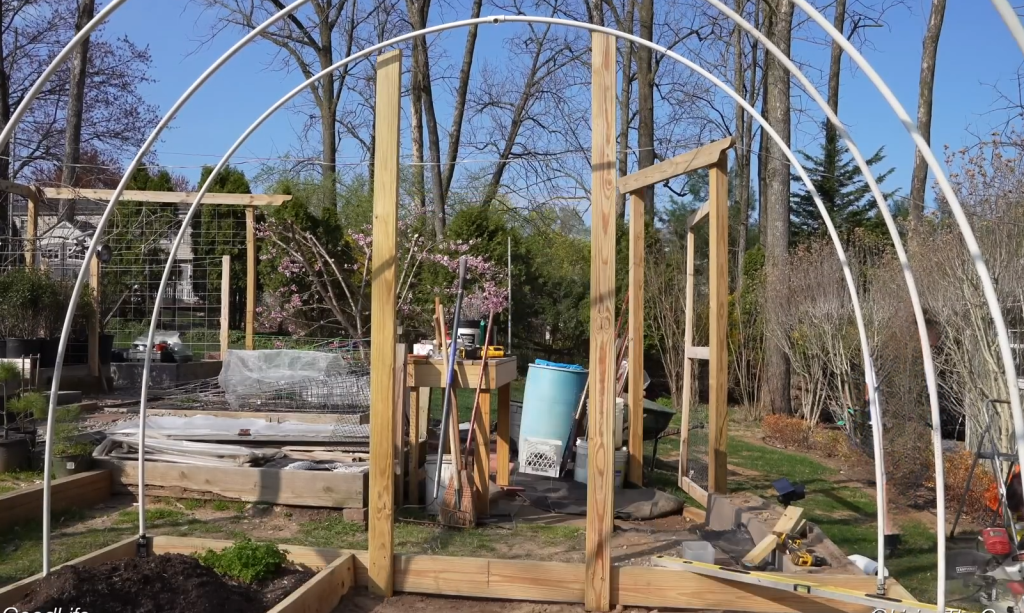
Decide on the desired width of your door based on your needs. Here we use a 30-inch wide door. Mark the center point and measure out 15 inches on each side to define the door opening.Cut 2×6 boards to create the door frame, ensuring the width matches your measurements. You may need additional support pieces depending on the height of your door.
A 30-inch board across the top of the door frame is added to support the cross boards that will be added to support the PVC hoops .They position the boards across the top of the door frame so that the PVC pipes can rest on it, ensuring proper support and alignment.
STEP 5 : Supporting Hinges
Cut and install additional 2×6 lumber across the top of the arches near the top edge of the door frame , 6 inches from each corner. This will provide support for the greenhouse plastic. Pre-drill holes and countersink the screws to avoid splitting the wood. The same process is repeated on the other side .
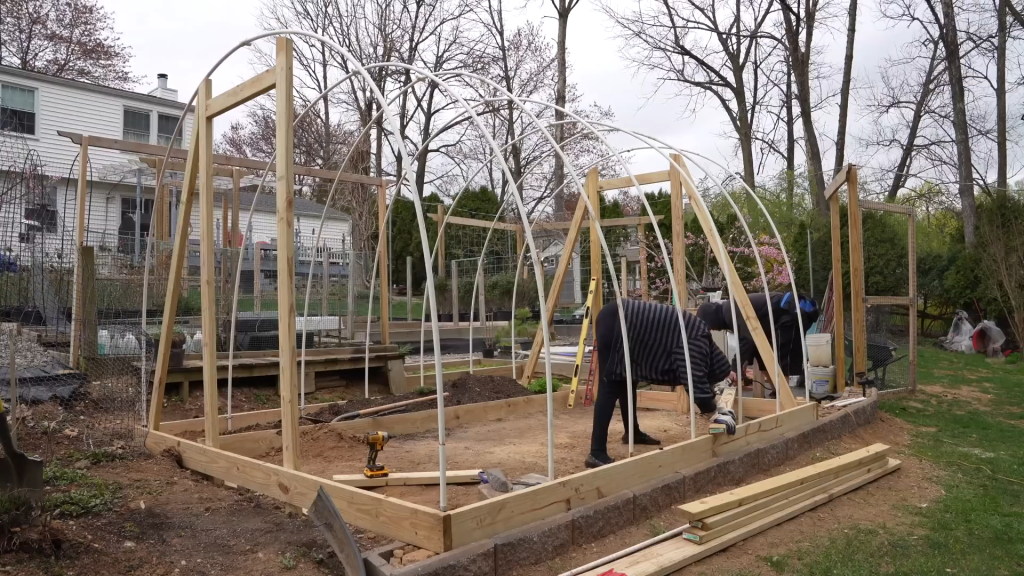
Two braces are installed and spread apart along the cross section of the top arches of the PVC pipes for increased stability of the structure . Also 2 30 inches boards are mounted onto these braces for addtional support of the PVC pipes.
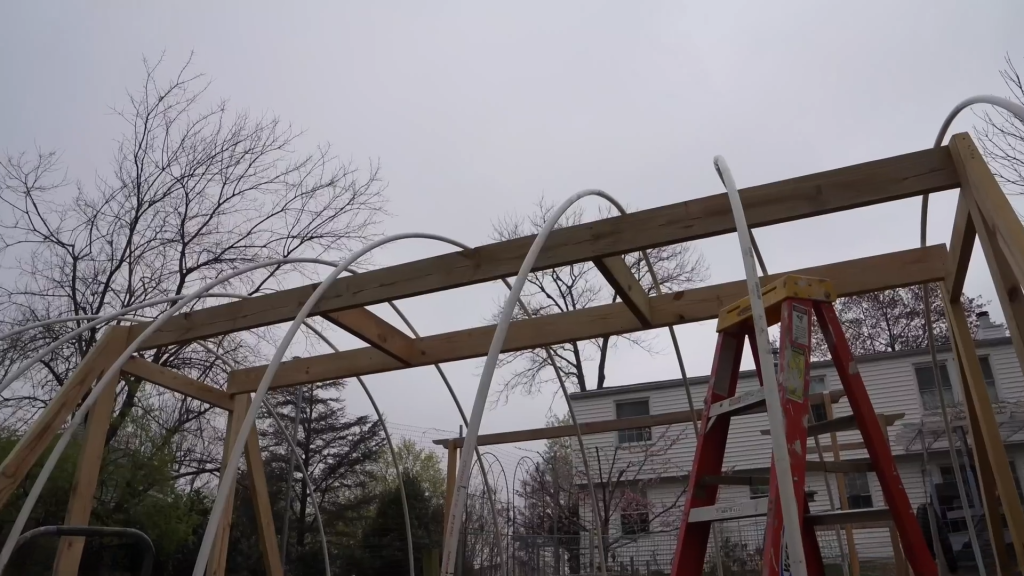
Cut sections of PVC pipes less than 2 feet and use them to connect the cross connectors at the top of each hoops.Once the pipes are cut and fitted into the connectors, you should check that the ends meet properly inside the fittings.
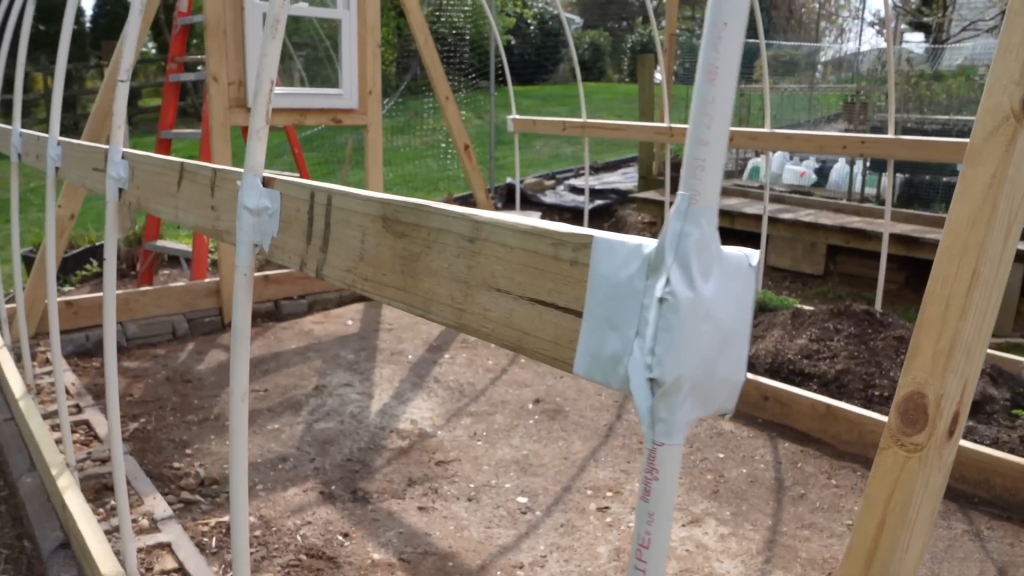
Mount 2 boards across the sides of the PVC pipes using two-hole straps. Here we mark 29 inches from the base for positioning the board.
As a precaution, we use a piece of 1/8-inch thick rubber cut to size and placed over the top spots on the corners and edges where the greenhouse plastic experiences the most tension. This extra layer of protection helps prevent the plastic from tearing or getting cut by the frame or fasteners. White tape is wrapped over for extra padded support.
STEP 5 : Installing the Greenhouse Plastic Sheeting
Here we use 2 Plastic sheets for wrapping the greenhouse frame. Two 10 X 12 ft for covering the sides and a 13 X 25 ft for the top.
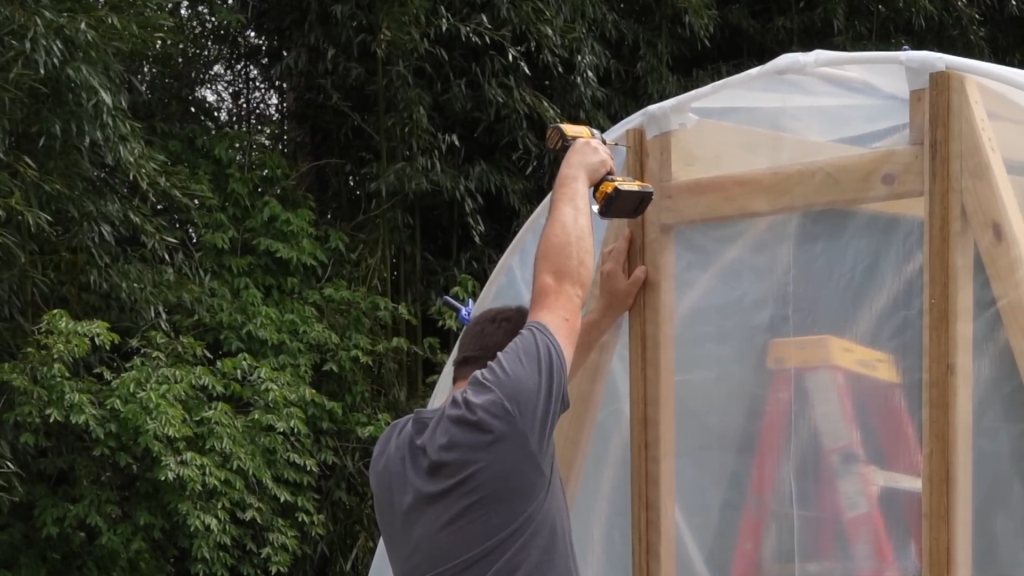
Two 1-inch by 1/2-inch wooden strips are use to hold the plastic onto the door frame . Wrap the first sheet around the side of the frame and use the strips to secure them in place. Cut out the plastic for the doors .
The 13 X 25 ft Plastic sheet is then wrapped over the top of the greenhouse frame. It is secured in place using pvc frame clips .
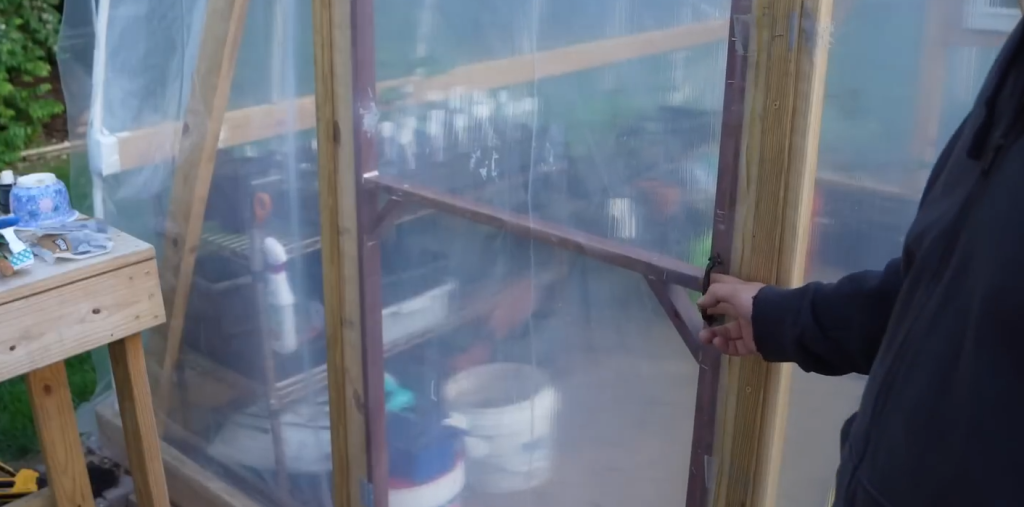
STEP 6 : Adding the Door
The door opening is roughly 30 inches wide by 70 1/2 inches tall, so we cut two 30-inch boards for the top and bottom of the door frame. Here use milled hardwood pieces measuring slightly over 3/4 inch by about 1 3/8 inch, pressure-treated pine could also be used.
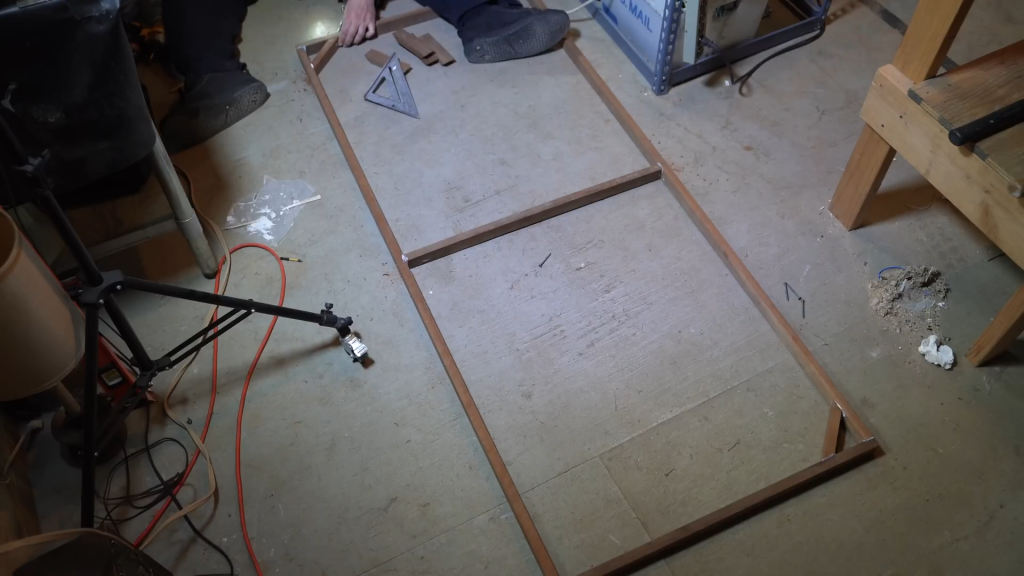
To make brackets for the corners and center of the door, we use a speed square to mark 45-degree angles at 6 inches, then cut the pieces accordingly . Six brackets are made in total.The pieces were pre-drilled to avoid splitting the hardwood and then assembled using a liquid nails type adhesive and standard wood glue.

The door is attached to the frame using 2 1/2 inch zinc-plated hinges and screws . Finally the plastic is stapled down to the door frame and a handle is attached.
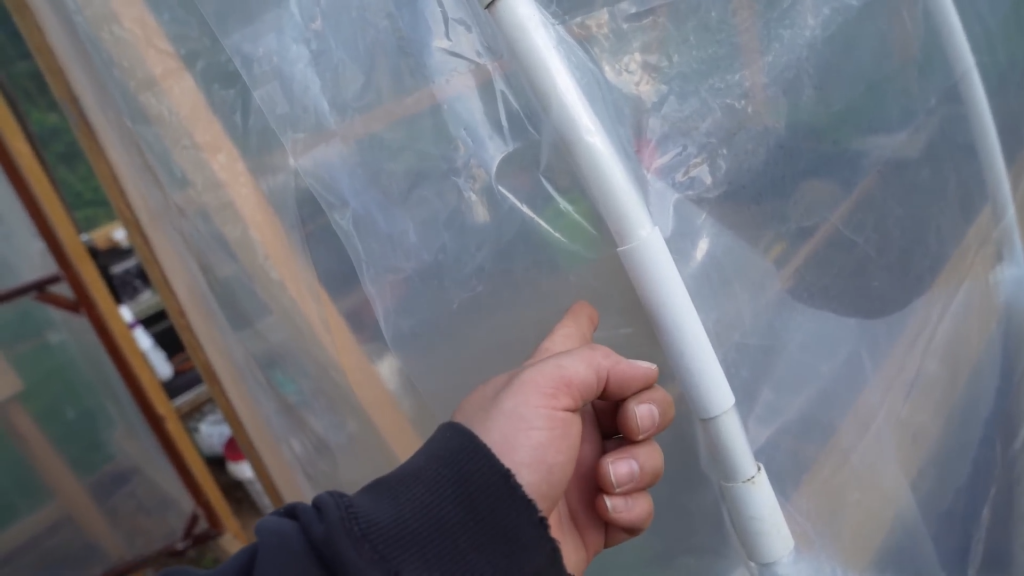
A 1-inch PVC pipe, a coupler, and another 25 feet of PVC to create a system for rolling up the plastic later in the season when it gets hot. This PVC pipe setup can be used to roll up the plastic sides of the greenhouse, allowing for ventilation. The rolled-up plastic can be secured using tape, wire, or a quick clamp to hold it in place.
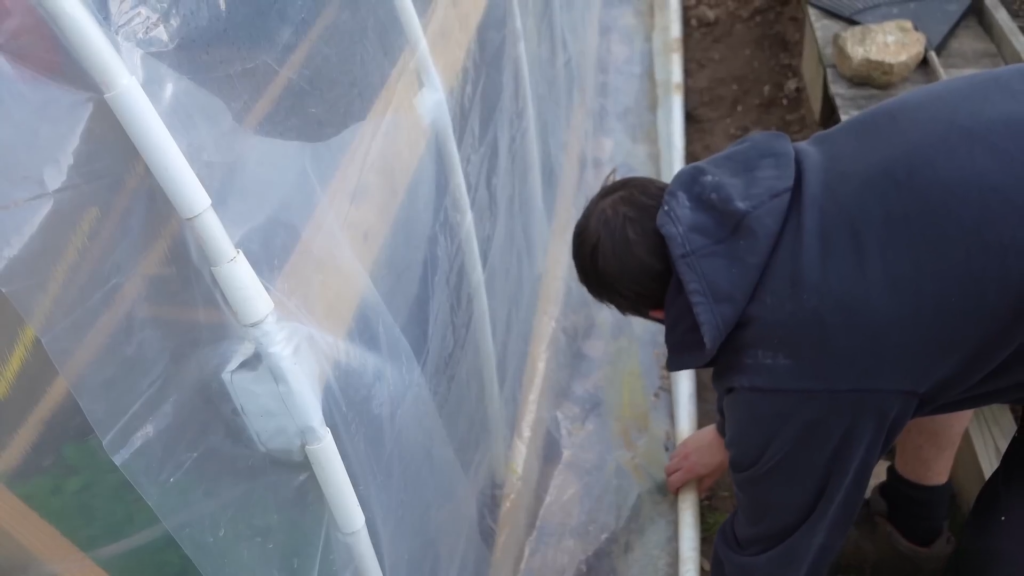
Image Credits : Living The Good Life