Access to clean drinking water is crucial in emergency situations .This DIY guide will help you construct a simple and portable water distiller that can remove biological contaminants salt and heavy metals from water making it safe for consumption.
STEP 1 : THE MATERIALS REQUIRED
-
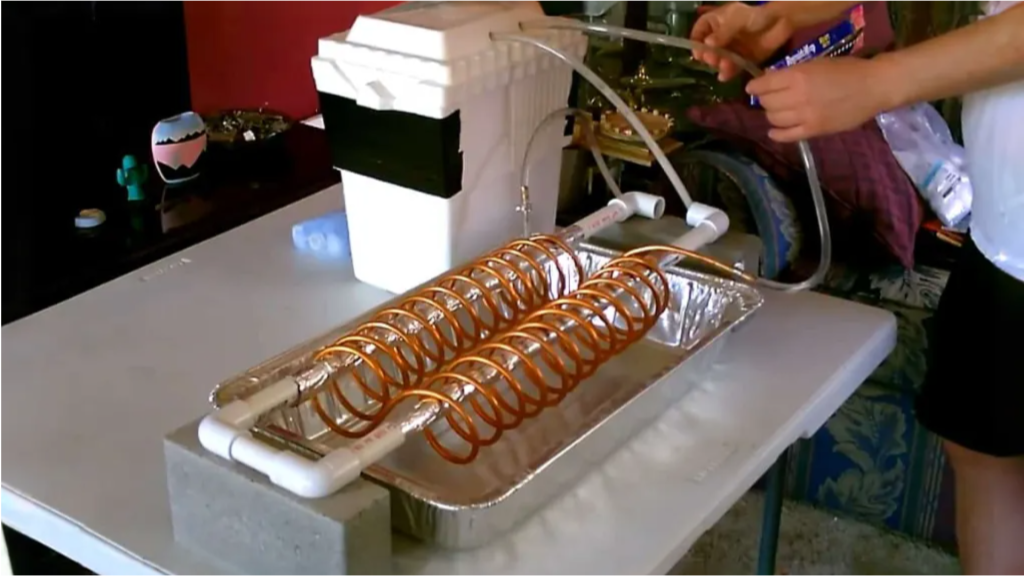
Boiling Container:
-
Ideally, a stainless steel pot designed for cooking.
-
In emergencies, any metal container like a large can with any plastic lining removed can be substituted
-
-
Condensation Funnel:
-
A stainless–steel laboratory funnel (4“ diameter recommended).
-
-
Condensation Tube:
-
1/2“ diameter x 22“ Type M copper pipe.
-
3 x 1/2“ copper 45–degree elbow fittings.
-
1 x 1/2“ copper 90–degree elbow fitting.
-
(Optional) A piece of wire to secure the tubing.
-
-
Condensation Aid:
-
A wet rag or cloth.
-
-
Collection Container:
-
A clean cup or container to collect the distilled water.
-
-
Heat Source:
-
Camp stove, fire, or any other suitable heat source.
-
STEP 2 : PREPARE THE BOILING CONTAINER
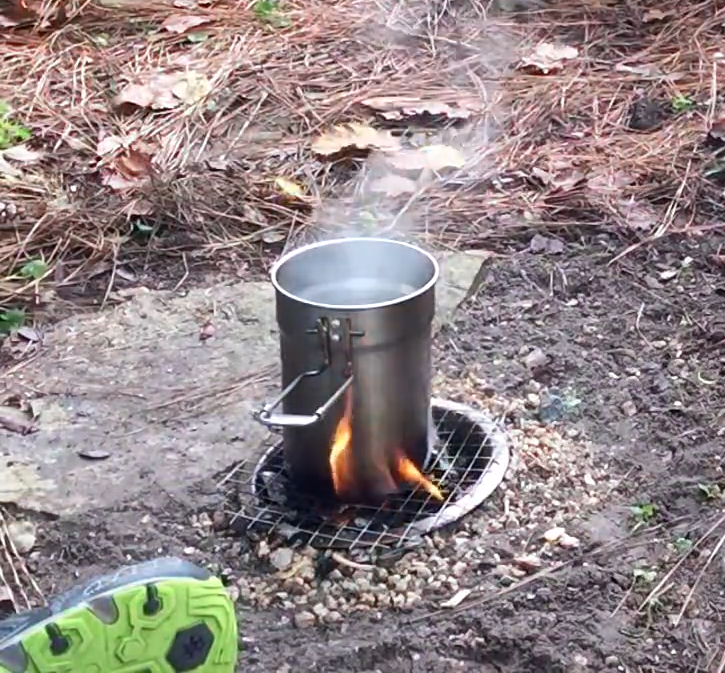
Fill the stainless steel pot with the water you want to purify. This could be from a natural source if you’re outdoors or tap water if you’re demonstrating this at home.Don’t fill it completely, leave some space at the top for boiling.
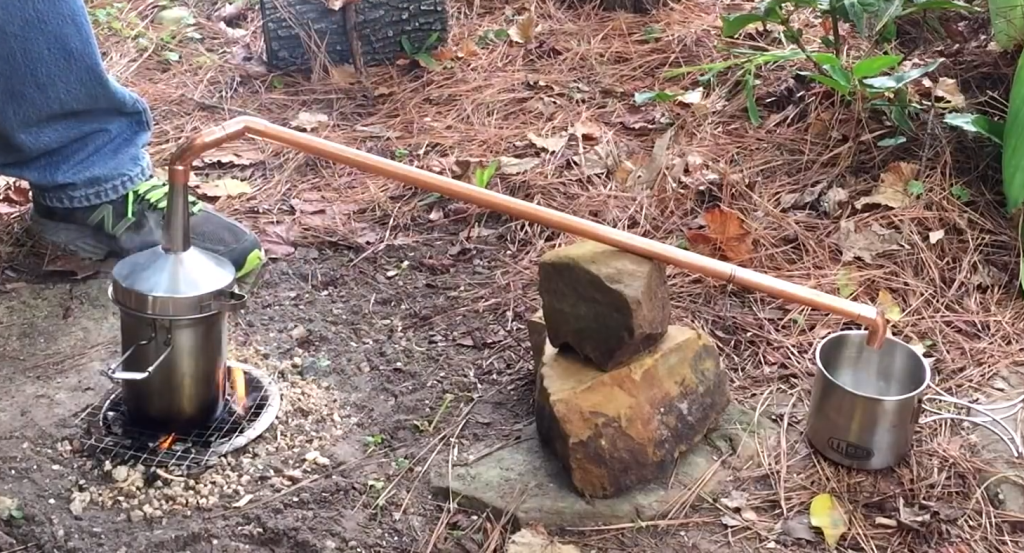
STEP 3 : PLACE THE LID
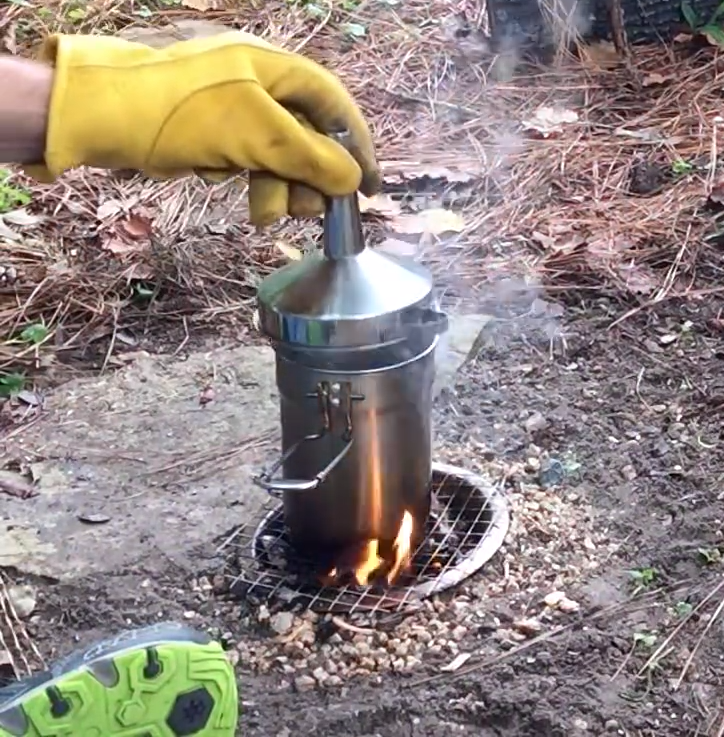
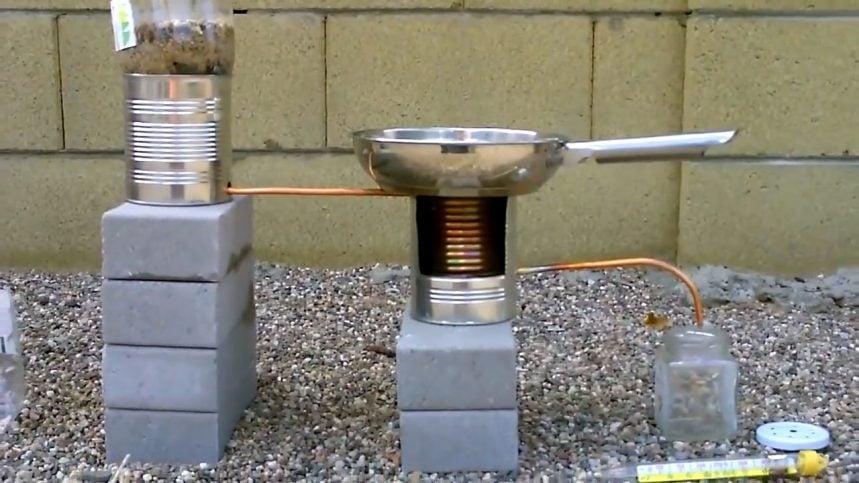
An upside down stainless steel funnel serves as a lid for the pot of boiling water Its purpose is to capture the steam rising from the boiling water and direct it into the attached copper pipe which leads to the condensation and collection process
The funnels inverted position facilitates efficient steam capture due to its wider opening at the bottom effectively channeling the steam upwards into the narrower pipe.
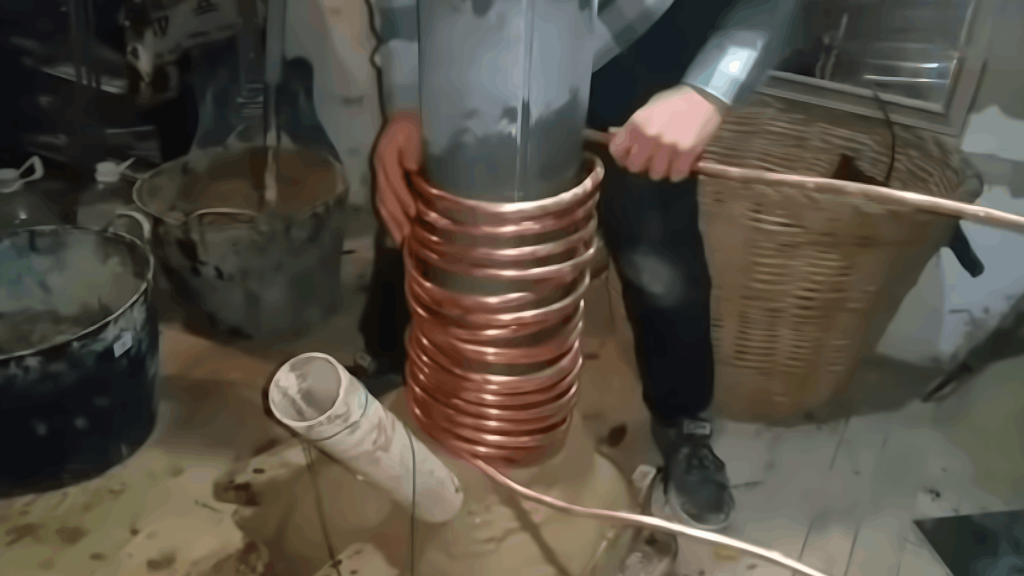
STEP 4 : INSTALLING THE CONDENSATION COPPER PIPE

Assemble the copper pipe and elbow fittings to form a long, angled tube.The configuration should allow steam to travel up from the funnel, condense as it moves along the cooled tube, and drip down into the collection container .
Attach the 1/2 inch copper pipe to the narrow end of the funnel. Ensure it’s fitted securely to guide the steam through the pipe.Position the other end of the copper tube over your collection container.
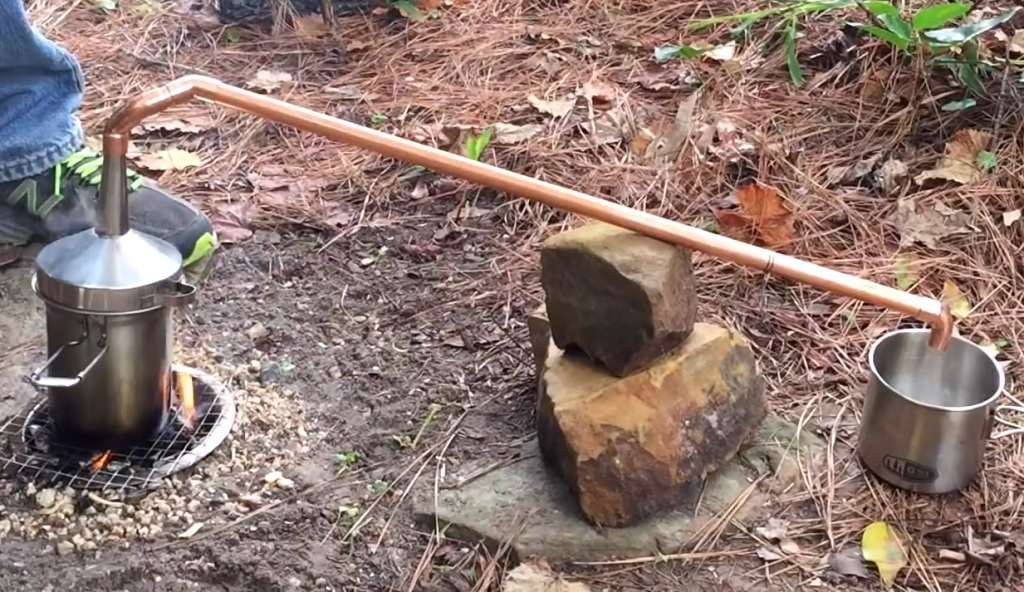
The design minimizes constrictions or tight bends in the tubing pathway. This reduction in back pressure allows steam to flow more freely and efficiently from the boiling container, through the funnel and tubing, to the point of condensation. Consequently, the distillation process is faster and more productive
STEP 5 : COOLING THE STEAM
Place a wet rag around the copper pipe. This helps to condense the steam back into liquid form as it travels through the pipe, facilitating the distillation process.
As the steam passes through the coil, the wet rag will help cool it down and condense it back into water. Keep the rag wet throughout the process
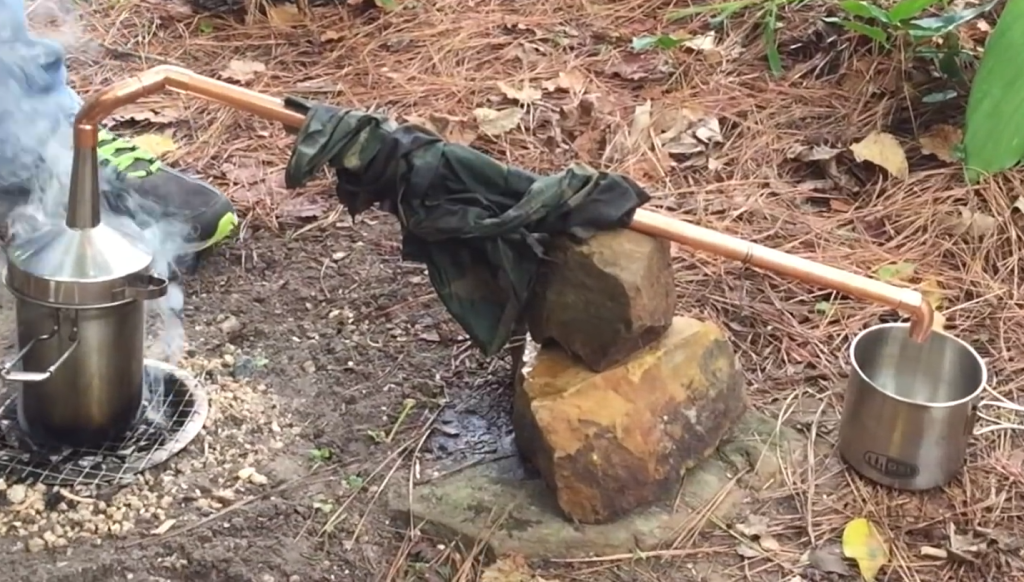
STEP 6 : START THE DISTILLATION PROCESS
Heat the water in the boiling container until it boils and produces steam.The steam will rise into the funnel, travel through the copper tubing, condense back into water droplets, and finally drip into your collection container.
This larger diameter of the copper pipe allows for a greater volume of steam to be captured and directed towards condensation ultimately leading to a higher yield of distilled water.
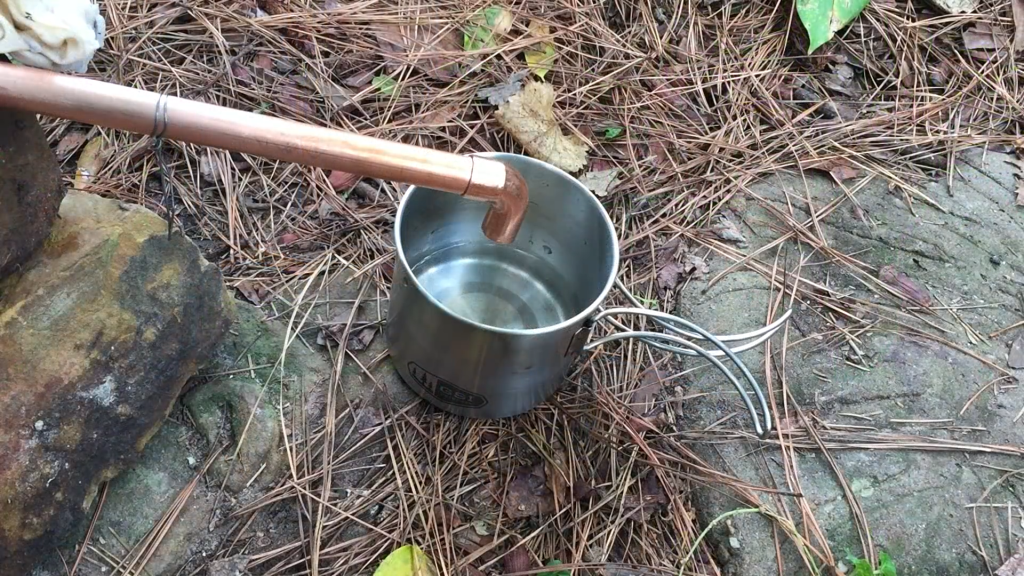
Wrap a piece of wire around the lower part of the tube to prevent it from directly touching the collection container and potentially contaminating the distilled water.
The first amount of water collected may contain impurities with lower boiling points than water, such as alcohol or oils. Discard this initial distillate to ensure the purity of your drinking water.Once you’ve collected enough distilled water, let it cool down and enjoy clean, safe drinking water.
IMAGE CREDITS : KennethKramm