Clean, pure water is essential for maintaining good health, but not everyone has access to safe drinking water. This DIY water distiller is an easy and cost-effective way to remove impurities, contaminants, and harmful microorganisms from your tap water . This unit can also be used as an essential oil distiller.
STEP 1 : Materials Required
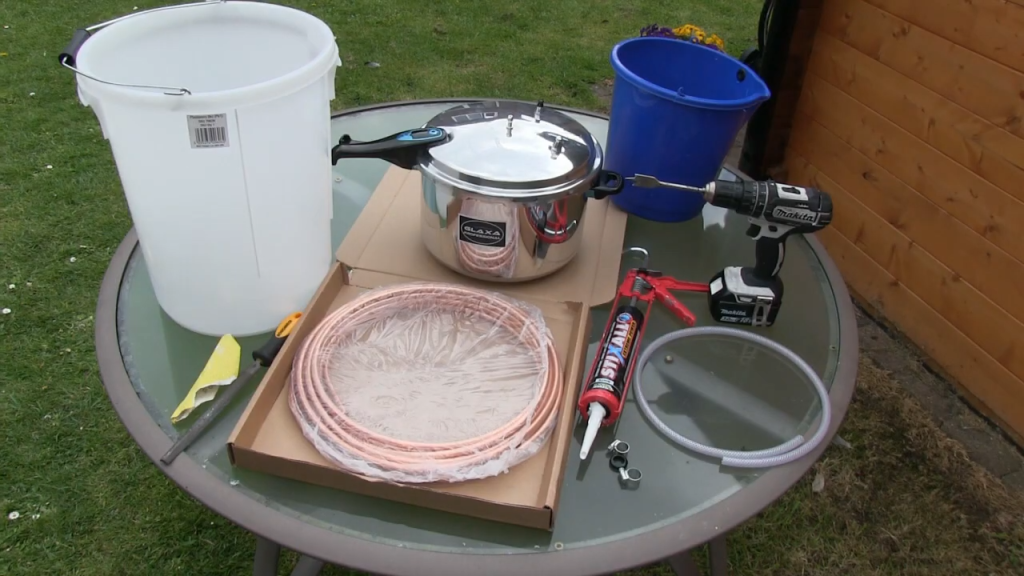
- 30-liter builder’s bucket : This will act as the main container for your distillation process.
- 4 meters of 10mm microbore copper pipe : This will be formed into a coil to act as the condenser.
- Pressure cooker : A standard kitchen pressure cooker will work perfectly. Choose a size suitable for your needs.
- High-quality silicone sealant and adhesive : This will ensure a secure and airtight seal throughout the system.
- 1 meter of 8mm internal diameter braided plastic tubing : This will connect the pressure cooker to the copper coil.
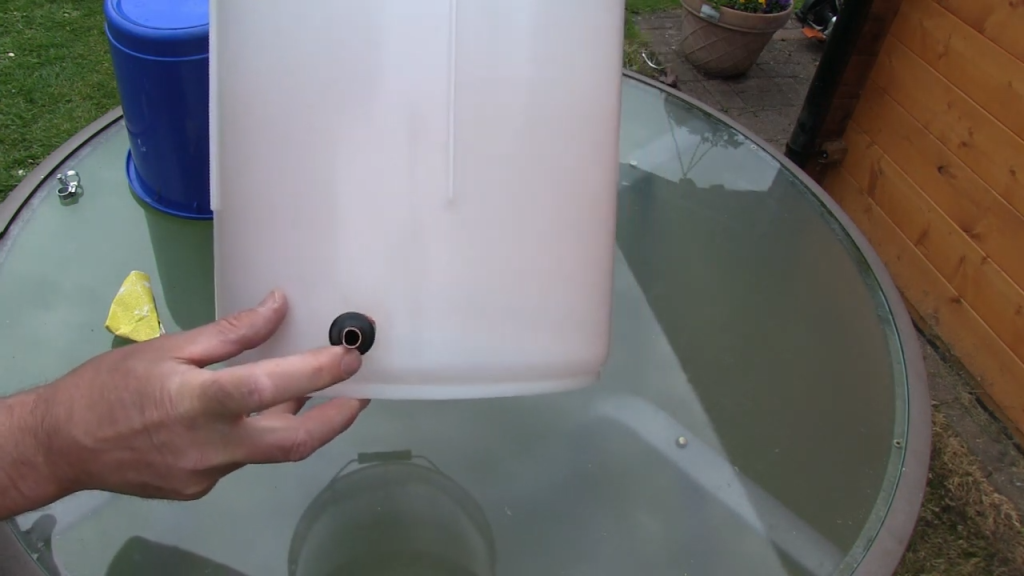
- 20mm rubber grommet : This will create an exit point for the copper pipe on the bucket.
- Smaller bucket or similar object : This will be used to wrap the copper pipe into a coil.
- Drill with a 19mm spade bit and a 10mm drill bit: These will be used to create holes in the bucket and pressure cooker lid.
- 2 hose clamps (10-16mm): These will secure the tubing to the copper pipe and pressure cooker.
- Sandpaper and a file.
STEP 2 : Wrapping the Copper Coil
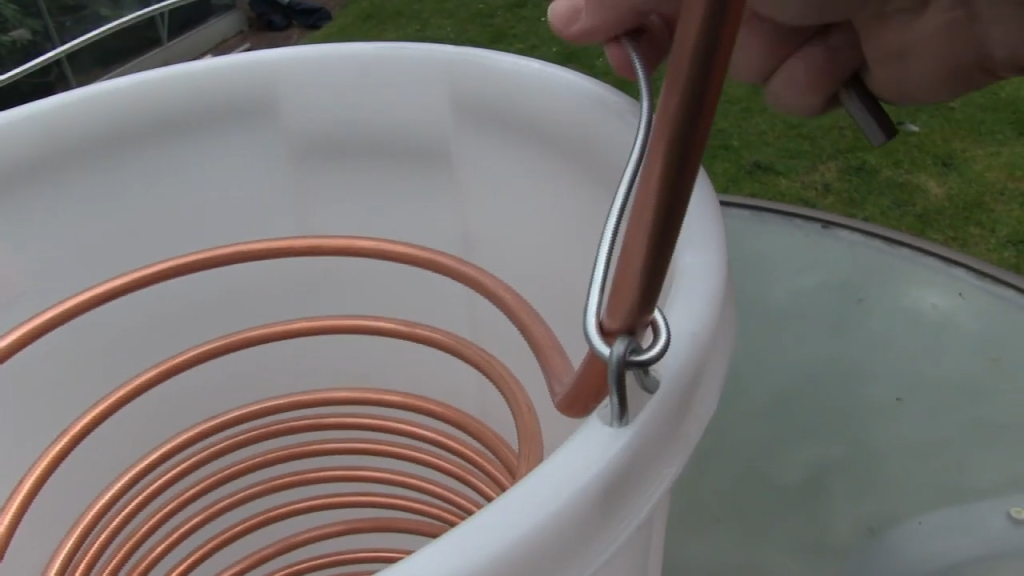
Take the 4 meters of copper pipe and wrap it around the smaller bucket or chosen object to create a coil.Its helpful to have a partner hold the bottom of the coil while you carefully wrap the pipe around ensuring it remains tight and even.
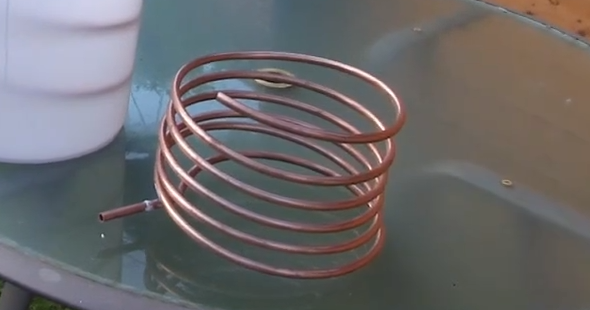
Be cautious not to kink the copper pipe during this process . Dont use excessive amount of tubing to wrap the bucket . It will cause the coils to sag, creating troughs and pools of water that block the steam flow.
STEP 3 : Prepare The Bucket
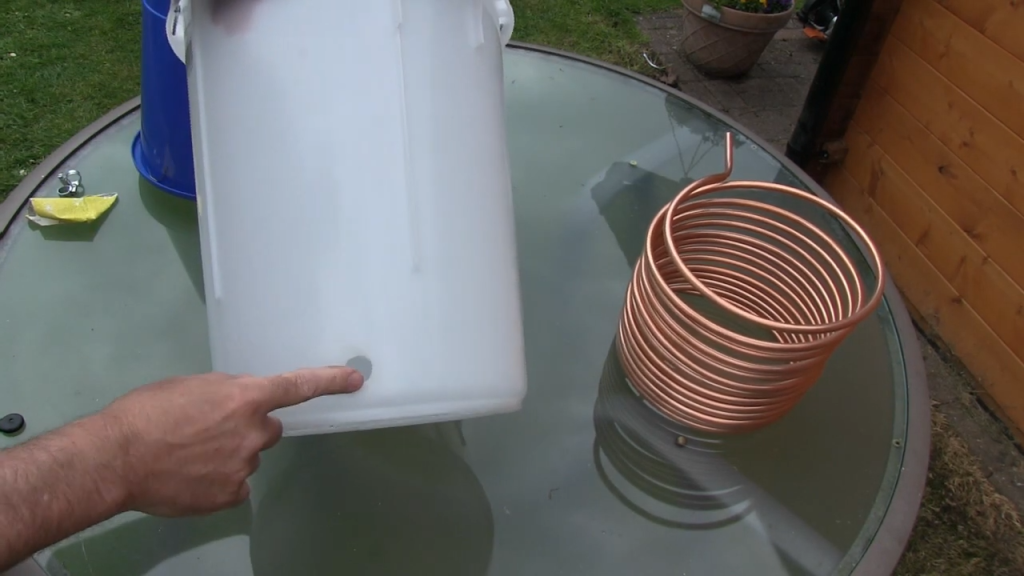
Drill a 19mm hole about 2cm up from the base of the bucket using the spade drill bit. Support the inside of the bucket with a piece of wood to prevent cracking the bucket and prevent leaks. Use sandpaper and a file to smooth any rough edges around the hole.
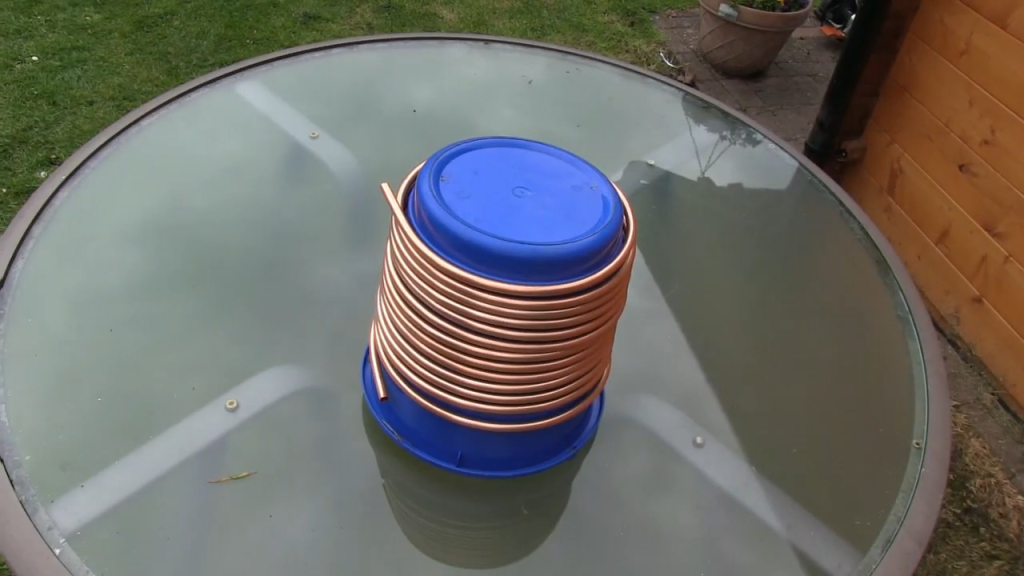
STEP 4 : Insert the Coil into the Bucket
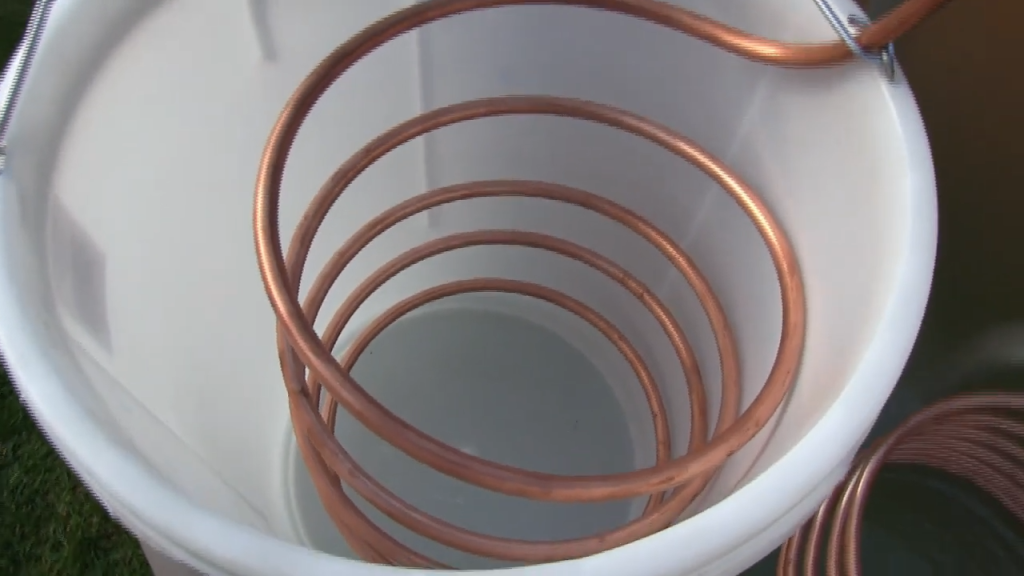
Feed the end of the copper coil through the hole in the bucket, ensuring it enters as straight as possible. The coil should sit on the bottom of the bucket and come up level.Every single spiral of the copper tubing is in a downward direction, as well as the outlet. This downward spiral allows the condensed steam (water) to flow freely through the tubing without creating any pools or blockages.

Drill an 8mm hole in the center of the grommet. Place the grommet over the copper pipe, with the cavity part on the inside of the bucket. Apply silicone sealant on the outside and inside of the grommet to create a secure seal.
The handle of the builders bucket is used to help stabilize and fasten the copper coil in place. This is done by drilling 10mm holes in the hooks.Using a pair of pliers, bring the hooks closer together and pass the copper coil under the tightened hooks.
STEP 5 : Attach the Braided Hose
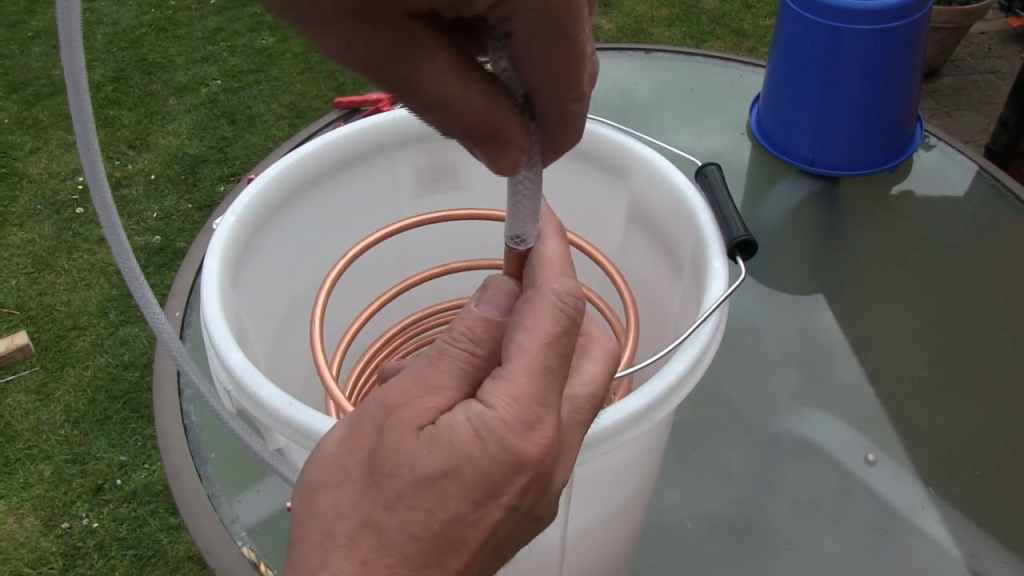
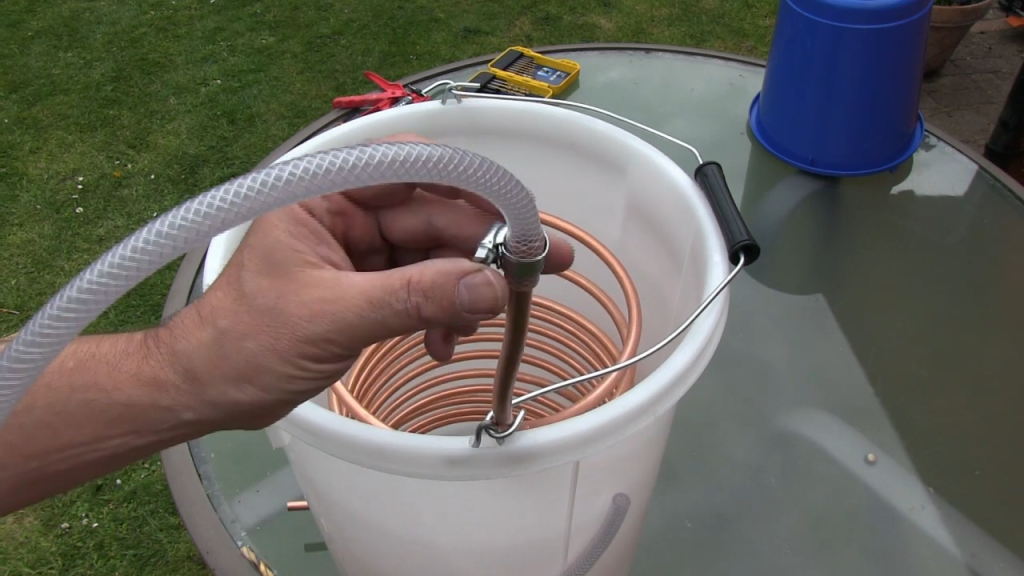
Use a file to create a chamfer on the end of the copper pipe. Heat the braided hose with a hairdryer to make it more pliable, then slide it over the copper pipe. Secure it with a hose clamp, being careful not to over-tighten and crush the pipe.
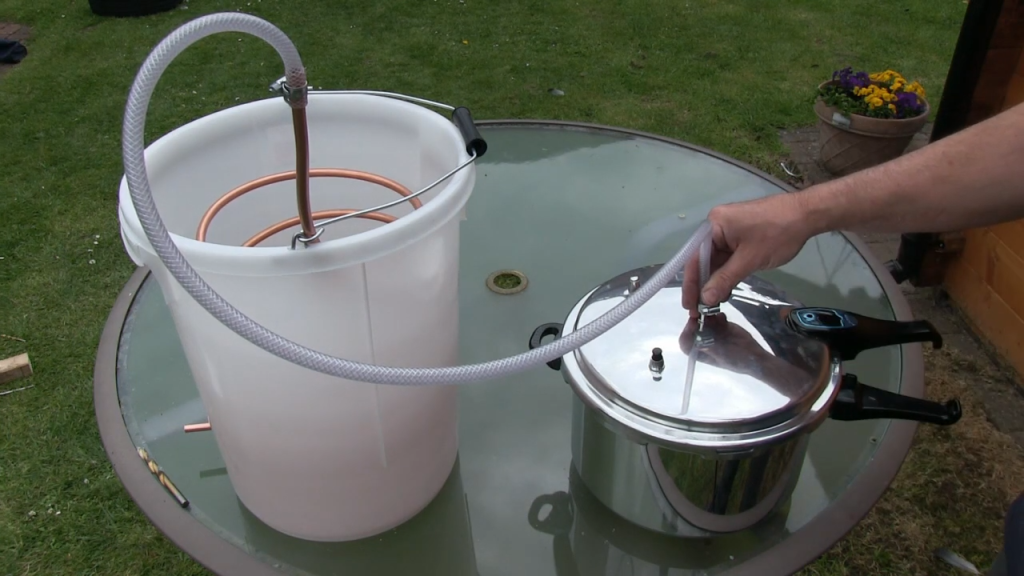
STEP 6 : Connect to the Pressure Cooker
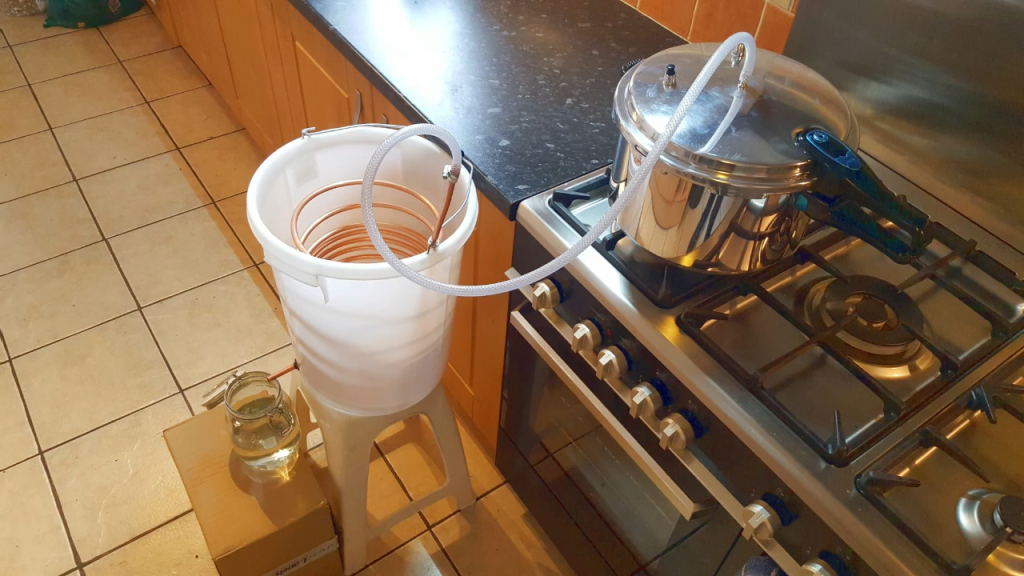
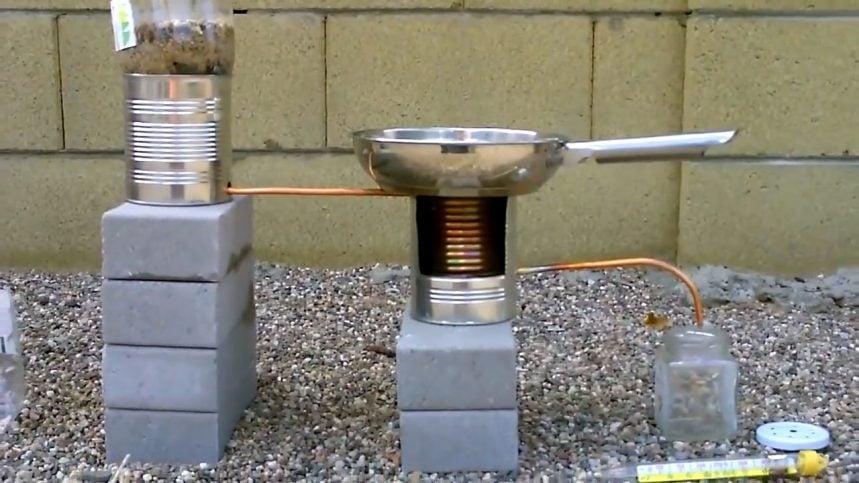
When ready to use, place the pressure cooker on the stove with the bucket sitting just below. Remove the pressure cooker’s weighted valve and connect the braided hose to the valve opening using a hose clamp.Fill the pressure cooker with tap water, making sure not to exceed the maximum fill line.
The water should be below the level of the valve opening.Turn on the stove and heat the water in the pressure cooker. As the water boils, steam will be forced through the braided hose and into the copper coil.As the steam travels through the coil, it will cool and condense back into liquid water. This distilled water will then drip out of the coil and collect in the collection jar.
STEP 7 : Setting up the Distiller for Essential Oil
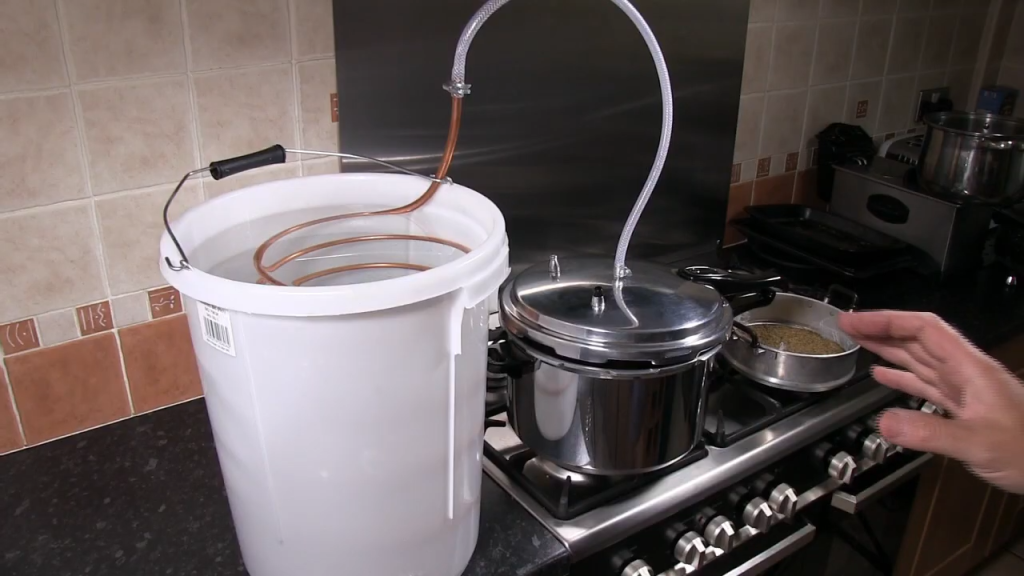
The bucket is filled with cold water and ice to facilitate condensation of the steam passing through the copper coil.
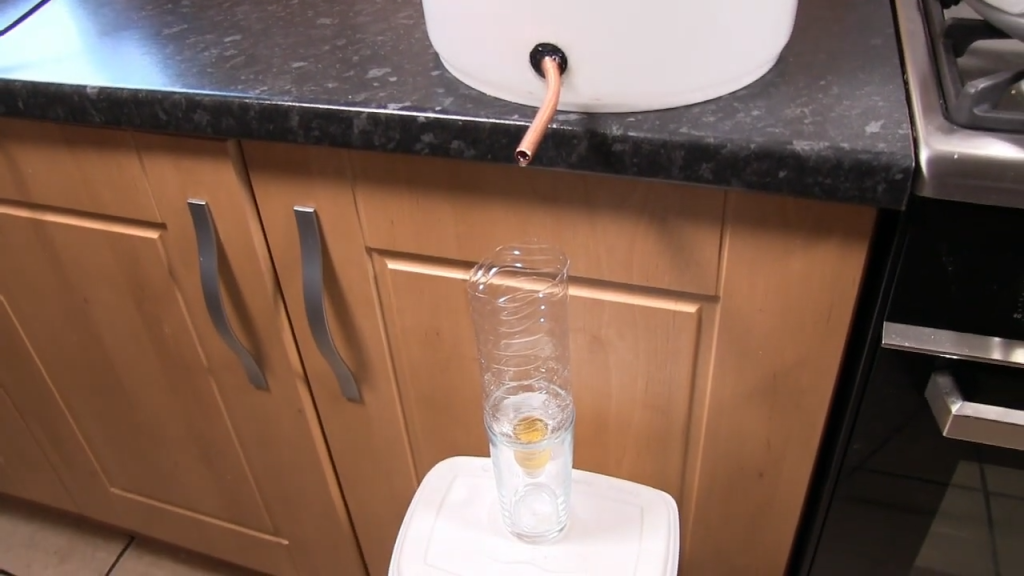
A modified sports drink bottle is used to collect the distilled water and essential oil. The bottle’s end is cut off and placed in a glass to allow the distillate to accumulate. The bottle’s mouthpiece can be pulled down to drain the water, leaving the essential oil behind.
The bottle sits in the top of a glass and starts to fill up with water. As the water accumulates, a film of essential oil should form on the top due to the oil’s lower density compared to water.
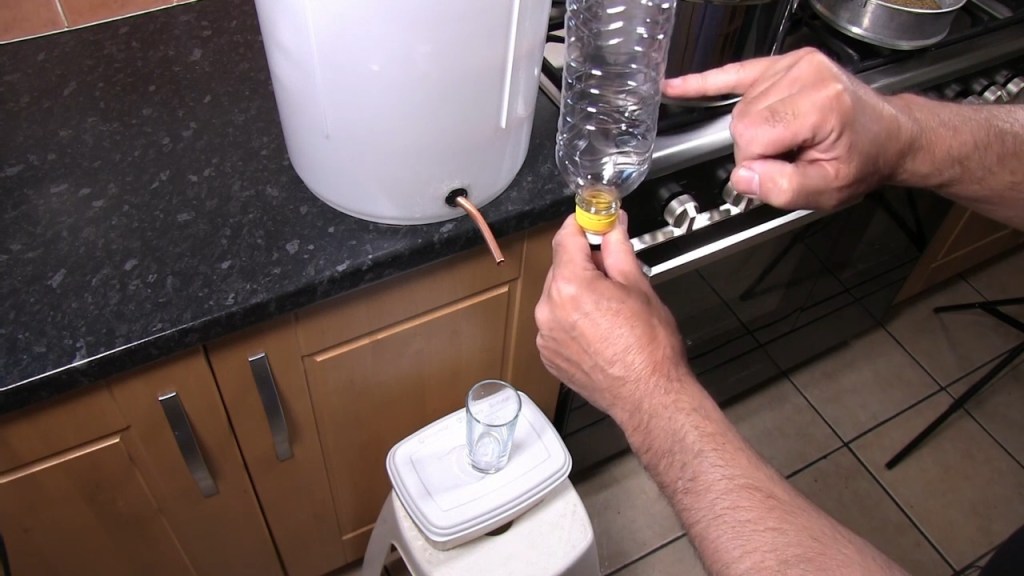
Once the distillation process is finished, pull down on the bottle’s mouthpiece to drain the water until it reaches the level of the essential oil. This leaves behind the essential oil, which can then be sealed off by pushing the mouthpiece back up.
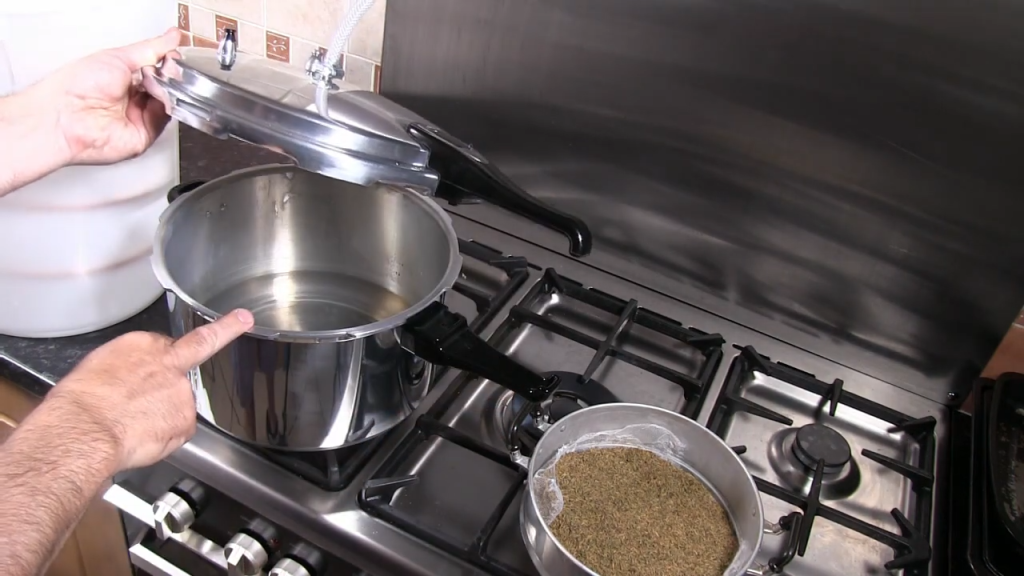
A pressure cooker contains 2 liters of pre-boiled water. The lid seal is lightly oiled with vegetable oil to improve the seal .Inside the pressure cooker, a tray or basket holds the plant material (in this case, dried thyme) above the water level.
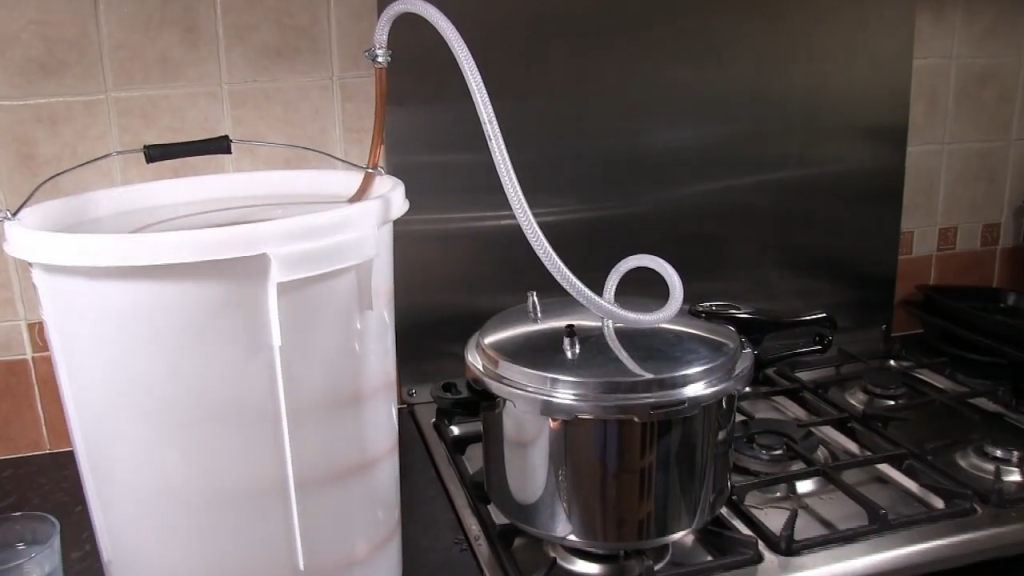
As the water boils, steam rises and carries the essential oils from the plant material with it. This steam then travels through a hose connected to the lid of the pressure cooker.The steam enters a copper coil submerged in cold water within a bucket. The cold water causes the steam to condense back into liquid form, which now contains the essential oils.
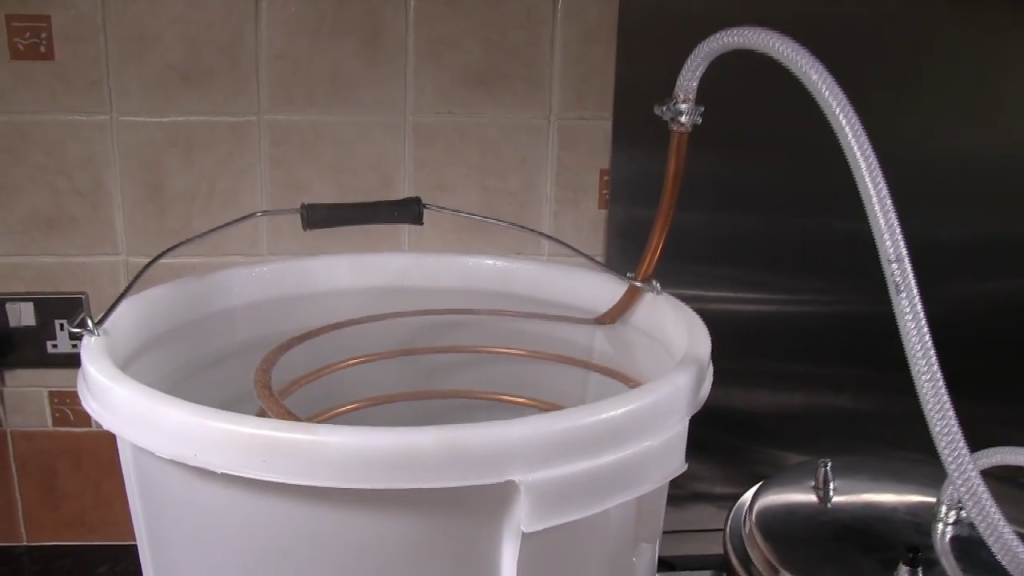
To maintain the temperature gradient and optimize the condensation process, periodically remove some of the hot water from the top using a jug and replaces it with cold water. Add more ice to the bucket to keep the lower portion of the coil cool.
Image Credits : Da Malat